Apache is a cross-platform web server application used on Linux systems. It is part of the LAMP stack, a set of applications that form the basis for most web technology. LAMP stands for Linux, Apache, MySQL, and PHP, Perl, or Python.
This tutorial will show you how to install and configure the Apache web server on CentOS and Rocky Linux.

Prerequisites
- A user account with sudo or root privileges.
- Access to the terminal.
- The yum package manager, installed by default.
Installing Apache on CentOS and Rocky Linux
Apache, one of the most widely used web servers, is available in the default repositories of both CentOS and Rocky Linux. The following steps explain how to install Apache on these systems.
Step 1: Update the Software Versions List
To ensure you are using the latest version of the software, run:
sudo yum update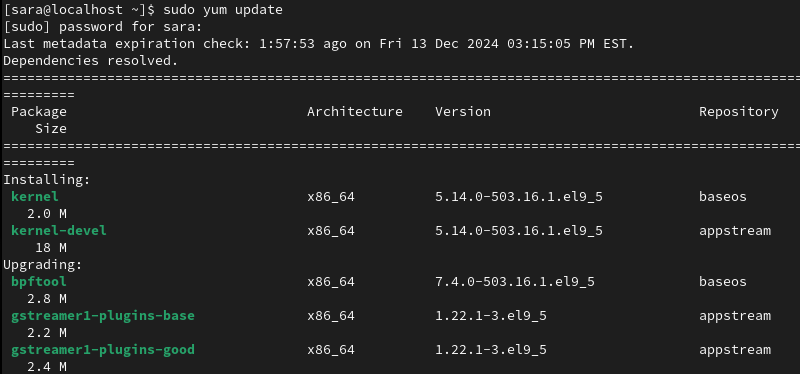
Step 2: Install Apache
To install Apache, use the yum command:
sudo yum install httpd -y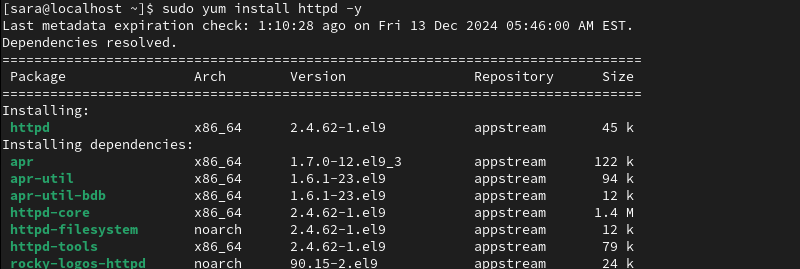
The system downloads and installs the Apache software packages.
Step 3: Activate Apache
To activate Apache:
1. Start the service with:
sudo systemctl start httpdThe command has no output, but it starts the Apache service.
2. Set the Apache service to start when the system boots:
sudo systemctl enable httpd
Step 4: Verify Apache Service
Display information about Apache and verify it's currently running with this command:
sudo systemctl status httpd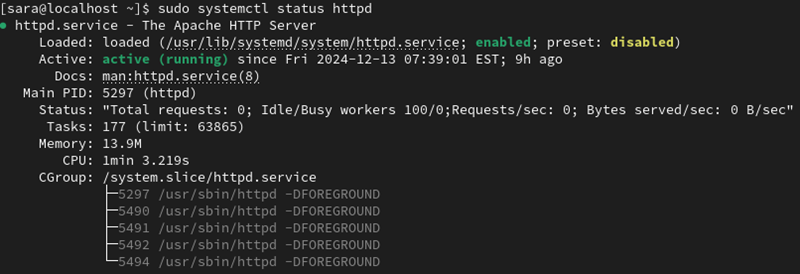
Step 5: Configure firewalld to Allow Apache Traffic
By default, CentOS and Rocky Linux block incoming web traffic to Apache through the firewall. To enable access, configure firewalld to allow connections for standard web traffic (HTTP on Port 80) and secure traffic (HTTPS on Port 443) using Apache's predefined services.
To accomplish that, follow these steps:
1. Allow traffic for HTTP and HTTPS by running the following commands:
sudo firewall-cmd --permanent --add-service=http
sudo firewall-cmd --permanent --add-service=https
2. Reload the firewall to apply the changes:
sudo firewall-cmd --reload
Step 6: Configure Virtual Hosts (optional)
Virtual hosts allow you to host multiple websites on the same server, with each site requiring its own configuration file. These files have a .conf extension and are saved in the /etc/httpd/conf.d/ directory.
The best practices to use when setting up different websites on the same server are to use a uniform naming convention for configuration files, such as:
/etc/httpd/conf.d/MyWebsite.com.confor
/etc/httpd/conf.d/TestWebsite.com.confAlso, its good practice create a separate configuration file for each domain (vhost). This approach allows for easy scaling and simplifies troubleshooting.
To create a virtual host configuration file, take the following steps:
1. Launch a text editor, in our case, Vim, and create a new host.conf file in the /etc/httpd/conf.d directory:
sudo vim /etc/httpd/conf.d/vhost.conf2. In the editor, enter the following text:
NameVirtualHost *:80

<VirtualHost *:80>

ServerAdmin [email protected]

ServerName MyWebsite.com

ServerAlias www.MyWebsite.com

DocumentRoot /var/www/html/MyWebsite.com/public_html/

ErrorLog /var/www/html/MyWebsite.com/logs/error.log

CustomLog /var/www/html/MyWebsite.com/logs/access.log combined

</VirtualHost>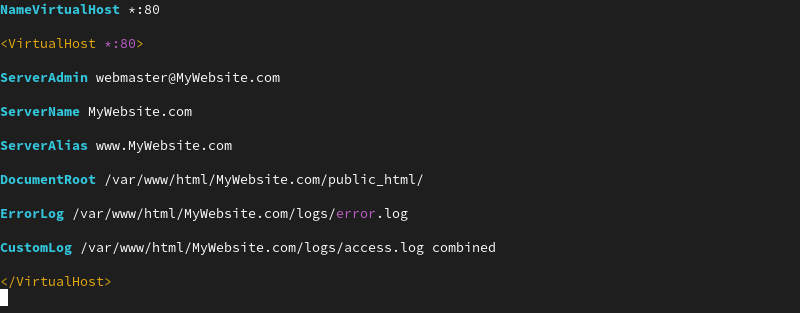
4. Enter the mkdir command to create a directory to store the website files in:
sudo mkdir -p /var/www/MyWebsite/{public_html,logs}The -p flag ensures the entire path is created, including /var/www/MyWebsite, if it does not already exist. The command has no output.
5. Restart the Apache service to apply your changes by entering:
sudo systemctl restart httpdOnce the system finishes, open a browser window to MyWebsite.com and a default Apache test page will appear.
Replace MyWebsite with the name of your domain. If you are hosting more than one domain, make sure you create a new directory in /var/www/ for each one. Copy the code block in the /etc/httpd/conf.d/vhost.conf file, and replace MyWebsite with another domain name you're hosting.
Apache Directories and Files
Apache relies on configuration files to manage its behavior and settings. These files are located in the /etc/httpd directory. These files are:
- Main configuration file. The main Apache configuration file is located at /etc/httpd/conf/httpd.conf.
- Additional configuration files. Other configuration files are sometimes included in the main httpd.con
ffile. These additional files have the .conf extension and are stored in the /etc/httpd/conf.d/ directory. - Modules. Apache can be extended by loading additional modules to provide enhanced functionality. Configuration files for these modules are stored in the /etc/httpd/conf.modules.d/ directory.
- Log files. Apache logs all activity, including client interactions with websites hosted on the system. These log files are in the /var/log/httpd/ directory.
Commands for Managing Apache Service
Some commands you can use to control the Apache service are:
1. Stop the Apache service:
sudo systemctl stop httpd2. Prevent or disable Apache from starting when the system boots:
sudo systemctl disable httpd
3. Re-enable Apache at boot:
sudo systemctl enable httpd
4. Restart Apache and apply any changes you have made:
sudo systemctl restart httpdThere is no output if the restart is successful.
Conclusion
This tutorial explained how to install Apache on CentOS and Rocky Linux. It also explained how to configure virtual hosts in Apache and presented common commands.
Next, learn how to check the Apache version.
