phpMyAdmin is a database management utility for MySQL and MariaDB databases with a web-based GUI. The program is simple to install and configure on Rocky Linux or CentOS, and can operate either a local or a remote database.
This tutorial will show you how to install phpMyAdmin and configure basic security on CentOS and Rocky Linux.
Requirements
- LAMP stack installed on the server.
- Access to a sudo user account with root privileges.
- A text editor, such as Vim or nano.
Installation of phpMyAdmin on CentOS and Rocky Linux
Before installing phpMyAdmin, ensure the web and database servers are running. Check if the Apache web server is active with:
sudo systemctl status httpd.service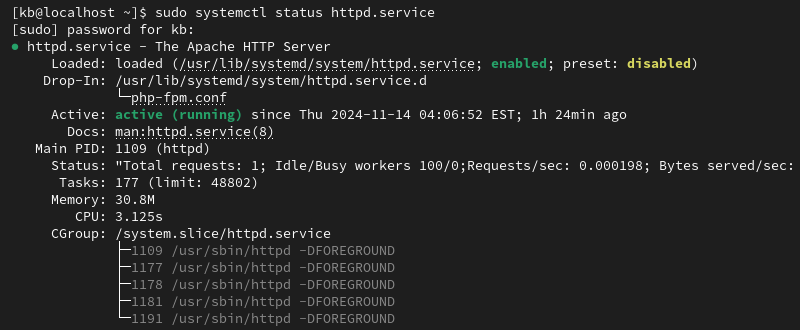
Ensure the database server is also running (MySQL or MariaDB):
sudo systemctl status mysqld.service
Both services show as active (running) if everything is set up and working correctly. If not, restart the services or install the servers before continuing.
Step 1: Install EPEL Repository
Neither CentOS nor Rocky Linux can install phpMyAdmin from the default repository. Add the EPEL repository (Extra Packages for Enterprise Linux) to gain access to the phpMyAdmin installation:
sudo yum install epel-release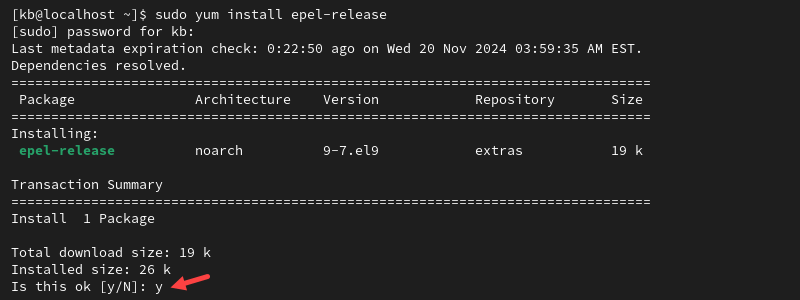
Press y to confirm the installation. Once finished, refresh and update the EPEL repository:
sudo yum updateThe package is now available to install on the system.
Step 2: Installing phpMyAdmin on CentOS and Rocky Linux
To install phpMyAdmin on CentOS and Rocky Linux, enter this command:
sudo yum install phpmyadmin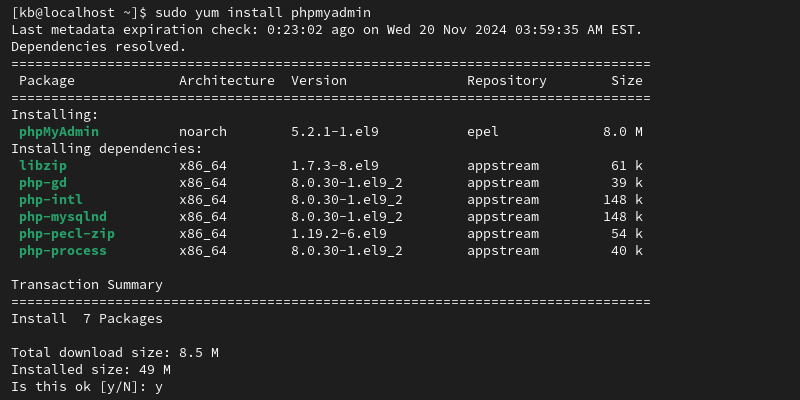
The package manager also installs any required dependencies. Confirm the installation with y, then wait for it to complete.
Step 3: Configuring and Securing phpMyAdmin
Configuring and securing phpMyAdmin requires modifying the default configuration file. The sections below show how to modify the file in /etc/httpd/conf.d/phpMyAdmin.conf.
Open the file using a text editor, such as Vim:
sudo vim /etc/httpd/conf.d/phpMyAdmin.confContinue reading to see how to control connections and aliases, which will help secure your server.
Restrict IP Addresses
phpMyAdmin is configured to restrict access and allow connections only from the local machine. Adjust the configuration file to allow remote access from a specific IP address or IP address range. Locate the /usr/share/phpMyAdmin/ and /usr/share/phpMyAdmin/setup directives:
<Directory /usr/share/phpMyAdmin/>
   AddDefaultCharset UTF-8
   Require local
</Directory>

<Directory /usr/share/phpMyAdmin/setup/>
   Require local
</Directory>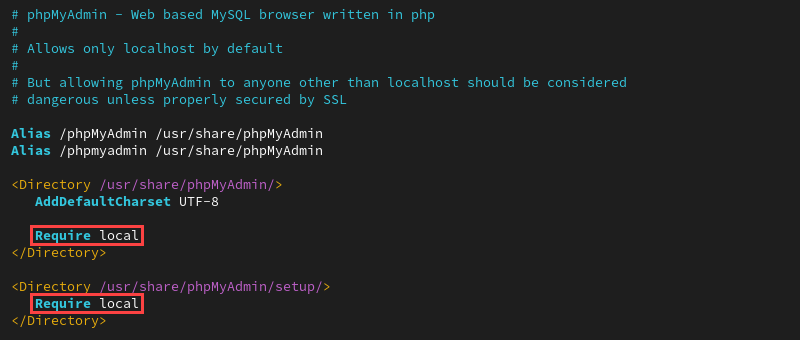
Replace Require local with a specific IP address or range. For example:
<Directory /usr/share/phpMyAdmin/>
   AddDefaultCharset UTF-8
   Require ip 127.0.0.1
</Directory>

<Directory /usr/share/phpMyAdmin/setup/>
   Require ip 127.0.0.1
</Directory>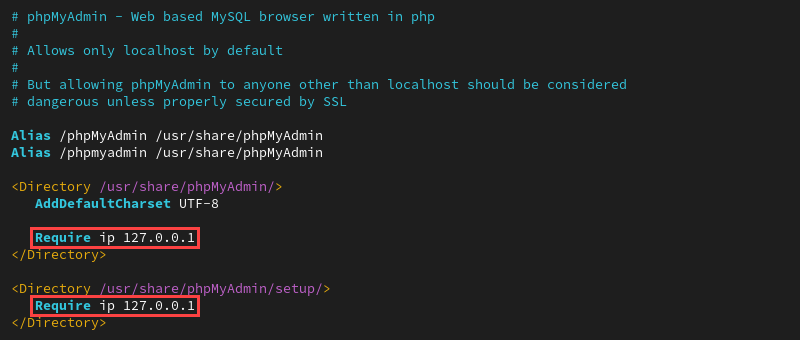
If external access to the /usr/share/phpMyAdmin/setup/ directory is not required, leave it restricted to Require local.
Note: Read more about secure remote access and how to establish it effectively.
Change Alias
Change the default /phpMyAdmin alias to add a layer of security. Comment out the existing alias definitions:
#Alias /phpMyAdmin /usr/share/phpMyAdmin
#Alias /phpmyadmin /usr/share/phpMyAdmin
Create a new alias. For example:
Alias /adminPHP /usr/share/phpMyAdmin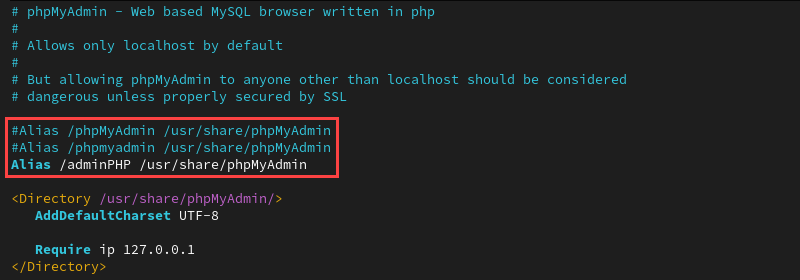
This changes the access URL to [domain]/adminPHP, which is unknown to potential intruders.
Step 4: Restart Apache
Restart the Apache service to apply the changes:
sudo systemctl restart httpd.serviceThe restart applies the new configuration.
Step 5: Verify phpMyAdmin is Working
Verify that phpMyAdmin is working correctly. Enter your server's IP or domain name and the alias (default is /phpmyadmin) in a web browser. For example:
[IP_or_domain]/phpmyadmin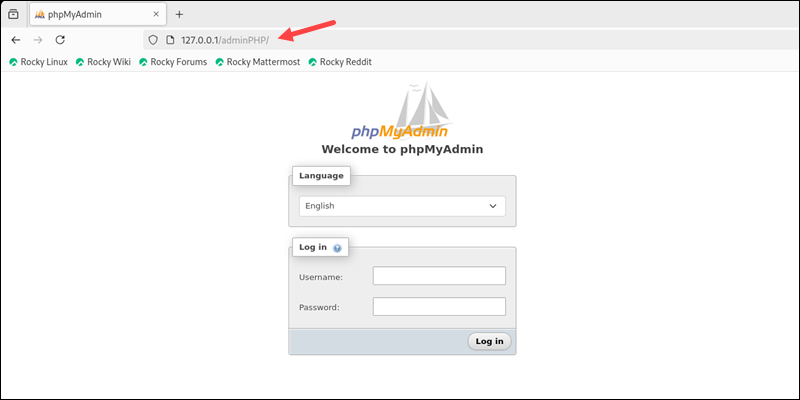
The phpMyAdmin login screen loads on the page. Use your database credentials to log in and access the phpMyAdmin dashboard.
Note: To create a new database user, follow our guide on how to create a MariaDB user and grant privileges.
Conclusion
This guide showed how to install phpMyAdmin on CentOS and Rocky Linux. phpMyAdmin is a widely used application for managing databases.
Next, see our comprehensive list of the best database software.
