MySQL is a popular open-source relational database management application. It is part of the LAMP Stack (Linux, Apache, MySQL, PHP), a software stack that powers web servers.
This guide will show you how to install MySQL on CentOS or Rocky Linux.
Prerequisites
- A system running CentOS or Rocky Linux.
- A user account with sudo privileges.
- Access to the terminal.
Guide to Installing MySQL on CentOS or Rocky Linux
MySQL availability in the default repositories of CentOS and Rocky Linux depends on the system version. In CentOS 7, MySQL was removed from the repository, and MariaDB was included by default as the relational database in their official repositories.
MySQL was later added back to the appstream repo, although it is usually not the latest available version. In this tutorial, we will use the Oracle MySQL repository to obtain the latest available program version.
Step 1: Download MySQL Repository
Follow the steps below to download the MySQL repository to your system and prepare it for use:
1. Open a browser and navigate to the official MySQL yum repository download page.
2. From the list of repository packages, find the one for your system and click the Download button. For this tutorial, we will use Red Hat Enterprise Linux 9 / Oracle Linux 9 for our Rocky Linux 9 system.
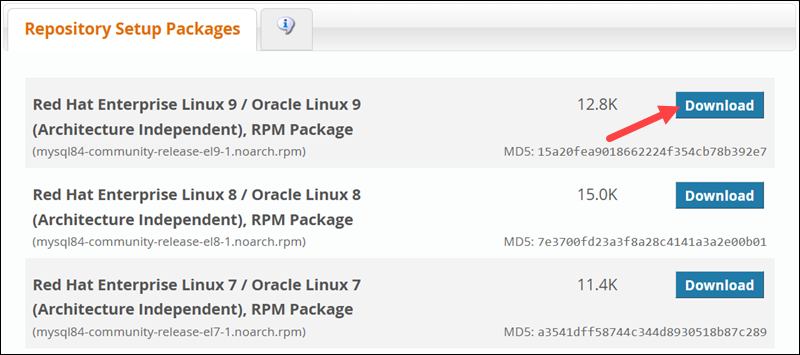
3. Before the download starts, the page prompts you to create an Oracle Web Account. Scroll to the bottom of the page and find the No thanks, just start my download link and copy it.
4. Open the terminal and use the wget command to save the file. The syntax is:
sudo wget [link]For example:
sudo wget https://dev.mysql.com/get/mysql84-community-release-el9-1.noarch.rpm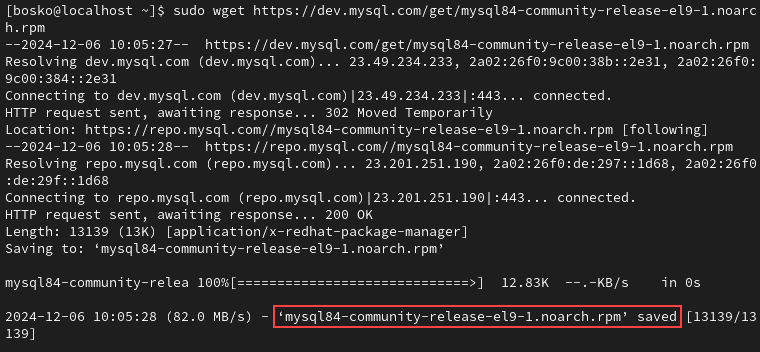
Wait for the system to download the files.
Step 2: Add the Software Repository
Next, install the downloaded repository. Use the syntax below:
sudo rpm -Uvh [file_name]Replace the [file_name] with the exact file name of the repository you downloaded in the previous step. The easiest way is to copy the file name from the download output. For example:
sudo rpm -Uvh mysql84-community-release-el9-1.noarch.rpm
The command adds the new Yum repository from which we can get MySQL.
Step 3: Install MySQL
After adding the repository, you can install the latest MySQL version. Follow the steps below:
1. Update the system package index with:
sudo yum update
The system now reaches out to the new repository and updates the package index.
2. Install MySQL with:
sudo yum install mysql-server -y
Wait for the process to complete.
Note: MySQL includes several security plugins to authenticate connections to the server, password verification and securing storage for sensitive data. All of these are available in the free version.
Using MySQL
After the installation completes, you can start using the MySQL server. This section covers the basic setup after installation.
Managing MySQL Service
Run the following command to start the MySQL service after installation:
sudo systemctl start mysqldTo check the status of MySQL, use the command:
sudo systemctl status mysqld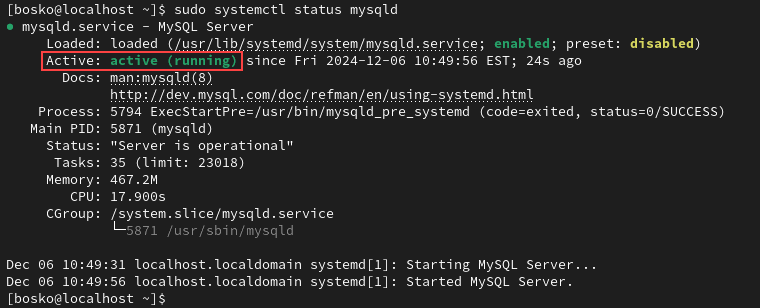
The system shows several lines of MySQL service information. In the Active line, it should display the active: (running) message. Return to the terminal with q.
By default, the MySQL service is set to launch at startup. To disable it, you can use the disable command:
sudo systemctl disable mysqldTo stop the MySQL service, use the stop command:
sudo systemctl stop mysqldFind Temporary Password
The MySQL installation routine sets up a default temporary password. Use the grep command to find the password:
sudo grep 'temporary password' /var/log/mysqld.logCopy the password for the next step.

Configuring and Securing
Your new MySQL installation comes with a security script to simplify security configuration. Refer to our mysql_secure_installation guide to learn more about the script and how to improve MySQL server security significantly.
Launch the script with the following terminal command:
sudo mysql_secure_installationUse the password you copied in the previous step to access the script and set up a new one. Follow the steps outlined in the guide to complete your MySQL server configuration.
Note: If you receive an access denied error, see how to resolve the Access denied for user 'root'@'localhost' error.
Log into MySQL
To launch MySQL from the command line, use the command:
mysql -u root -pEnter the password you set up with the security script in the previous step, and the system should respond by displaying the MySQL shell:
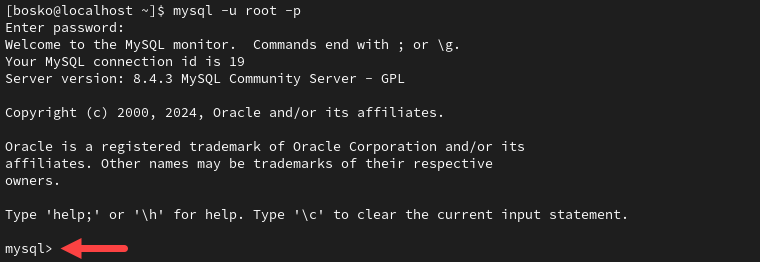
It lists the necessary information about MySQL, and your command prompt will change to mysql> to indicate that you are logged in.
Once you are done, log out with:
exitThe command prompt changes, indicating that you have logged out of MySQL.
Conclusion
This tutorial showed how to install and configure MySQL on a CentOS or Rocky Linux system. The fast, reliable, and open-source relational database management system is widely used to efficiently manage and query structured data in applications.
Next, check out our article on PostgreSQL vs MySQL if you are looking for an alternative Relational Database Management System (RDBMS).
