CentOS released its long-awaited update of the widely popular Linux distribution CentOS 8 – in September 2019.
If you are already a CentOS user and want to use the latest version, there is still no straightforward way of upgrading to version 8. To set up CentOS 8, you will need to install the OS from scratch.
This tutorial will show you how to install CentOS 8 with step-by-step instructions and screenshots.
Prerequisites
- A recommended minimum of 8GB hard disk space (+2 GB for optimal performance)
- Bootable USB/DVD
- Internet connection
Step 1: Download CentOS 8
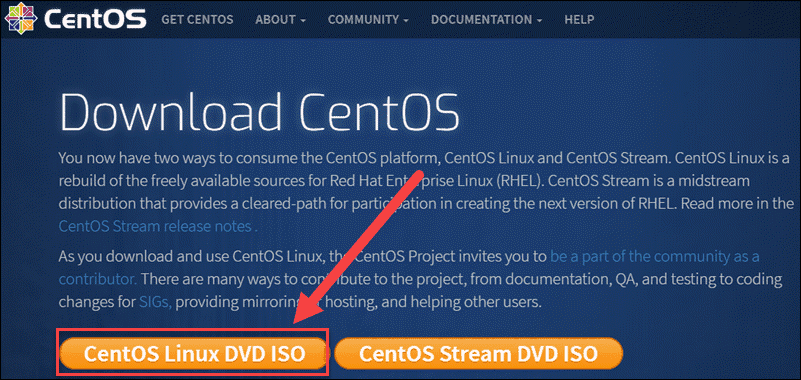
The first step is to download the CentOS 8 ISO file located on the official CentOS website.
There you will find two available ISO packages – CentOS Linux DVD ISO (the non-enterprise environment that includes the GUI) and CentOS Stream DVD ISO (the rolling-release distro).
In this guide, we installed the freely available CentOS Linux 8 and downloaded the corresponding ISO.
Note: The default desktop environment for CentOS 8 is GNOME 3.28. The latest GNOME introduced many useful features such as an upgraded UI, extended device support, new box features, and many other novelties.
Step 2: Boot System from USB
After downloading the ISO, create a bootable USB.
Boot the system from the medium on which you have stored the ISO file.
It should display the main menu with several options to choose from. Select Install CentOS Linux 8.0.1905 and hit Enter to begin the installation process.
Step 3: Install CentOS 8
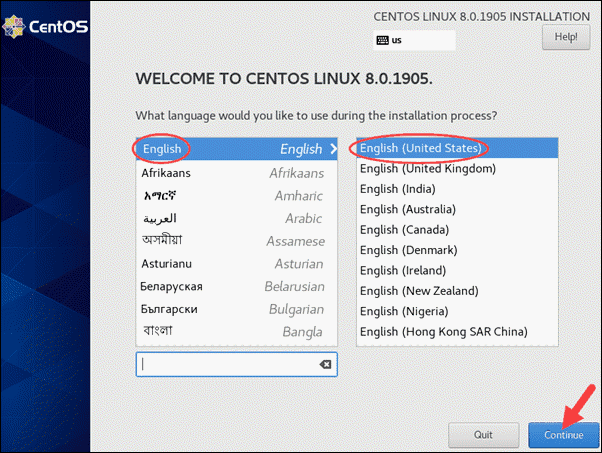
The installation process starts by selecting the language you want to use while installing. Find the language of your choice and click on Continue.
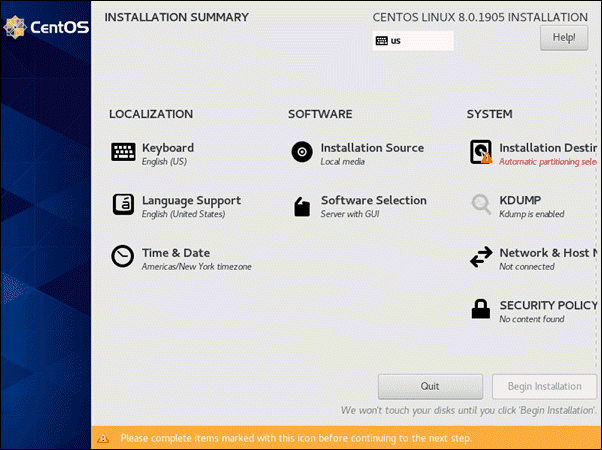
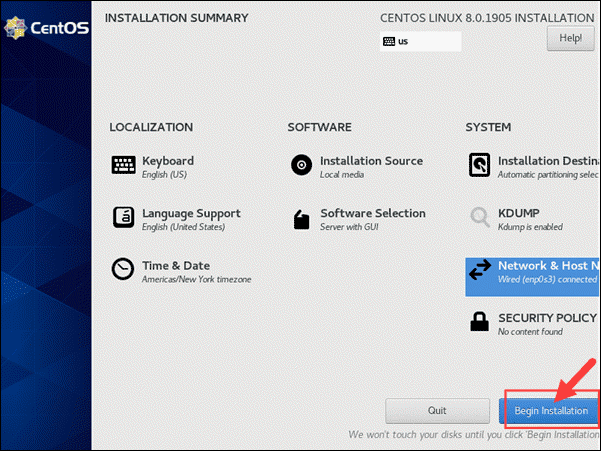
The next window shows you a summary of the localization, software, and system configuration. You can inspect all the settings and adjust the parameters to suit your needs.
Keyboard Layout
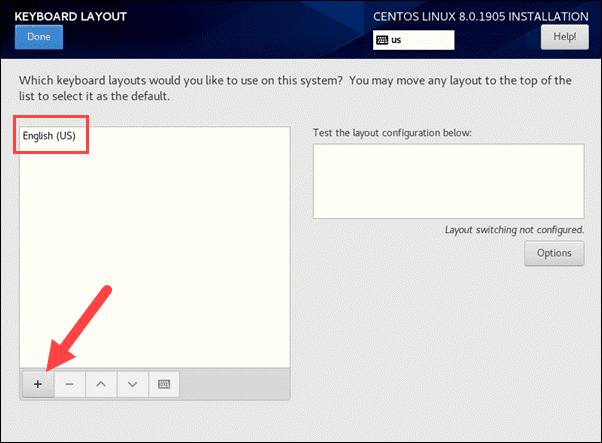
The first thing you can set is the keyboard layout you want to use on your system.
The default keyboard layout is in English (US), but you can add other keyboards by clicking on the plus sign (+) and finding the one you want.
If you have multiple keyboard layouts, the one on the top of the list will be set as the default. You can move the layouts around and select the order in which they are listed.
Language Support
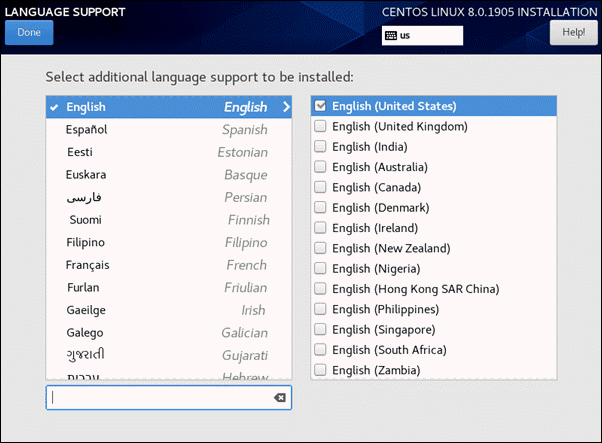
Although you have already selected a language for the installation process, you can install additional language support. Find the languages you want to add, check the box, and click Done to return to the main menu.
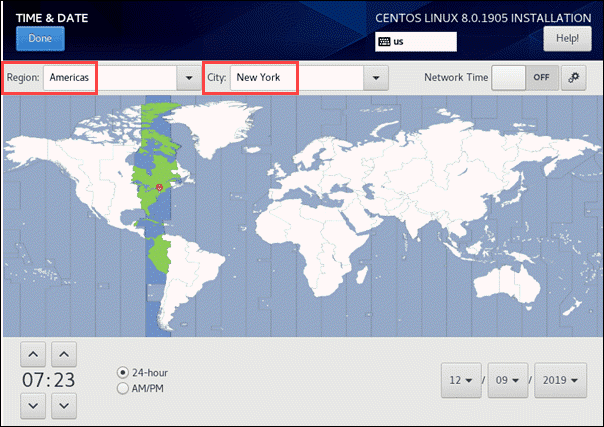
Time and Date
Set the time and date for your CentOS 8 by selecting the region and city you are in. The system automatically changes the time according to your geographical location.
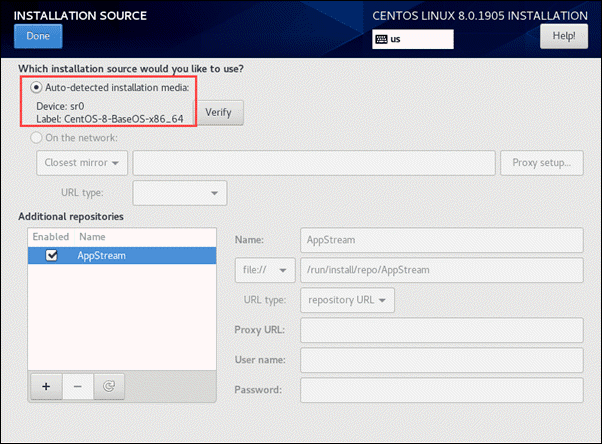
Installation Source
You can also select the installation source you want to use. By default, it is set to the auto-detected installation media (a DVD or ISO file). If you don’t want to use the locally available media, you can use a network location.
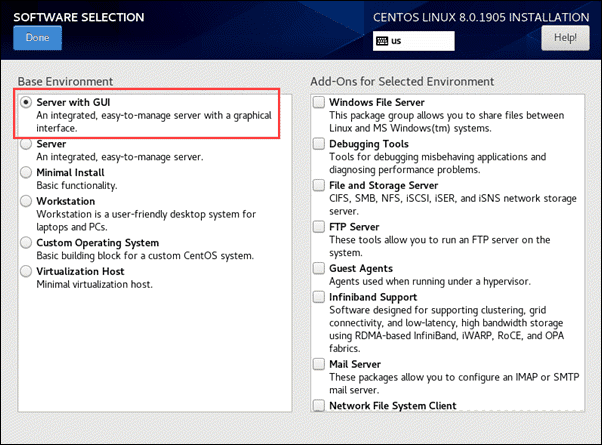
Software Selection
The Software Selection section lets you decide which packages to install as part of your CentOS 8 system. You can decide on the Base Environment (whether you want a server with a GUI, the minimal installation or something else) and even add additional packages from the Add-ons list.
In this guide, we are going to install the server with a graphical interface (GUI).
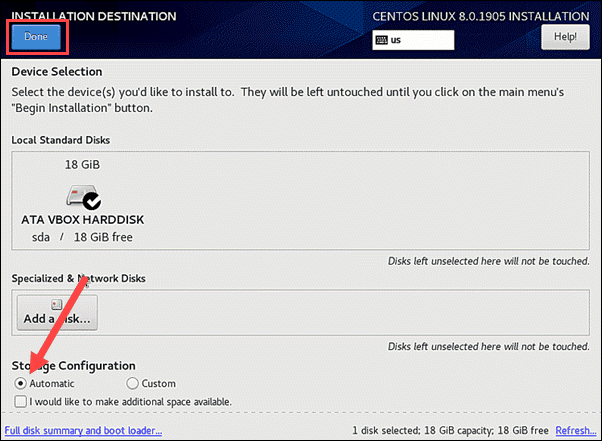
Installation Destination
Make sure to click on the Installation Destination to select the device(s) on which you want to install CentOS 8.
You can decide how you want to partition the storage devices by selecting Automatically configure partitioning or I will configure partitioning (meaning you will do it manually).
If the storage you selected hasn’t been previously used (i.e. it is a clean installation), you can use automatic partitioning.
In case you are reusing storage on which you have important data you want to preserve, manual partitioning would be a wiser choice. This feature allows you to configure advanced setting options that reflect your needs.
Go back to the Installation Summary by clicking on Done.
Once you have finished setting up the CentOS 8 configuration, click on the button in the bottom right corner labeled Begin Installation.
Kdump
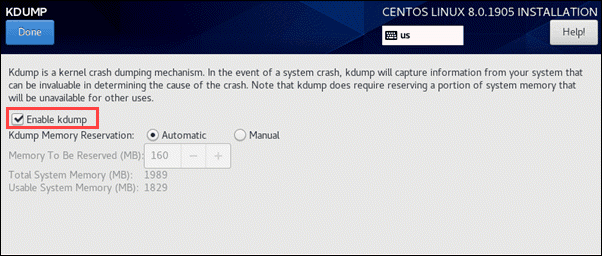
Under the System heading you will find kdump configuration. In the event of a system crash, kdump captures information that can be invaluable in determining the cause of the crash.
This kernel crash dumping mechanism requires a part of the system memory that will be reserved just for its use. Kdump is enabled by default, with automatic memory reservation.
You can also set the memory reservation to an amount you find suitable, manually.
Network and Host Name
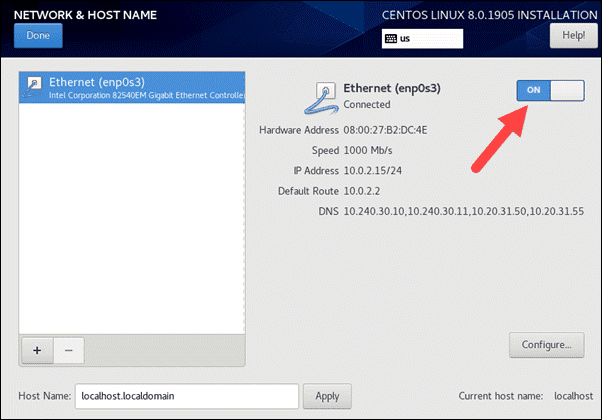
The installation wizard will automatically detect locally accessible interfaces which will be listed in the left pane. You can select a network and activate (or deactivate) it. After the installation of CentOS, follow our guides to learn more details about configuring your network settings and how to change hostname on CentOS 8.
Security Policy
Security policies are not enabled by default.
They should only be enforced if a policy is required by specific organization rules or government regulations.
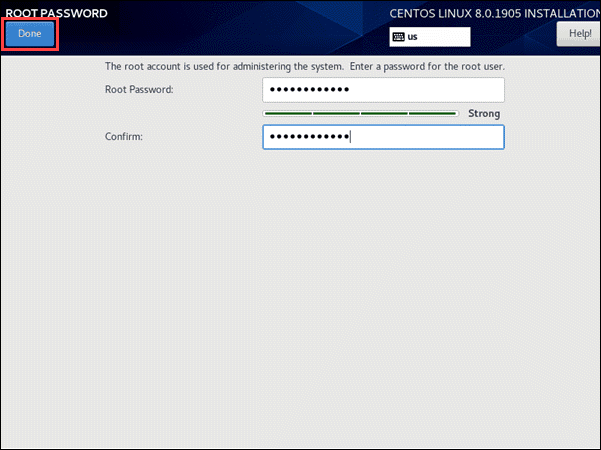
User Settings
While the wizard installs CentOS 8 on your machine, you can configure the User Settings.
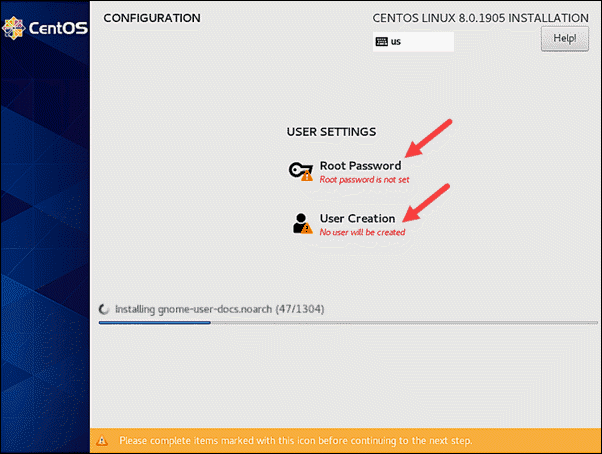
Start by creating a root password. Bear in mind that this needs to be a strong password. The root user is used for system administration and has access to all commands and files. For uncrackable password ideas, consider some of our suggestions for greater system protection.
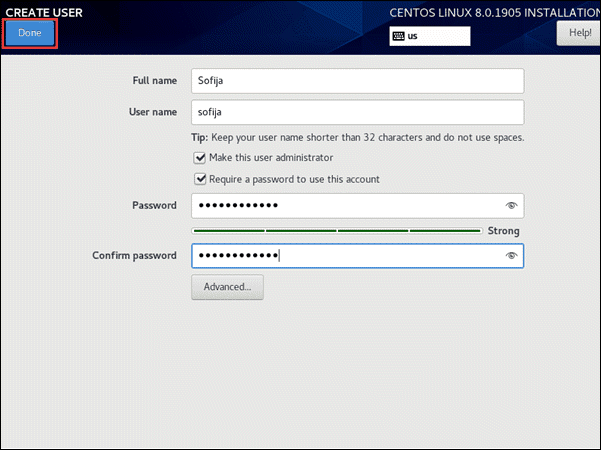
Next, create a user with non-root privileges for everyday use. Then, type in your full name and a user name for the system. Tick the boxes that make the user an administrator and require password confirmation. Finally, provide the password you want to use and retype it to confirm.
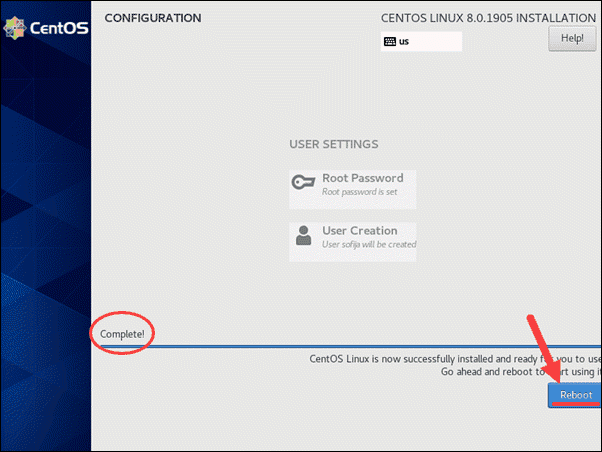
Wait until the installation is complete. You will receive a message that CentOS Linux 8 has been successfully installed and is ready to use. To start using the new OS, you first need to Reboot the system.
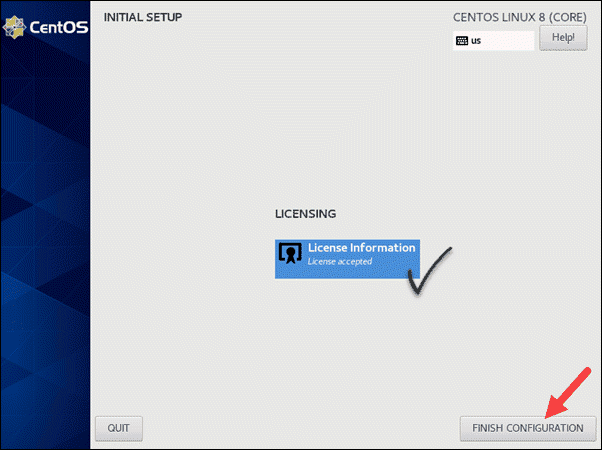
Licensing
The system restarts and opens an Initial Setup window with a Licensing Agreement that you must accept to finish the configuration. Click on the License Information and tick the box to confirm you accept the agreement.
Step 4: Run CentOS 8
With the initial setup and configuration done, the installation wizard redirects you to the login screen. Type in the password you assigned to your user and hit Enter.
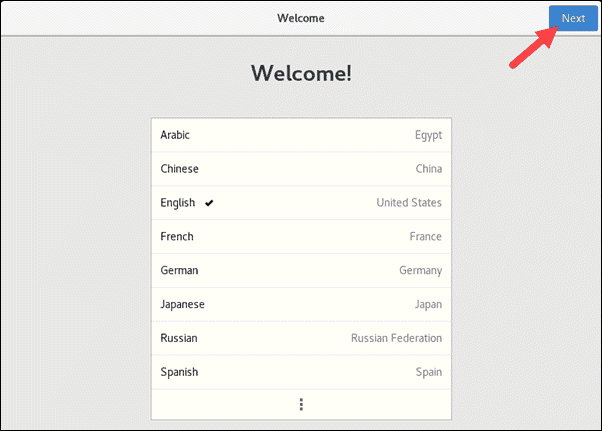
This takes you to the CentOS 8 Welcome screen, where you need to choose a language for your OS and click Next.
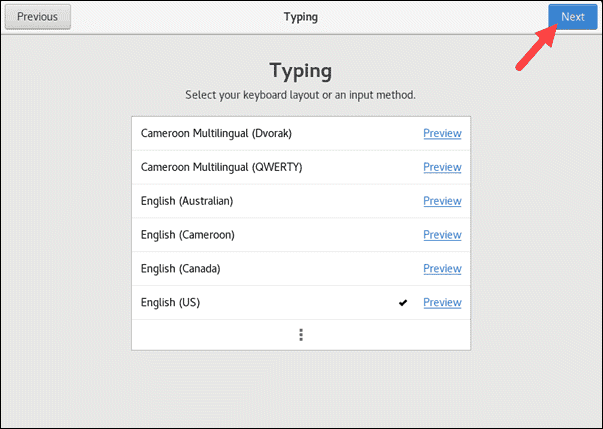
In the following prompt, select the keyboard layout or input method you prefer and click Next again.
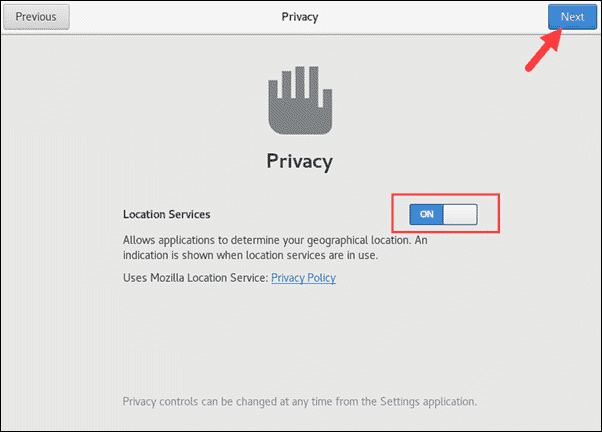
Select whether you want Location Services turned on or off. This is a privacy setting you may or may not want to uphold. By leaving Location Services ON, you allow applications to determine your geographical location.
Finally, the prompt gives you an option to Connect to Your Online Accounts for more convenient access. If you do not want to do so, click the Skip button to proceed.
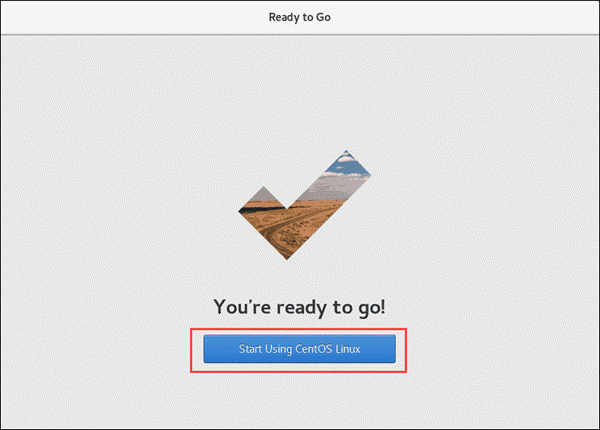
The button Start Using CentOS Linux takes you to the CentOS 8 desktop.
Conclusion
That’s it! You’re ready to go. After reading this guide and following all the steps, you should have successfully installed CentOS 8 on your system. You can now explore all the new features CentOS 8 has to offer.
To find out more about these new features and updates, take a look at our review on the CentOS 8 release.