The Linux kernel is the foundation on which all Linux distributions operate. It is open-source software, which means anyone can decompile, examine, and modify the code.
Updated kernel versions enhance security, introduce new functionality, and boost the operating system's performance.
This guide will show you how to upgrade the Linux kernel on CentOS and Rocky Linux.

Prerequisites
- CentOS or Rocky Linux system.
- Access to the terminal.
- sudo or root privileges.
- A recent backup of your system.
Steps to Update CentOS Kernel Version
The Yum package manager supports kernel updates, but the official CentOS and Rocky Linux repositories do not provide the latest kernel versions. To access the newest kernel releases, you need to enable the ElRepo repository, a third-party source offering the latest kernel versions on their website.
Official Linux kernel releases undergo testing to ensure stability and compatibility, preventing issues with applications and system functions.
The following steps show how to upgrade the kernel on CentOS and Rocky Linux.
Step 1: Check Your Current Kernel Version
To check the current kernel version, run the uname command:
uname -msr
The output indicates which kernel version you are currently running and which architecture it is based on.
Step 2: Update Repositories
Before upgrading the kernel, all packages must be updated to the latest version. To update software repositories, use the command:
sudo yum -y update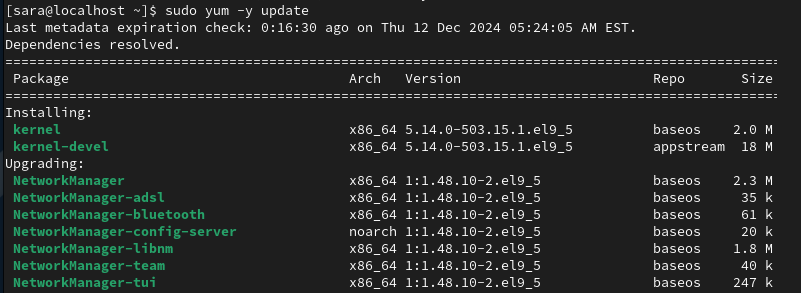
Your software repository is now updated. This ensures you have access to the latest kernel version.
Note: The -y switch tells the system to say "yes" to any prompts that may pop up.
Step 3: Enable the ELRepo Repository
To install the new kernel version, the ELRepo repository must be enabled. To do that, run:
sudo rpm --import https://www.elrepo.org/RPM-GPG-KEY-elrepo.orgThe command has no output but installs the GPG key for the ELRepo repository. This is important because the system does not allow the installation of unsigned software packages. The GPG key provides a digital signature to verify the software is authentic.
Next, install the ELRepo repository by executing the following command:
sudo yum install https://www.elrepo.org/elrepo-release-9.el9.elrepo.noarch.rpm
Note: The command to install the ELRepo repository depends on the version of ELRepo you're using. For the latest versions, you should use updated ELRepo release packages specific to those versions listed on the official ELRepo website.
Step 4: List Available Kernels
Listing available kernels is necessary to verify which kernel versions are currently available for installation or upgrade. To list available kernels, enter:
yum list available --disablerepo='*' --enablerepo=elrepo-kernel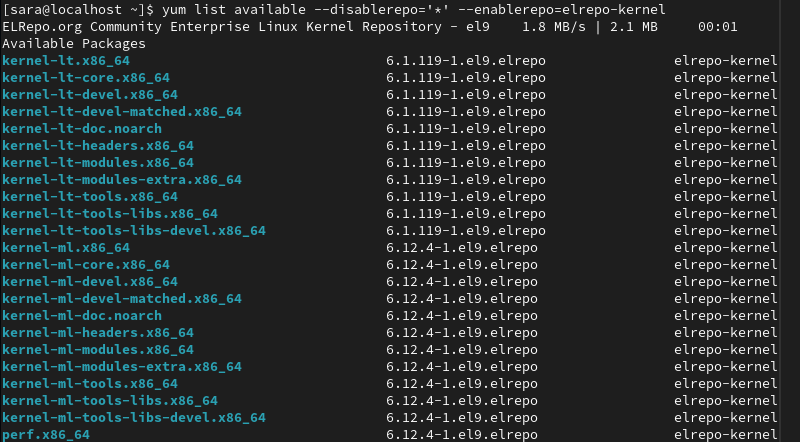
The system displays a list of available kernels. Look for entries that include either kernel-lt, which refers to a long-term support (LTS) release, or kernel-ml, which indicates a mainline release with a shorter support cycle but more frequent updates.
Next, focus on the right-hand column of the output, which lists a string of letters and numbers. This represents the specific kernel version.
The kernel-ml package with version 6.12.4-1.el9.elrepo is the latest version based on the most recent mainline kernel, while kernel-lt offers a more stable LTS release with version 6.1.119-1.el9.elrepo.
Step 5: Install New Kernel Version
There are two primary types of kernel versions:
- Mainline Kernel. Receives updates more often but has a shorter support period.
- Stable Long-Term Support (LTS) Kernel. Updated less frequently and designed for extended support.
To install the latest mainline kernel, use the dnf command:
sudo dnf --enablerepo=elrepo-kernel install kernel-ml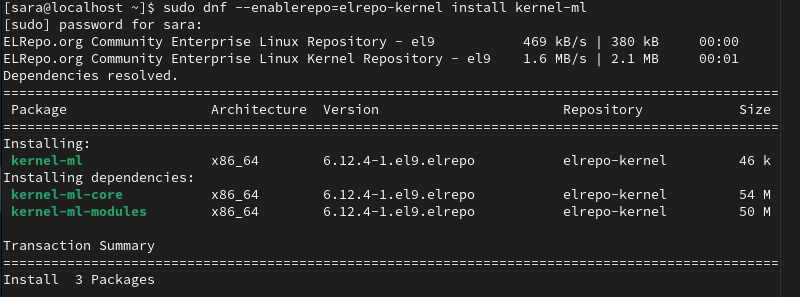
To install the latest long-term support kernel, run:
sudo dnf --enablerepo=elrepo-kernel install kernel-lt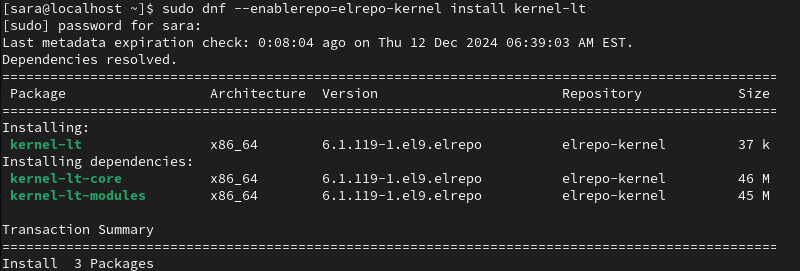
Step 6: Reboot and Select the New Kernel
After you install a new kernel, reboot your system so the new kernel is loaded into memory. Reboot by running the command:
rebootYou may be presented with the GRUB or boot menu. Use the arrow keys to select the Linux kernel you have just installed, then press Enter. Your operating system should boot normally.
However, newer systems sometimes automatically boot into the default kernel without displaying the GRUB menu. If only one kernel is installed or the default kernel is set to the most recent one, the system typically boots directly into that kernel.
Step 7: Verify Functionality
After booting into the new kernel, ensure the system is functioning properly. Perform the following checks:
- Hardware checks. Verify all devices are recognized correctly.
- System logs checks. Check logs for any errors related to the new kernel
- Performance checks. Ensure the system runs smoothly without unexpected slowdowns or crashes. Monitor system resources using commands like top, vmstat, or lsof.
- Driver compatibility checks. Verify network interfaces, graphics, and other hardware components are working correctly.
Step 8: Set Default Kernel Version
Once you confirm that the new kernel is compatible and working correctly, edit the GRUB boot loader so that it loads the new kernel by default. To do that, take the following steps:
1. Open the file in a text editor of choice. For example, to access it in Vim, run:
sudo vim /etc/default/grub2. Look for the line:
GRUB_DEFAULT=0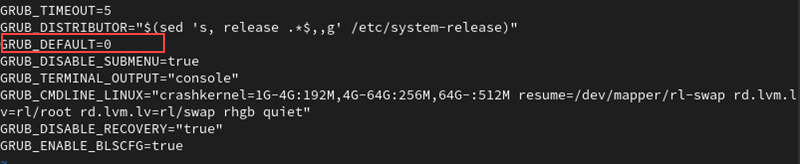
This line determines which entry is loaded by default.
3. Set the line to 0 if it's not already set. Setting it to 0 selects the first kernel in the GRUB list (usually the latest installed one) by default.
5. Recreate the kernel configuration with:
sudo grub2-mkconfig -o /boot/grub2/grub.cfg
6. Reboot once more:
rebootConclusion
This tutorial explained how to update the Linux kernel in CentOS and Rocky Linux using ELRepo.
Next, learn how to build the Linux kernel from scratch.