MySQL is an open-source relational database server tool for Linux operating systems. It is widely used in modern web-based technology, and it forms part of the popular LAMP stack of software.
This tutorial provides step-by-step instructions on how to install MySQL on Ubuntu 18.04. For the new version of Ubuntu, check out our guide on how to install MySQL on Ubuntu 20.04.
Prerequisites
- A system running Ubuntu 18.04
- Access to a user account with sudo privileges
- Terminal window (ctrl-alt-T)
- APT package manager (installed by default)
Installing MySQL in Ubuntu Using Terminal
This guide assumes you're installing to a local system. If you need to set up encryption or security certificates for configuring a remote server, please refer to this guide.
Step 1: Enable MySQL Repositories
Your installation of Ubuntu 18.04 may not have access to MySQL repositories.
To download the latest repositories, enter:
wget -c https://dev.mysql.com/get/mysql-apt-config_0.8.11-1_all.debThe system should respond by reaching out to the server and downloading the .deb configuration file. A progress bar displays to let you know when the download is completed.
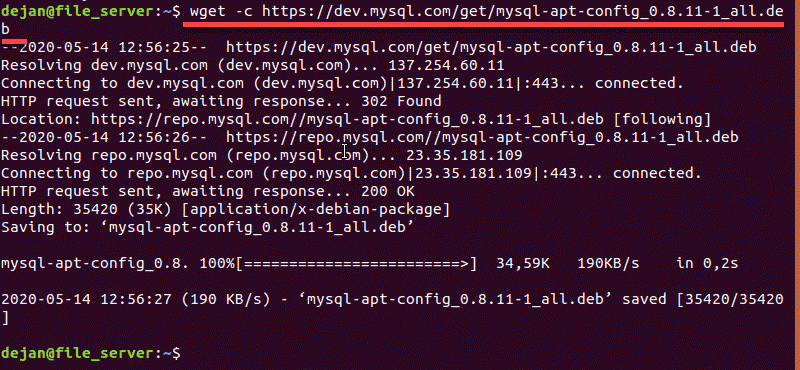
NOTE: The -c option will direct the system to resume the download if it’s interrupted. Also, it’s possible that a newer apt-config file has been published since this document was written. You can find the link to the latest file on the MySQL downloads page.
Step 2: Install MySQL Repositories
To install and enable MySQL repositories, enter the command:
sudo dpkg -i mysql-apt-config_0.8.11-1_all.debThe system should respond by launching an installation configuration tool. It will present options to you for which MySQL version you want to install.
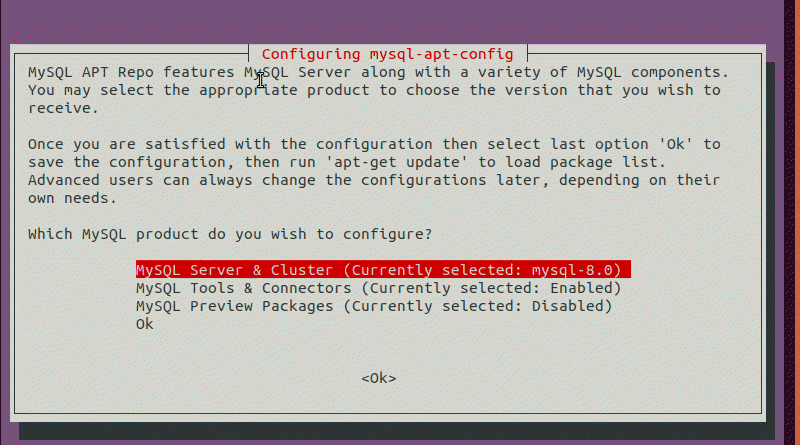
Leave the default settings and click OK, unless you’re an advanced user and have a specific reason to change them.
Step 3: Refresh the Repositories
Any time you’re installing new packages, you should update repository listings to ensure you are installing the latest release.
In the terminal, enter the following:
sudo apt-get updateThe system should take a few moments and refresh the repository cache.
NOTE: This step configures your system to build MySQL 8 directly from the official MySQL repository. You won’t be able to use Ubuntu’s native repositories to install MySQL software until this repository is disabled.
Step 4: Install MySQL
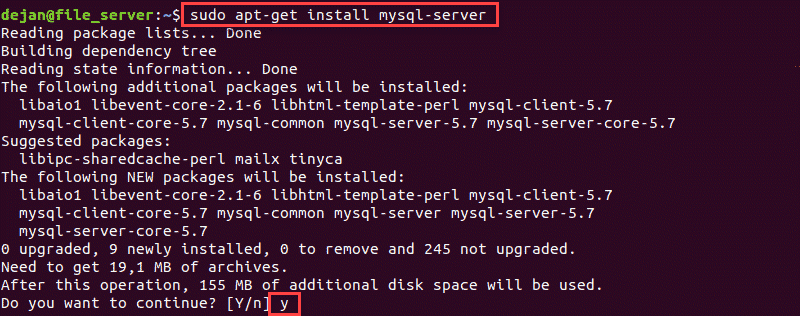
To install MySQL on Ubuntu, run the command:
sudo apt-get install mysql-serverEnter your administrator credentials, and the system will install the MySQL server package, client packages, and database common files.
The installation will prompt you to enter and confirm a root user and password for the MySQL database.
This password grants total access to the database, so it should be secure and private.
Next, the installer will display a notice about a new authentication method. The newer authentication is more secure but may cause compatibility problems with older MySQL clients.
Click OK, then on the next screen select the authentication method you want to use, then click OK again.
NOTE: If the PATH environment variable hasn't been set up on your system, you may receive a 'MySQL Command Not Found' error. Don't worry, there's an easy way to fix the MySQL ‘Command Not Found’ error on any OS.
Step 5: Set up MySQL Security
By default, MySQL lacks many basic and important security features. Luckily, it comes with an installation script that walks you through the configuration.
To install the MySQL security script, enter:
sudo mysql_secure_installationThe system will prompt you for the MySQL root password.
Validate Password Plugin
Next, the installer will describe the features of the Validate Password plugin.
This plugin checks to make sure that any new passwords are strong/complex enough.
Type y to enable or n to disable. This is your choice, but enabling this plugin is more secure.
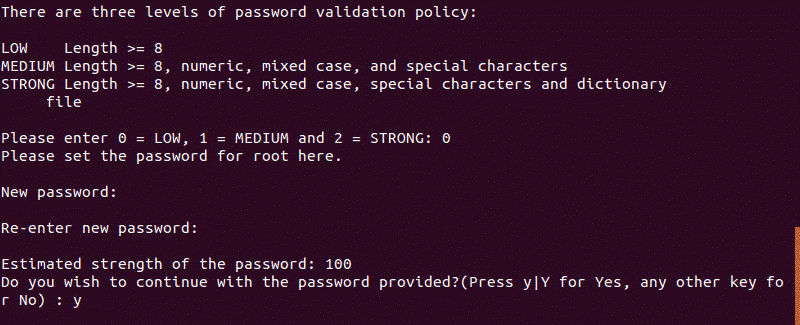
The Validate Password plugin has three settings for passwords:
- Low: passwords must be at least 8 characters
- Medium (default): passwords must have 1 uppercase, 1 lowercase, 1 numeric, and 1 special character
- Strong: compares the password to a dictionary file to prevent brute force attacks
Change Root Password
Next, the installer will offer you the chance to change the password for root. Type y to change the password, or n to keep the same password you set in Step 4.
If you do change the password, it will need to follow any requirements you configured in Step 5a.
Configure MySQL Security
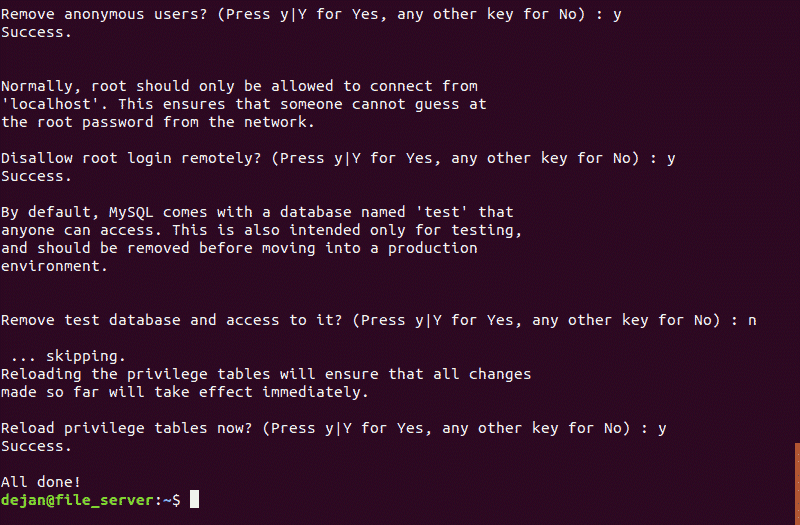
The system will prompt you for the following security features.
It is recommended that you confirm (type y) all options, unless you have a reason to keep them disabled.
- Remove anonymous users?
- Disallow root login remotely?
- Remove test database and access to it?
- Reload privilege tables now?
Step 6: Start, Stop, or Check Status of MySQL Service
In Ubuntu, the MySQL service should start automatically.
To verify MySQL is running enter the command:
sudo service mysql status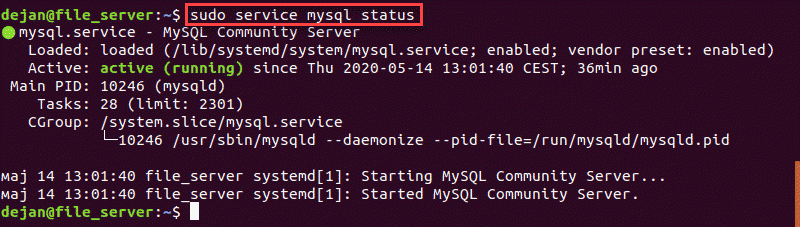
To stop the service:
sudo service mysql stopTo start the service:
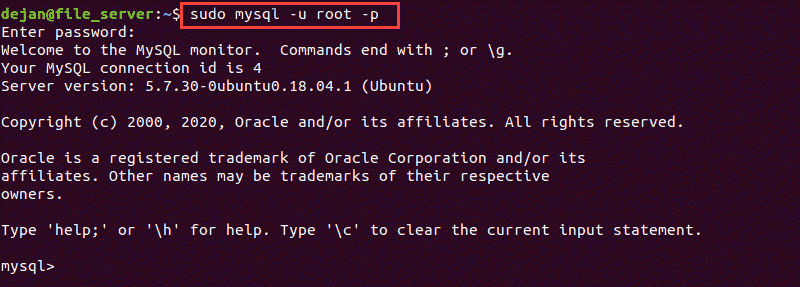
sudo service mysql startStep 7: Launch MySQL to Enter Commands
Many MySQL commands can be entered from the MySQL command shell. This is very similar to a terminal window, but the commands are issued directly to the MySQL service.
Launch MySQL shell with the command:
sudo mysql -u root -pThe system should prompt for a password, then give an introduction to the MySQL shell. The command prompt will change to look like this: mysql>
Conclusion
Installing MySQL on Ubuntu 18.04 was a breeze!
At this point, you should have MySQL 8 installed on your Ubuntu server, with basic security controls.
You can run additional database tasks through the MySQL shell, as described in Step 7. Or, you can install other plugins or tools to manage your database.
Popular tools for managing MySQL on Ubuntu are phpMyAdmin and MySQL Workbench. If you are interested in using a GUI to manage your MySQL databases, start by learning how to create a database with MySQL Workbench.