Windows Subsystem for Linux (WSL) allows users to run Ubuntu and other Linux distributions on Windows machines without creating separate virtual machines (VMs) or dual booting. While a dedicated WSL image is published for each new version of Ubuntu, upgrading an installed instance to a newer operating system (OS) version is possible.
This article will show how to upgrade the Ubuntu 22.04 long-term support (LTS) release to 24.04 LTS on WSL.

Prerequisites
- Windows Subsystem for Linux (WSL) installed on Windows.
- Ubuntu 22.04 installed on WSL.
- Administrative access on the Windows host and the Ubuntu WSL instance.
Note: Learn about the benefits of upgrading WSL to WSL2.
Upgrade Ubuntu on WSL
The Ubuntu upgrade process on WSL involves:
- Backing up the Ubuntu instance.
- Enabling upgrades inside Ubuntu.
- Performing the in-place upgrade.
Follow the steps below to upgrade an Ubuntu 22.04 LTS instance to Ubuntu 24.04 LTS.
Step 1: Locate Ubuntu 22.04 Instance
Open a PowerShell or Command Prompt window and use the following command to list the available WSL instances:
wsl -lFind and note the name of the instance in the command output.

Step 2: Create Backup
Since performing an in-place OS upgrade may lead to the WSL instance becoming corrupted, creating a backup is recommended. Back up the Ubuntu 22.04 instance by entering the command below:
wsl --export [wsl_instance_name] [path_to_backup]/[filename].tarFor example, to back up the instance named Ubuntu-22.04 to the Ubuntu_22_04.tar file located at c:\backups, type the following:
wsl --export Ubuntu-22.04 c:\backups\Ubuntu_22_04.tarThe output confirms the operation was successful.

Step 3: Update and Upgrade Packages on Ubuntu 22.04
Before starting the upgrade process, ensure the Ubuntu system is up-to-date:
1. Start the instance by typing the following wsl command:
wsl -d [wsl_instance_name]
2. Use APT to update repository lists and perform the necessary upgrades:
sudo apt update && sudo apt upgrade -yStep 4: Edit release-upgrades File
Ubuntu WSL instances do not allow upgrading to a new release by default. Apply the following steps to change this behavior:
1. Open the release-upgrades file in a text editor like Nano:
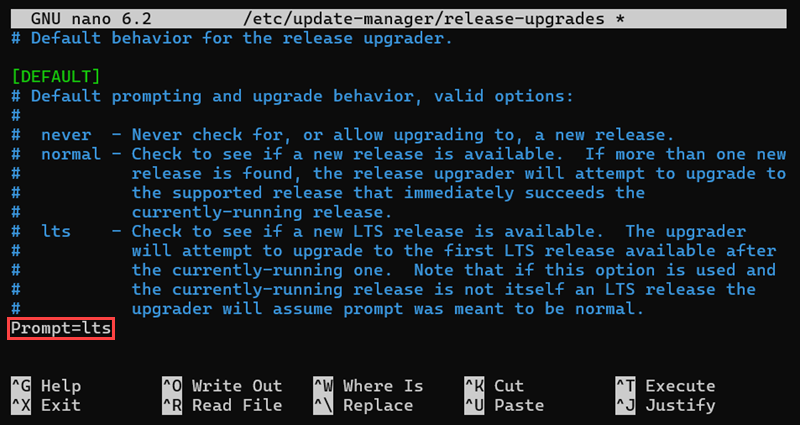
sudo nano /etc/update-manager/release-upgrades2. Find the Prompt=never line and change it to Prompt=lts. Setting the Prompt parameter to lts tells Ubuntu to suggest upgrades if a newer LTS release is available.

3. Save the file and exit.
Step 5: Perform Upgrade
Proceed with the steps below to perform a release upgrade procedure on Ubuntu 22.04:
1. Use the following command to search for release upgrades:
sudo do-release-upgradeThe system displays an Ubuntu 24.04 LTS prompt.

2. Type y and press Enter to continue.

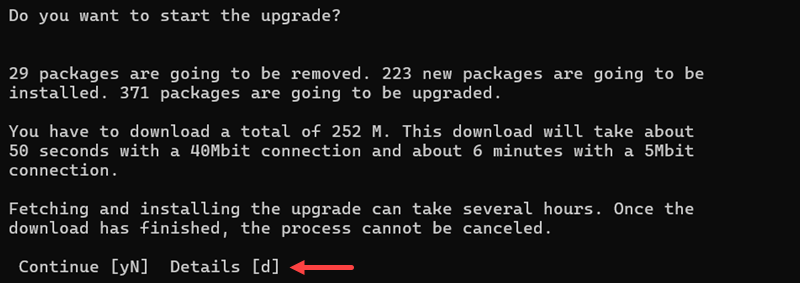
3. Enter y at the following prompt to start the upgrade.

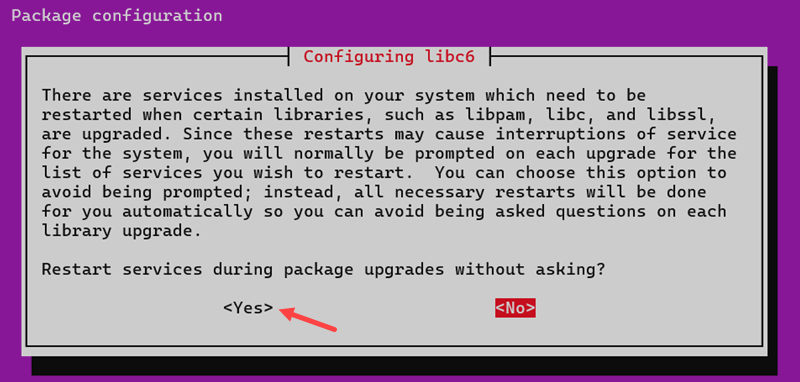
4. When prompted, select Yes in the Configuring libc6 dialog to avoid interruptions related to service restarts.

5. After downloading and installing new packages, the system offers to remove obsolete packages. Type y and press Enter to proceed.

Wait for the upgrade process to finish.
Step 6: Restart Instance
The Ubuntu instance needs to be restarted before it runs the upgraded version of Ubuntu. Follow the steps below to complete the restart procedure and test the upgraded instance:
1. Exit the WSL instance:
exit2. Terminate all instance processes:
wsl --terminate [wsl_instance_name]
3. Start the instance again:
wsl -d [wsl_instance_name]4. Once in Ubuntu, type the command below to see the release version information:
lsb_release -aThe output shows that the system running on the instance is now Ubuntu 24.04 LTS.

Conclusion
This article presented the simple procedure for performing an in-place upgrade of Ubuntu 22.04 to Ubuntu 24.04 in WSL. Upgrading a WSL instance lets you move to a newer Ubuntu release while keeping all the files and settings from the previous one.
Next, improve package management on your Windows system by learning How to Install Winget.


