Visual Studio Code (VSC) allows users to set up a remote development environment using an extension that is a part of the default VSC installation. Using the SSH protocol, developers can connect to a remote system, such as a computer or a container/virtual machine.
This tutorial shows how to add an SSH key to VSC and access a remote environment without a password.
Prerequisites
- Command-line access to the remote host system.
- SSH server installed on the host.
- VS Code installed on the local system.
Step 1: Connect to Remote Host via SSH in VSC
Before adding an SSH key, connect to the remote system using a password. Follow the steps below to establish an SSH connection with a remote host in VSC:
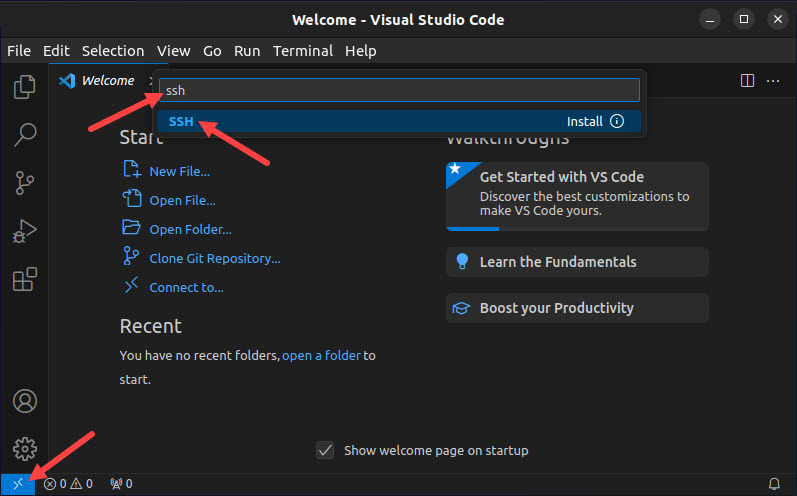
1. Select the remote connection button in the bottom left corner of the VSC window. The remote connection search bar appears.
2. Type ssh in the search bar and select the SSH option from the search results.
3. Select Add New SSH Host.

4. Type the SSH username and address you want to connect to and press Enter.

5. Select the SSH configuration file where the SSH connection information will be stored.

VSC creates a connection to the remote host.
6. Select Continue to confirm the remote host fingerprint.

7. Type the password of the remote user and press Enter.

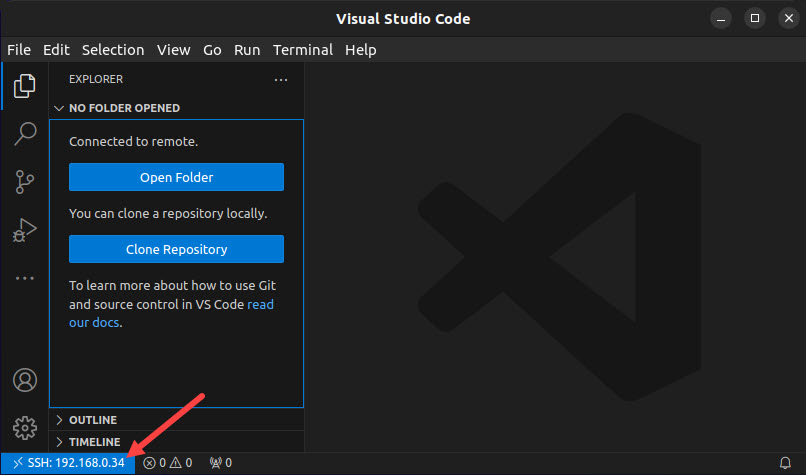
VSC connects and sets up the remote host by installing the VSC server. When the setup finishes, a new window opens for the remote environment. The IP address of the remote host is visible in the bottom-left part of the window.
Step 2: Generate SSH Key Pair
Note: This tutorial explains how to generate an SSH key on Ubuntu. For other operating systems and Linux distributions, check out our guides:
Once you established an SSH connection, generate an SSH key on your local machine. You will use this key to authenticate with the host and avoid typing the password in the future.
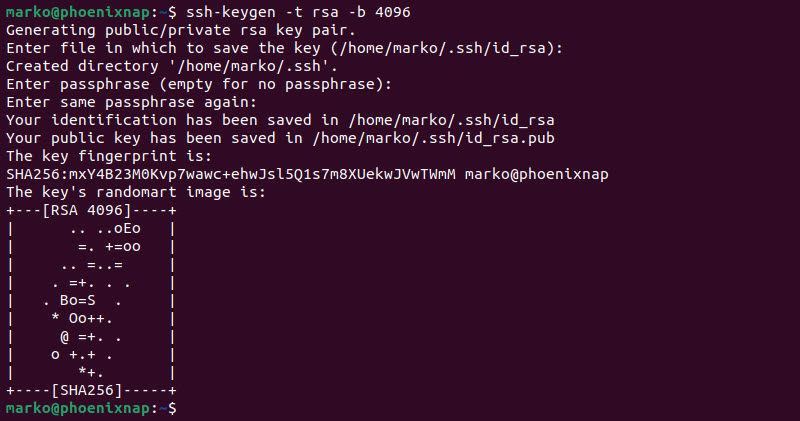
To create an SSH key pair, open the terminal and type the following command.
ssh-keygen -t rsa -b 4096The command creates a strong 4096-bit-long RSA key. Follow the prompts to complete the procedure. When asked for a passphrase, leave the field blank by pressing Enter.
Step 3: Add SSH Key to Host in VSC
To enable public key authentication, copy the public SSH key from your local system to the host system. You can perform this action by typing the following command in your local terminal:
ssh-copy-id -i [path-to-ssh-key] [username]/[remote-host-ip-address]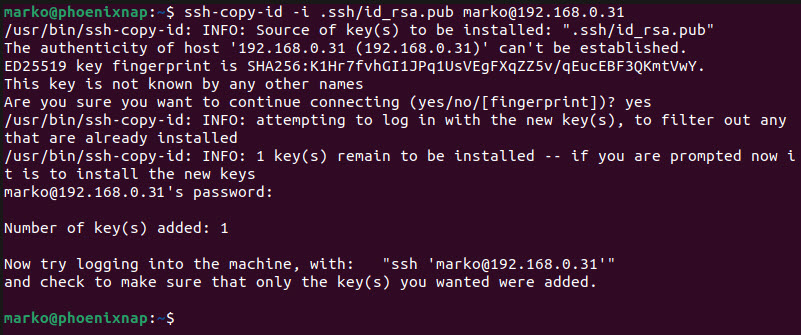
Alternatively, follow the steps below to perform the same action in VSC:
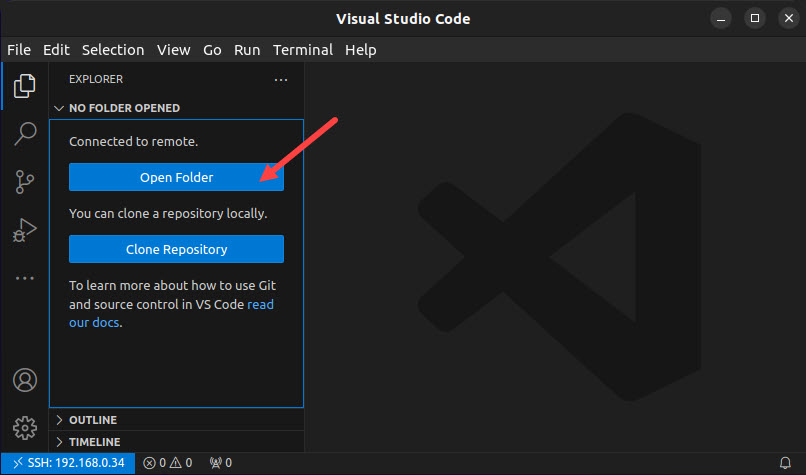
1. Select Open Folder in the VSC remote connection window.
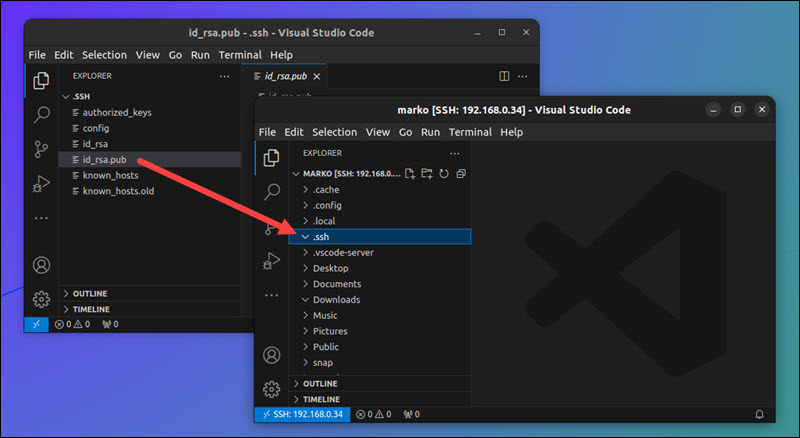
2. In the directory tree view, find the .ssh directory of the remote user.
3. Return to the local VSC window and locate the public key you generated in the previous step.
4. Drag and drop the public key from the local machine to the .ssh directory on the remote system.
5. Rename the file you copied from [ssh-key].pub to authorized_keys.
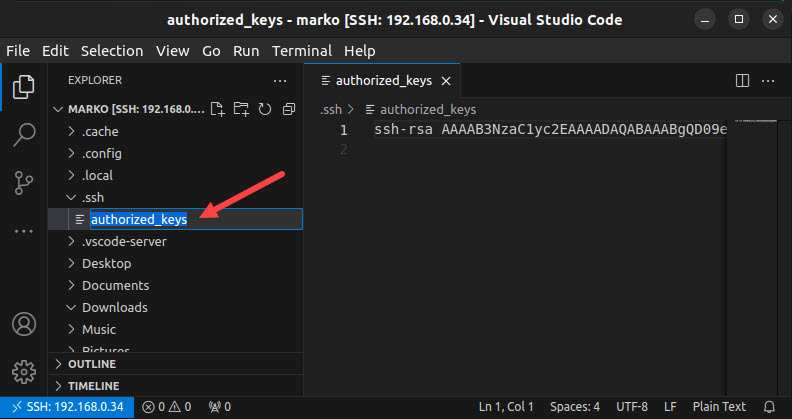
You can now establish an SSH session without a password.
Note: Double-check that the key was transferred correctly. You will not be able to access the remote system with an incorrect key and will be greeted with an error message, instead.
If that happens, check out our guide on how to fix the Permission denied (publickey,gssapi-keyex,gssapi-with-mic) error.
Conclusion
After reading this tutorial, you should be ready to set up a remote development environment in VSC and enable passwordless access with an SSH key pair. Using public key authentication with SSH allows for a seamless experience when developing software remotely.
Next, learn to use SSH to connect to a remote server in Linux or Windows.


