Telnet (teletype network) is a network protocol for two-way text-based communication through a CLI, allowing remote access. Telnet is vulnerable to cybersecurity attacks because it lacks encryption methods compared to the more modern SSH. However, it is still helpful for tasks that do not involve transmitting sensitive information.
This article teaches you what Telnet is as well as how to use Telnet on Windows to test for open ports.
Prerequisites
- Windows OS with administrator privileges
- Access to the command prompt
- An address and port to test
What is Telnet?
Telnet is a client-server protocol predating the TCP protocol. The network protocol allows a user to log into another computer within the same network through a TCP/IP connection.
A client machine running the Telnet client connects to a CLI on a remote device, most commonly a dedicated platform. Telnet is lightweight and fast, making it the preferred option in some use cases:
- Initial network hardware configuration.
- Remote access to trusted internal networks.
- Testing for open or used ports.
- Troubleshooting mail and web servers.
- Checking port forwarding.
How Does Telnet Work?
The Telnet protocol creates a communication path through a virtual terminal connection. The data distributes in-band with Telnet control information over the transmission control protocol (TCP).
Unlike other TCP/IP protocols, Telnet provides a log-in screen and allows logging in as the remote device’s actual user when establishing a connection on port 23. This type of access grants direct control with all the same privileges as the owner of the credentials.
Telnet comes with a command accessible from the command line in Windows. The telnet command also exists for macOS and Linux operating systems.
Note: Read our article to find out how to use telnet command in Linux.
How to Enable Telnet on Windows 10?
In Windows systems, Telnet is disabled by default. To check if Telnet is already activated, open your command line, and run telnet:

If the command prompt does not recognize the command, there are two possible ways to enable the Telnet client in Windows.
Option 1: Enable Telnet using GUI
To activate the Telnet command using the GUI:
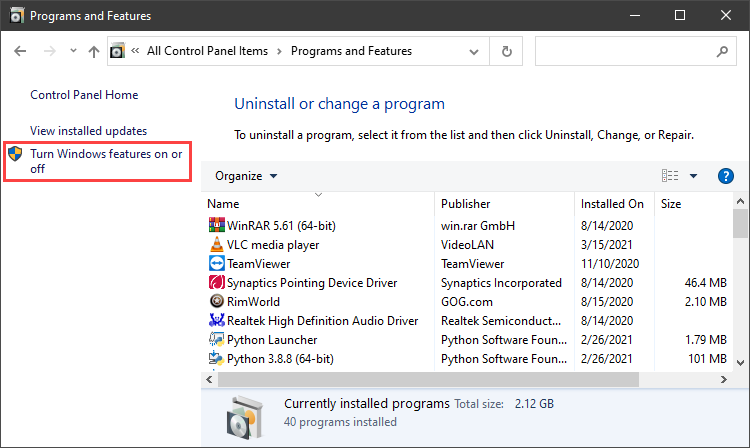
1. Open the Programs and Features options in Control Panel:

2. Click the Turn Windows features on or off setting:
3. Locate the Telnet Client option on the list, select it and click OK to install the feature:

4. When Windows completes the requested change, click Close.
5. Open the command prompt and run telnet to open the Microsoft Telnet Client:

6. Run quit to exit the Telnet client.
Option 2: Enable Telnet Using Command Prompt
To activate the Telnet client from the command prompt:
1. In the command prompt, run:
pkgmgr /iu:"TelnetClient"2. Restart the command prompt and run telnet to open the Microsoft Telnet Client.
3. Run quit to exit the client:

How to Use Telnet in Windows to Test Open Ports
The Telnet syntax for testing open ports is:
telnet <address> <port number>The command accepts both symbolic and numeric addresses. For example:
telnet towel.blinkenlights.nl 23Or alternatively:
telnet 127.0.0.1 80After running the command, one of the following three options happen:
1. The command throws an error, indicating the port is not available for connection:

2. The command goes to a blank screen, indicating the port is available.
3. Running the command on an open port 23 displays the screen of the telnet host, confirming an established Telnet connection:

Note: Learn how Telnet differs from SSH in our comparison article Telnet vs SSH.
Conclusion
The Telnet communication protocol provides a way to establish a direct connection with a remote host. Although not a secure option for most tasks, there are use cases where Telnet is a viable option.
For further reading, check out the more secure option and learn how to use SSH to connect to a remote server in Linux or Windows.