Self-Monitoring, Analysis, and Reporting Technology (SMART) is built into modern storage devices to track performance, reliability, and potential failure indicators. The smartctl command, part of the smartmontools package, provides direct access to this data from the command line.
This article will explain what SMART is and how the smartctl command works, as well as its syntax and options, practical examples, benefits, and potential risks.

Prerequisites
Introduction to SMART
SMART is built into most hard disk drives (HDDs) and solid-state drives (SSDs). It monitors health and reliability metrics directly from the device firmware, such as error rates, wear level, and temperature.
This information helps detect early warning signs of failure. SMART organizes this information into a list of attributes.
SMART Attributes Explained
A SMART attribute represents a specific drive characteristic, such as the number of reallocated sectors or the total power-on hours. While some attributes are standardized across all drives, many are vendor-specific, which means the exact list and interpretation differ by manufacturer and model.
Each SMART attribute is identified by a numeric ID and is reported with several values:
- ID number. A unique code that identifies the attribute (e.g., 5 = Reallocated Sectors Count).
- Raw value. The device's direct measurement (for example, the number of hours or the number of errors).
- Normalized value. A vendor-defined score, scaled from 0–100 or 0–200, where higher is better.
- Threshold. The value below which the attribute is considered failed.
The ID numbers in the table below are the standardized identifiers, not the normalized values. They are used to distinguish one attribute from another. Although vendors provide additional attributes, the following are among the most common and useful:
| Attribute ID | Number of Unstable Sectors Awaiting Reallocation | Meaning |
|---|---|---|
| 5 | Reallocated Sectors Count | Number of bad sectors remapped to spare space on the drive. |
| 9 | Power-On Hours (POH) | Total number of hours the drive has been running. |
| 194 | Temperature | Current operating temperature in degrees Celsius. |
| 197 | Current Pending Sector Count | Number of unstable sectors waiting to be reallocated. |
| 199 | UDMA Cyclic Redundancy Check (CRC) Error Count | Errors detected during data transfer between the drive and the host system. |
These attributes are critical for the drive health evaluation. For example, a rising reallocated sector count usually signals a failing disk, while CRC errors indicate a cabling or controller issue rather than a physical problem with the drive itself.
What Is smartctl?
smartctl is a command-line utility included in the smartmontools package that provides access to SMART data on storage devices. It communicates directly with device firmware to read health metrics, check error logs, and run diagnostic self-tests. The tool supports a wide range of drives, including SATA, NVMe, and other devices.
smartctl is available on most Unix-like systems, including Linux, as well as macOS. Windows ports are available, but they sometimes have limited functionality.
Not all drives provide full SMART access. Hardware RAID controllers and some USB or SATA adapters block direct queries, while software RAID generally allows access to the underlying disks.
What Is smartctl Used For?
smartctl is used to monitor and assess the health and performance of storage devices. Common use cases include:
- Checking drive health. SMART attributes identify early signs of failure, such as an increase in reallocated sectors or pending sectors.
- Monitoring drive wear. Attributes such as Power-On Hours and SSD wear-leveling counts help track device aging and estimate the remaining lifespan.
- Reviewing past issues. SMART logs store historical error data, which reveals intermittent problems.
- Monitoring temperature. Drives report operating temperatures to allow users to detect overheating before it causes damage.
- Running self-tests.
smartctlinitiates short or long diagnostics on the drive, which helps identify failing components without taking the system offline.
These capabilities make smartctl a valuable tool for system administrators who need proactive monitoring. SMART data allows users to schedule replacements, reduce unexpected downtime, and maintain system reliability.
How to Install smartctl
smartctl is a Linux system tool that monitors drive health directly from the command line. It is included in the smartmontools package, which contains utilities that control and monitor storage devices.
The following steps show how to install it on Ubuntu:
1. Update the local package repository:
sudo apt update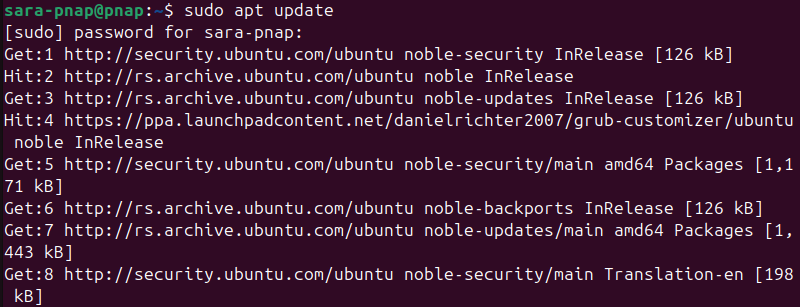
2. Install smartmontools:
sudo apt install smartmontools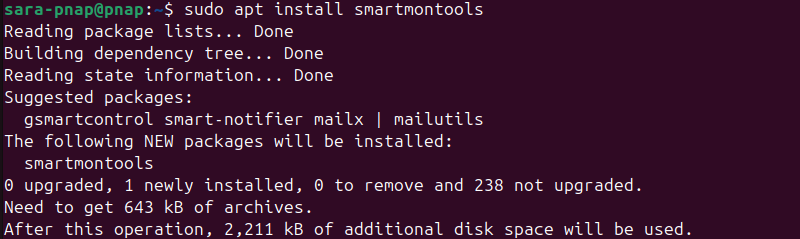
3. Verify the installation:
smartctl --version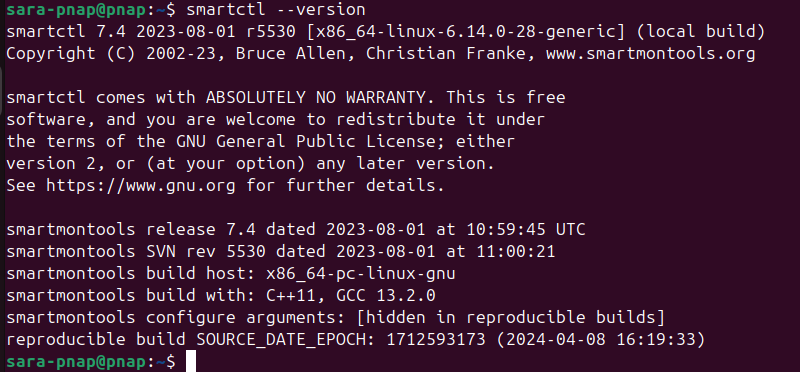
Note: The installation is the same on Debian-based distributions. On Red Hat–based systems, install it with dnf.
smartctl Syntax
The smartctl syntax is:
smartctl [options] [device]The syntax consists of:
[options]. Define what action to perform.[device]Specifies the drive to query.
Running smartctl without any options does not return any output. You must provide an option and a device name.
smartctl Options
Options define the type of information to retrieve or the action to perform on a given device.
The table below lists the most important ones:
| Option | Description |
|---|---|
-a | Displays all SMART information available for the device, including attributes, logs, and capabilities. |
-H | Shows the overall SMART health status reported by the drive. |
-i | Displays basic device information, such as model, serial number, and firmware version. |
-t short | Starts a short self-test that completes within a few minutes. |
-t long | Begins a long, more thorough self-test that takes hours depending on drive size. |
-l error | Displays the error log, which shows recent hardware or I/O errors. |
-l selftest | Shows the results of the most recent self-tests. |
-x | Displays an extended report, combining -a output with additional device statistics. |
smartctl Examples
smartctl is used to monitor and diagnose storage devices. Real-life examples demonstrate how the tool helps assess drive health, track wear, and detect errors.
The following sections show the most common smartctl use cases. The examples use /dev/sda as the target drive. On most Linux systems, this is the first storage device detected. However, depending on your setup, the actual device name may differ.
Check Overall Drive Health
Use the -H argument to assess whether a drive functions properly. This provides a pass/fail assessment based on the drive’s internal SMART thresholds.
For example, run the following:
sudo smartctl -H /dev/sda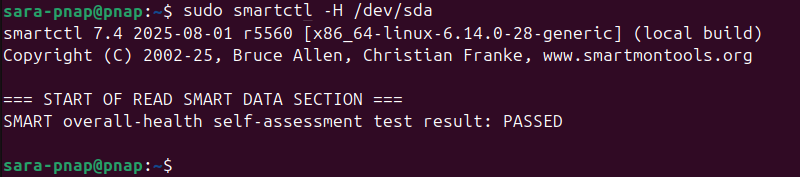
The command shows the overall SMART health of the drive. The PASSED status indicates the drive operates within safe parameters.
Note: The output varies depending on the drive manufacturer and model. Some fields may appear differently or be absent.
If the output shows FAILED, it warns that the drive is at risk of failure and should be replaced or backed up immediately.
Display All SMART Attributes
The -a option shows all SMART attributes for a drive. This provides detailed insight into drive health and potential issues.
Run the following command:
sudo smartctl -a /dev/sda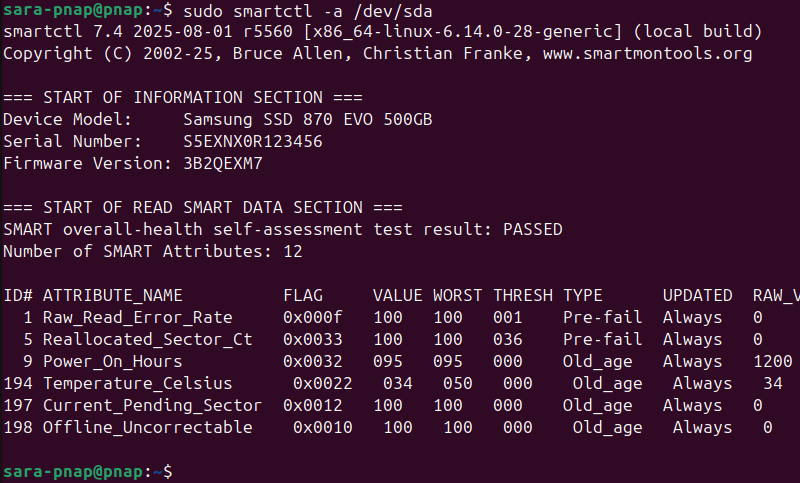
The command shows all SMART attributes for the drive, such as normalized values, thresholds, and raw counts. Each attribute helps monitor specific aspects, such as read errors, reallocated sectors, power-on hours, and temperature.
View Basic Device Information
Use the -i argument to view general information about a drive. This argument helps verify device identity and ensure the correct disk is monitored.
Execute the following command:
sudo smartctl -i /dev/sda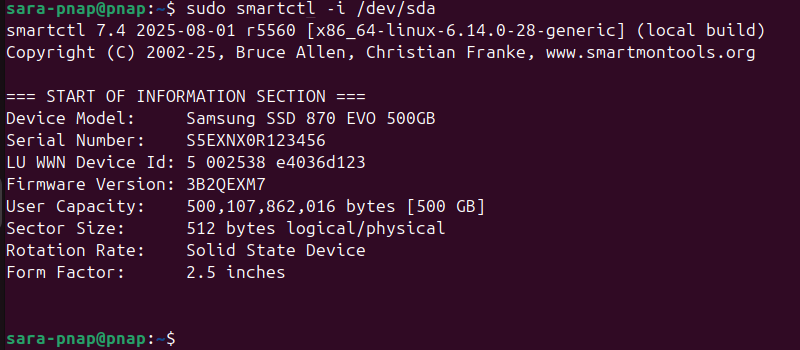
The output shows the drive’s model, serial number, firmware version, capacity, sector size, rotation rate, and form factor.
Run Short Self-Test
The -t option initiates a short self-test on the drive. This test takes a few minutes and checks the most critical SMART attributes for potential issues.
Run the following:
sudo smartctl -t short /dev/sda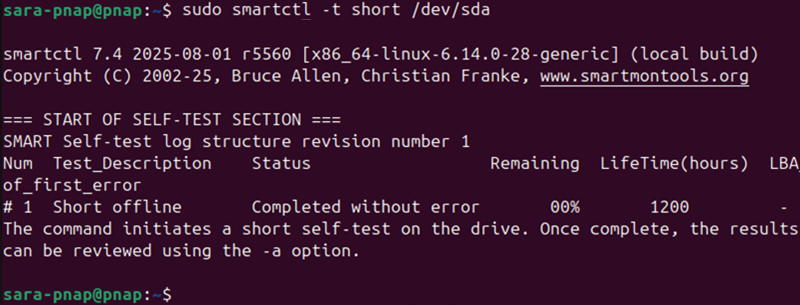
The output reports the test type, whether it completed successfully, the percentage remaining during the test, the drive’s lifetime in hours, and the Logical Block Addressing (LBA) of any first error if detected.
Run Long Self-Test
smartctl allows you to start a long (extended) self-test on the drive. This test is more thorough than the short test and takes several hours, depending on the drive’s size and speed.
Use the following command:
sudo smartctl -t long /dev/sda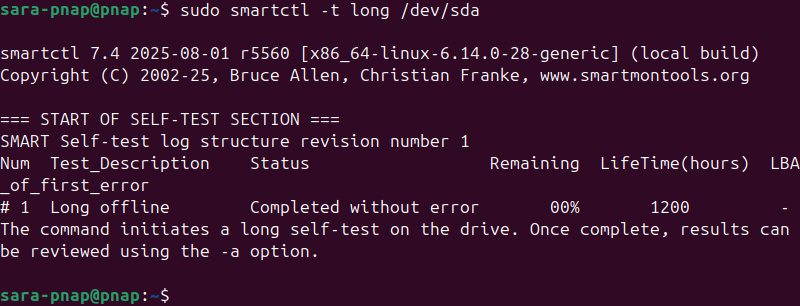
The output lists each test entry with its description, completion status, progress percentage, the drive’s lifetime in hours at the time of the test, and the LBA of the first error, if any were found.
Check Error Log
The smartctl command also displays the drive's error log. This log contains records of recent errors the drive has encountered, which helps identify recurring or critical issues.
Execute the following command:
sudo smartctl -l error /dev/sda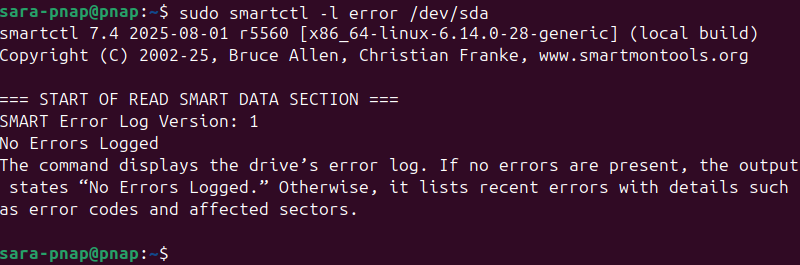
The error log provides early warnings about failing hardware or unstable sectors. The exact details depend on the drive manufacturer and model.
Review Past Self-Tests
Use this option to review the results of previous self-tests run on the drive. This helps track whether issues are recurring or if the drive has consistently passed diagnostics.
Run the following:
sudo smartctl -l selftest /dev/sda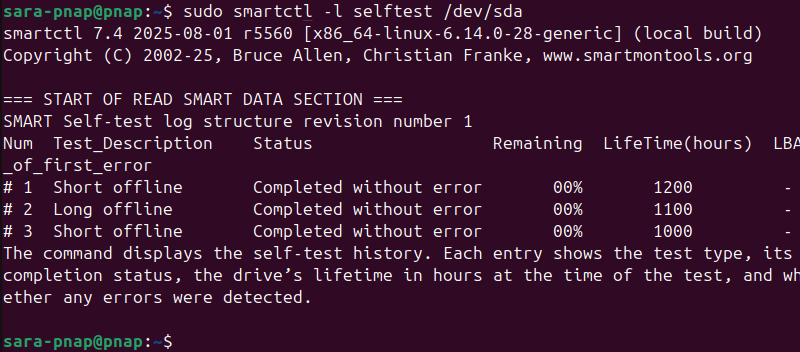
The log determines if failures are isolated events or part of a larger pattern.
Generate an Extended Report
The -x argument produces a full SMART report for the drive. The extended report includes all attributes, logs, and detailed device information in a single output.
Execute the following:
sudo smartctl -x /dev/sda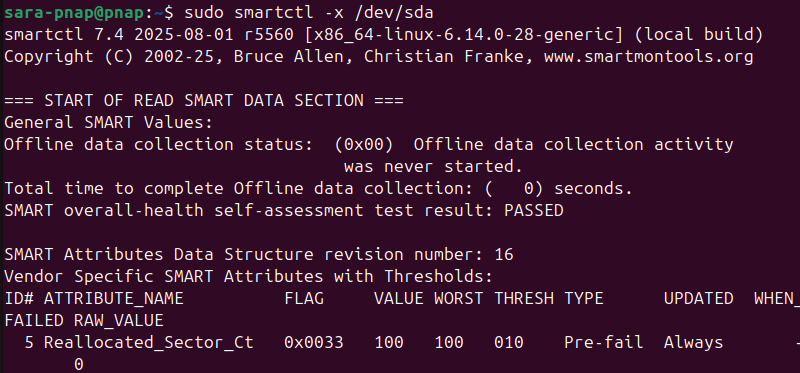
The extended report is useful for detailed troubleshooting or providing information to support teams.
smartctl Benefits
The smartctl tool provides users with direct insight into the storage device's health. The utility enables proactive maintenance and reduces the risk of unexpected failures.
Key benefits include:
- Support for automation. Can be integrated into scripts and monitoring systems for regular, unattended health checks.
- Early warning of drive issues. Reveals problems before they lead to data loss.
- Detailed monitoring. Provides information on temperature, power-on hours, error counts, and other metrics beyond standard OS reporting.
- Data-driven decisions. Helps determine when a drive should be replaced.
- Consistency across devices. Works with a wide range of HDDs, SSDs, and NVMe drives, which makes it a versatile monitoring tool.
smartctl Risks and Challenges
While smartctl is valuable, it has limitations. Understand these risks to avoid misinterpretation of results and over-reliance on SMART data.
Key challenges include:
- Potential misinterpretation. Reading raw values incorrectly leads to false assumptions about drive health.
- Sudden drive death. Even if SMART shows
PASSED, a drive can still fail unexpectedly without warning. - Incomplete visibility. Some RAID controllers or virtualized environments block access to individual drive data.
- Vendor differences. Not all attributes are standardized, and interpretation varies between manufacturers.
- Limited predictive accuracy. SMART data provides only probabilities of failure, not guarantees.
Conclusion
This article explained what SMART is and what its attributes describe. It also elaborated on the smartctl command, its uses, installation, syntax, and practical usage. Moreover, the tutorial explained the key benefits and challenges of using smartctl.
Next, learn how to measure storage performance and IOPS on different systems.