Apache Spark is an open-source framework for processing large volumes of batch and streaming data from multiple sources. It is used in distributed computing for machine learning, data analytics, and graph processing tasks.
Learn how to install Apache Spark on Windows and verify the installation works.

Prerequisites
- A system running Windows.
- A user account with administrator privileges.
- Access to Windows Command Prompt or PowerShell.
- A tool to extract .tar files, such as 7-Zip or WinRAR.
Install and Set Up Apache Spark on Windows
To set up Apache Spark, you must install Java, download the Spark package, and set up environment variables. Python is also required to use Spark's Python API called PySpark.
If you already have Java 8 (or later) and Python 3 (or later) installed, you can skip the first step of this guide.
Step 1: Install Spark Dependencies
Using the Windows winget utility is a convenient way to install the necessary dependencies for Apache Spark:
1. Open Command Prompt or PowerShell as an Administrator.
2. Enter the following command to install the Azul Zulu OpenJDK 21 (Java Development Kit) and Python 3.9:
winget install --id Azul.Zulu.21.JDK -e --source winget && winget install --id Python.Python.3.9 -e --source winget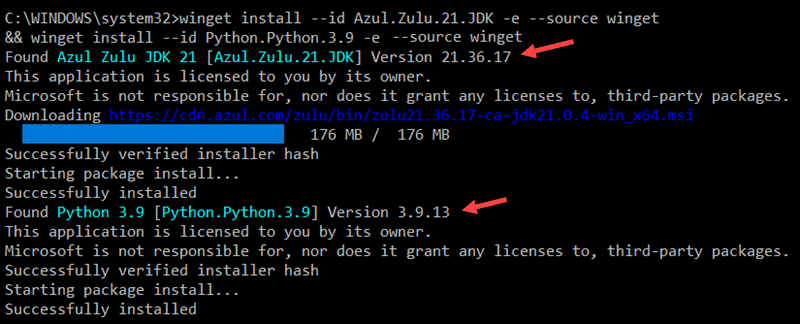
Adjust the command if you need a specific Java or Python version or a different OpenJDK vendor.
3. The OpenJDK installation is in the C:\Program Files\Zulu\zulu-21 folder by default. The space in the path can cause issues when launching Apache Spark. Avoid this by moving the installation to a folder without spaces. Use the following command to create a new Zulu folder in the root directory and move the installation:
mkdir C:\Zulu && robocopy "C:\Program Files\Zulu\zulu-21" "C:\Zulu\zulu-21" /E /MOVE4. Verify the installation by checking the Java and Python versions:
java -version && python --version
The output confirms your system is using OpenJDK 21 and Python 3.9.
Step 2: Download Apache Spark
To download the latest Apache Spark release:
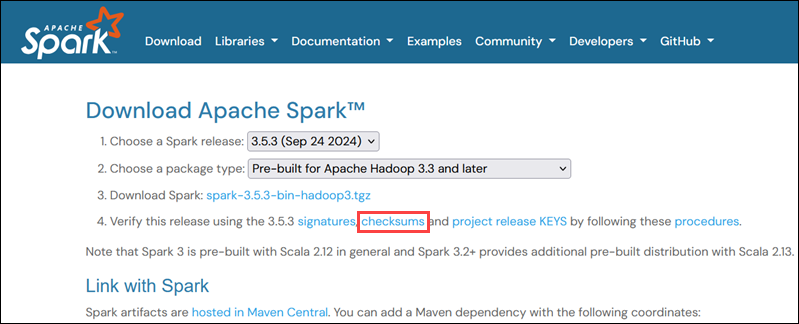
1. Open a browser and navigate to the official Apache Spark download page.
2. The latest Spark version is selected by default. At the time of writing, the latest version is Spark 3.5.3 for Hadoop 3.3.
3. Click the spark-3.5.3-bin-hadoop3.tgz download link.
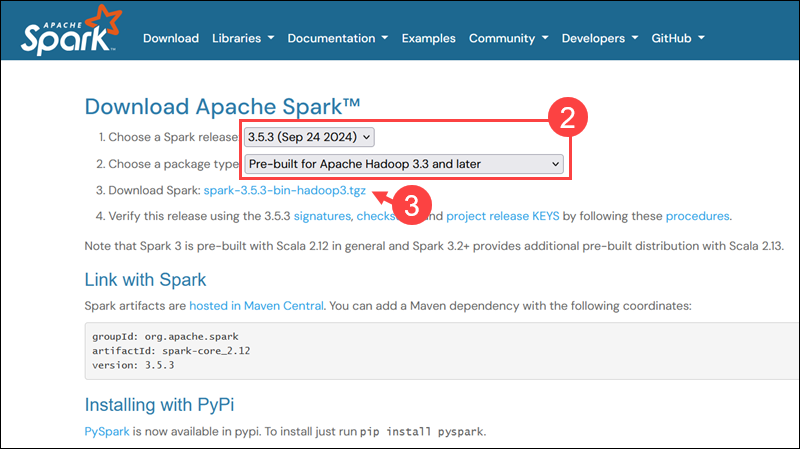
4. Select a location from a list of mirror servers to begin the download.
5. Save the file, for example, to the Downloads folder.
Step 3: Verify Spark Software File
To verify that you are working with an unaltered, uncorrupted file, check its checksum:
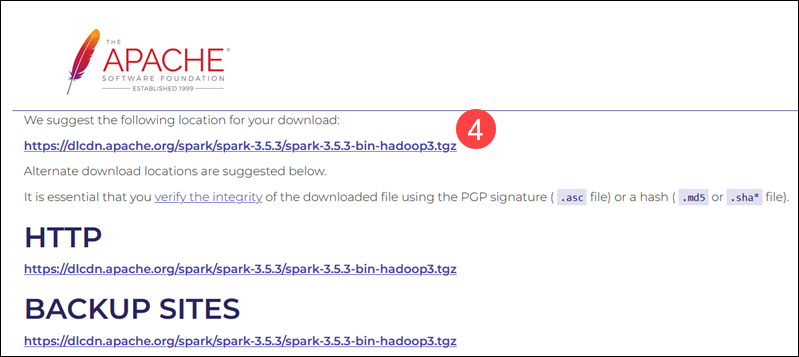
1. Navigate to the Spark Download page and open the checksums link, preferably in a new tab.
2. Open Command Prompt and use the cd command to navigate to the folder where you downloaded Apache Spark. For example, if the file is in the Downloads folder, enter:
cd C:\Users\username\DownloadsReplace username with your actual Windows username.
3. Use the following command to calculate the downloaded file's checksum:
certutil -hashfile spark-3.5.3-bin-hadoop3.tgz SHA512
The system displays a long alphanumeric code followed by the message Certutil: -hashfile completed successfully.
4. Manually compare the checksum output with the one on the Apache Spark website.
If they match, the file is legitimate.
Step 4: Install Apache Spark
To install Apache Spark, extract the downloaded file to a desired location:
1. For example, create a new Spark folder in the root of the C: drive using the following command:
cd \ && mkdir Spark2. Use 7-Zip to extract the Spark .tar file from the .tgz compressed file and place it in the Spark folder:
"C:\Program Files\7-Zip\7z.exe" x "C:\Users\username\Downloads\spark-3.5.3-bin-hadoop3.tgz" -oC:\Spark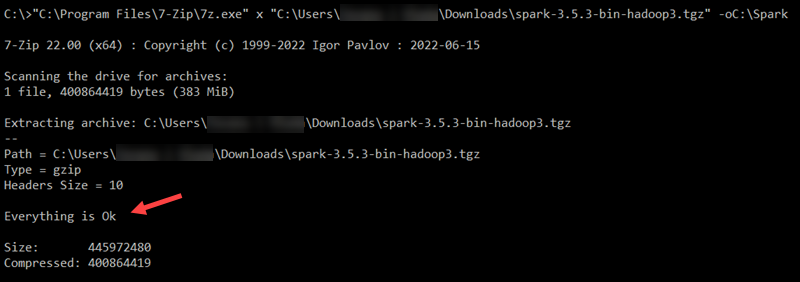
Replace username in the file path with your username.
Note: The file paths are wrapped in double quotes because the username and folder names contain spaces.
3. Extract the Spark binaries from the Spark .tar file:
"C:\Program Files\7-Zip\7z.exe" x "C:\Spark\spark-3.5.3-bin-hadoop3.tar" -oC:\Spark
4. Use the dir command to list the contents of the Spark folder:
cd C:\Spark && dir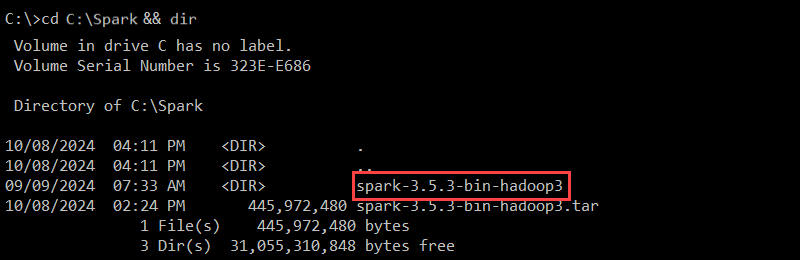
The spark-3.5.3-bin-hadoop3 folder contains the necessary files to run Spark.
Step 5: Add winutils.exe File
The winutils utility enables Apache Spark and other Hadoop-based tools to run on Windows. You need to download the winutils.exe file that matches the Hadoop version used by your Spark installation:
1. Create a hadoop\bin folder in the C: drive to store the winutils.exe file:
cd \ && mkdir C:\hadoop\bin2. Use the curl command to download the file from the winutils GitHub repository into the newly created folder:
curl --ssl-no-revoke -L -o C:\hadoop\bin\winutils.exe https://github.com/cdarlint/winutils/raw/master/hadoop-3.3.5/bin/winutils.exe
In this example, the Hadoop version is 3.3.5. If necessary, edit the command to correspond to the Hadoop version your Spark installation is using.
3. Verify that the file has been downloaded:
cd C:\hadoop\bin && dir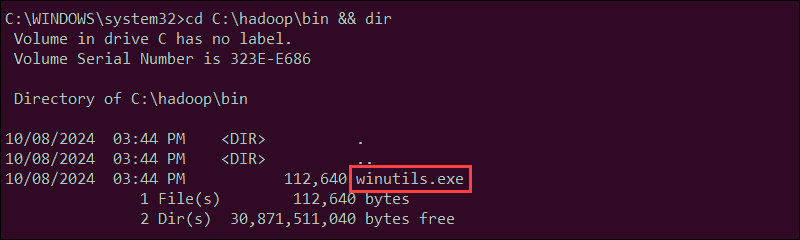
The winutils.exe file is listed in the folder.
Step 6: Configure Environment Variables
Add the Spark, Java, and Hadoop locations to your system's Path environment variable to run the Spark shell directly from the CLI.
You can manually edit environment variables using the Windows UI. However, setting User Variables from the Command Prompt can be faster and more efficient.
Use the setx command to set the SPARK_HOME User Variable:
setx SPARK_HOME "C:\Spark\spark-3.5.5-bin-hadoop3"To set HADOOP_HOME, enter:
setx HADOOP_HOME "C:\hadoop"To set JAVA_HOME, type:
setx JAVA_HOME "C:\Zulu\zulu-21"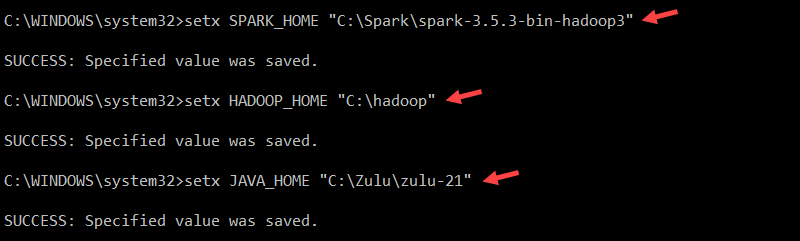
The paths in the commands are set based on the previous installation steps. If you used different versions and file paths, adjust the commands accordingly.
Enter the following command to retrieve the current Path from the registry and store it in the oldPath variable:
for /f "tokens=2*" %A in ('reg query "HKCU\Environment" /v Path') do set "oldPath=%B"Append the Spark, Hadoop, and Java paths to the Path variable without overwriting existing entries:
setx Path "%oldPath%;%SPARK_HOME%\bin;%HADOOP_HOME%\bin;%JAVA_HOME%\bin"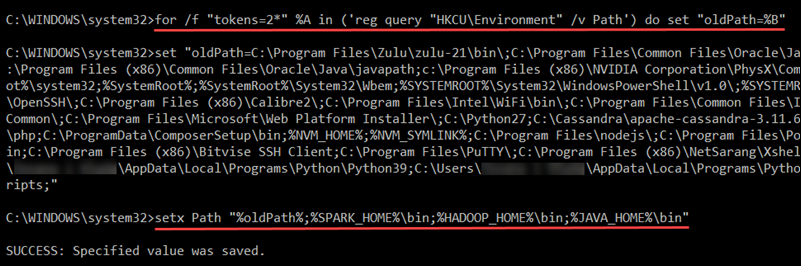
Restart Command Prompt to apply the changes. In rare instances, a full system reboot may be required.
Step 7: Launch Spark
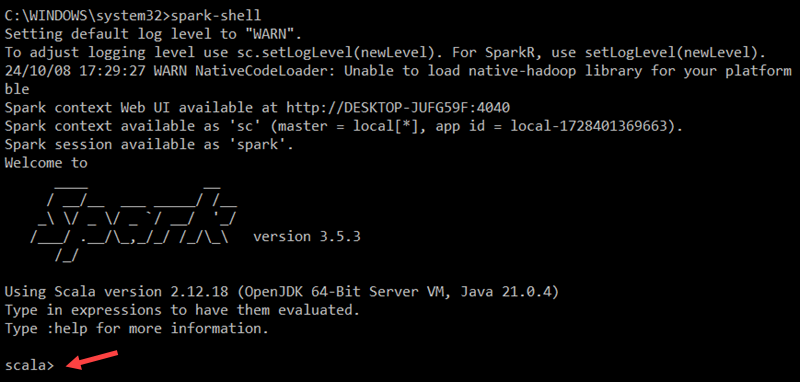
To start the Spark Scala shell, enter the following:
spark-shellThis opens an interactive shell interface with Spark notifications and information. The output includes details about the Spark version, configuration, and available resources.
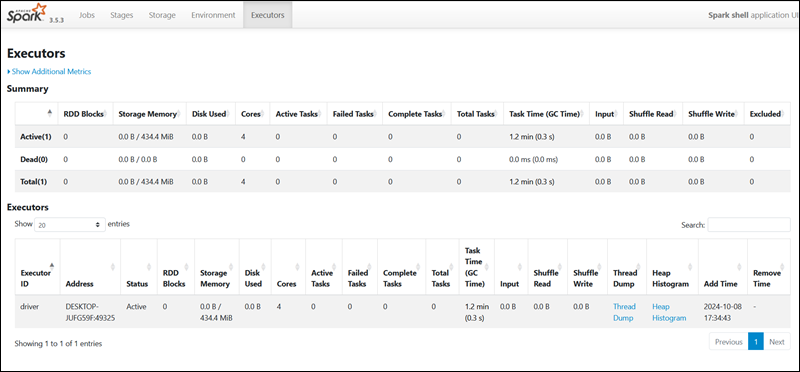
To access Spark's Web UI, open a web browser and navigate to the following URL:
http://localhost:4040/You can replace localhost with the name or IP address of your system. The Spark Web UI provides details about running jobs, stages, and resource usage.
Use the following command to exit Spark and close the Scala shell:
:quitAlternatively, press CTRL+D while using the command prompt. Enter the following command to run Spark using Python:
pysparkThis launches the Spark shell with a Python interface.
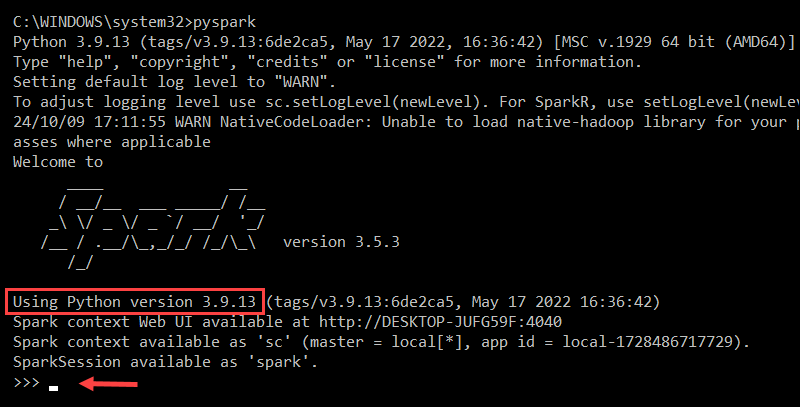
To exit pyspark, type:
quit()Test Spark
To test the Spark installation, use the Scala interface to read and manipulate a file. In this example, the file name is pnaptest.txt. Open Command Prompt and navigate to the folder with the file you want to use:
1. Launch the Spark shell:
spark-shell2. Load the file in the Spark context by defining a variable and specifying the file name (including its extension):
val x = sc.textFile("pnaptest.txt")The command loads the file into a Resilient Distributed Dataset (RDD), which allows you to perform actions and transformations on the data.
3. Enter the following command to perform an action on the RDD and view the contents of the file:
x.take(11).foreach(println)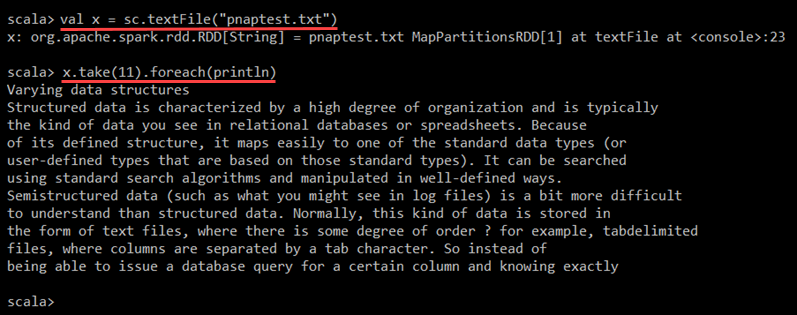
Spark displays the first 11 lines of the file. You can adjust the number of lines by changing the number in the take() method.
4. Use the map transformation to create a new RDD from the existing one. For example, reverse each line of the file using the following command:
val y = x.map(_.reverse)This creates a new RDD (y), where each original RDD (x) line is reversed.
5. Enter the following command to display the first 11 lines of the transformed RDD:
y.take(11).foreach(println)
The output prints 11 lines of the pnaptest.txt file, with each line reversed.
When ready, enter the :quit command or press CTRL+D to exit the Spark shell.
Conclusion
You now have a working Apache Spark installation on Windows. This local setup is ideal for running basic tests and getting familiar with Spark's core features.
Read about Spark DataFrames and Spark Streaming to explore more advanced functionalities.