Redis is an open-source in-memory data structure store. It is often used as a flexible, highly available key-value database. Redis enables high-performance operations while supporting data types like strings, hashes, lists, and sets. Thus, it is ideal for real-time applications such as chat systems, leaderboards, and session storage.
In this tutorial, learn how to install, configure, and secure Redis on Ubuntu.
Prerequisites
- A system running Ubuntu (this tutorial uses Ubuntu 26.04).
- Access to the terminal.
- A user account with root access.
Install and Secure Redis on Ubuntu
Redis is available in Ubuntu's default package repositories, so we will install it using the apt package manager. After the installation and setup, follow the instructions to add password authentication, bind Redis to localhost, and rename dangerous commands.
Follow the steps below to install Redis on Ubuntu.
Step 1: Install Redis
Before installation, update the package repository index to ensure you get the latest version available. Run the command:
sudo apt updateWhen the process completes, install Redis with:
sudo apt install redis-server -y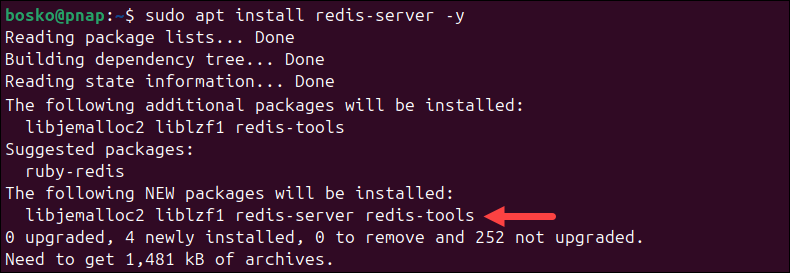
Step 2: Configure Redis
Once the installation completes, modify the Redis configuration file. The config file allows you to tailor Redis to your needs and enhance its performance, security, and behavior.
Follow the steps below:
1. Open the config file with a text editor (we use nano):
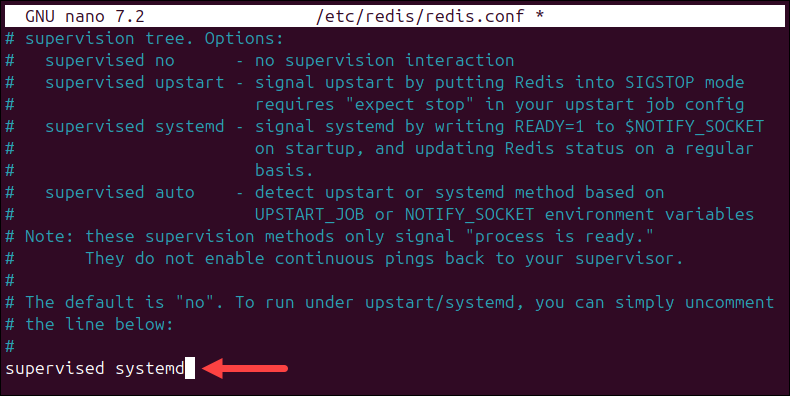
sudo nano /etc/redis/redis.conf2. Next, find the line specifying the supervised directive. By default, this line is set to no. However, to manage Redis as a service, set the supervised directive to systemd (Ubuntu's init system).
3. Save the changes and close the file.
4. Finally, restart the Redis service to apply the changes. Run the command:
sudo systemctl restart redisStep 3: Verify Redis Installation
Refer to the sections below to test if the service is running, test the connection to the server, and check if you can set a key-value pair.
Step 3.1: Check Redis Service Status
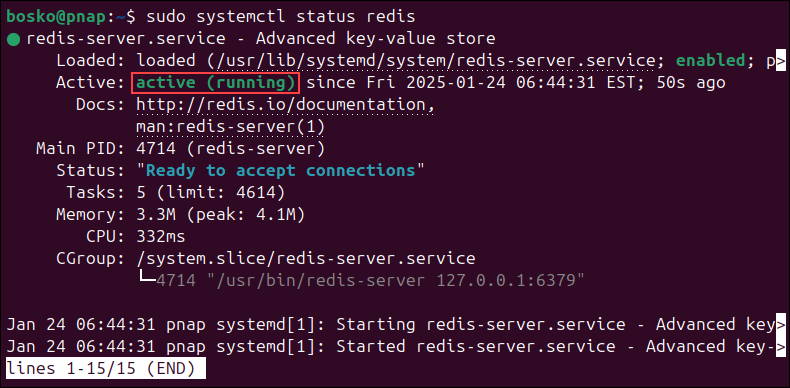
Check the Redis service status with the command:
sudo systemctl status redisThe output should display the service is active (running), as in the image below:
If the service status is inactive, start it by running the command below:
sudo systemctl start redisStep 3.2: Check Redis Connection
Next, verify the connection with the Redis server using the redis-cli tool. Connect with this command-line client by running:
redis-cliThis moves you to the redis-cli command prompt. To test the connectivity, run:
pingThe service should respond with PONG:

Step 3.3: Test Setting up Key-Value Pairs
Since Redis is an in-memory key-value NoSQL database, it is recommended to test whether it retrieves the assigned value for the specified key.
1. First, connect to the Redis CLI client:
redis-cli2. Next, set a key using the set command. To do so, run the command:
set key1 "You have successfully set up a key-value pair!"In this example, the key is labeled as key1 and has the value of "You have successfully set up a key-value pair!".
Once you hit Enter, the prompt responds with OK.

3. Now, check whether you have successfully assigned the given value to the key with the get command:
get key14. The output should respond with the message you attached as the value in the first step.

5. Exit the Redis shell with:
quitNote: Redis is incredibly flexible and supports a wide variety of data types. Read our article to learn all about Redis data types.
Step 4: Secure Redis
Redis security is a critical consideration because, by default, it is designed for trusted network environments and lacks built-in mechanisms such as authentication, encryption, and access controls. A Redis instance exposed to the internet or an untrusted network can become a significant vulnerability.
The following section shows how to secure your Redis instance after installation.
Step 4.1: Set Up Redis Authentication
Redis includes an authentication feature as an additional security layer. The feature is not enabled by default. Therefore, you need to modify the configuration file to activate the authentication.
1. Open the Redis configuration file in a text editor:
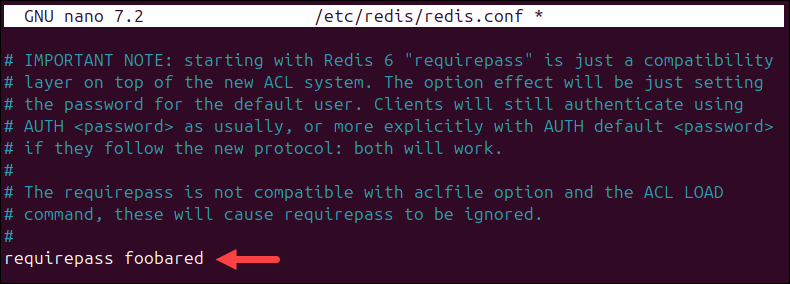
sudo nano /etc/redis/redis.conf2. Locate the requirepass directive under the SECURITY section and uncomment it (remove the #).
3. Replace foobared with a strong password.
4. Save and close the file.
5. Restart the Redis service:
sudo systemctl restart redisOnce Redis is configured to require authentication, it refuses any queries until you provide the required password. For example, if you switch to the redis-cli command prompt and run the ping test, the output displays the message: (error) NOAUTH Authentication required.
The only way to start working in Redis in such a case is to provide the password defined in the configuration file.
Use the command below to authenticate:
auth [your_password]If the output responds with OK you are good to go.

In the example above, we kept the default password, foobared.
Step 4.2: Bind Redis to Localhost
If you installed the software following the steps outlined above, Redis is only accessible from localhost. Limiting access in such a way is a matter of network security.
Follow the steps below to restrict connections to localhost:
1. Open the Redis configuration file:
sudo nano /etc/redis/redis.conf2. Scroll down and find the NETWORK section in the file. Then, uncomment the bind 127.0.0.1 ::1 line (remove the #), as in the image below:
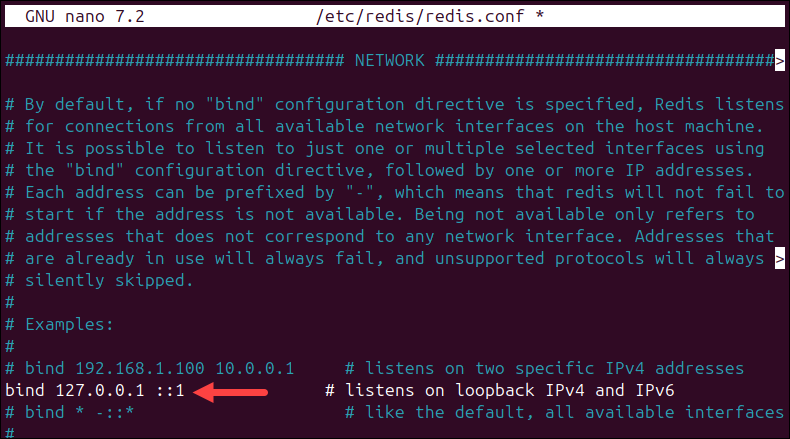
3. Save and exit the file.
4. Restart the service to apply the changes:
sudo systemctl restart redisRedis is now bound to localhost and restricts access to other connections.
Note: If you are new to Redis and want to easily clear cache or to automate cache clearing, refer to our guide on how to clear Redis cache.
Step 4.3: Rename or Kill Dangerous Commands
Another way to protect your data is to disable specific commands or rename them so they are unguessable. This is a useful security feature that can restrict regular users from using commands that could harm the system.
Follow the steps below to disable dangerous commands in Redis:
1. Open the Redis config file:
sudo nano /etc/redis/redis.conf2. Locate the SECURITY section and scroll down to the #Command renaming line. The section contains examples of how to rename or kill commands.
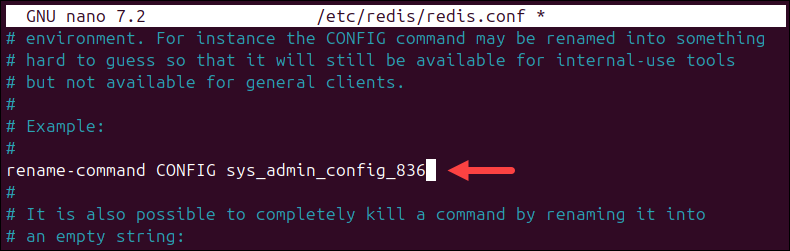
For example, to rename the CONFIG command, add the line:
rename-command CONFIG [new_command_name]In this example, the config command is renamed to sys_admin_config_836 (something a regular user would not be able to guess).
3. To remove certain commands completely, disable (kill) them. To do this, rename the dangerous command into an empty string.
Therefore, to disable the config command, add the line:
rename-command CONFIG ""After making the changes, save them and restart the Redis service with:
sudo systemctl restart redisConclusion
The steps in this tutorial should help you install and set up Redis on your Ubuntu operating system. Also, the guide provided a few tips on securing your Redis data store.
NoSQL databases, like Redis, are designed to run efficiently in distributed clusters that scale out horizontally. Use Docker to deploy Redis in a container to make horizontal scaling a routine, straightforward process.