phpMyAdmin is a web-based graphical database management tool. With it, you no longer need to use the default command-line interface to manage databases.
This guide will show you how to lay the groundwork and install phpMyAdmin on Debian 12.
Prerequisites
- Debian 12 installed.
- A user account with root privileges.
- Command-line access.
Step 1: Install LAMP Stack on Debian 12
phpMyAdmin requires the LAMP stack to work correctly. This section shows how to install the supporting software to turn a Debian 12 system into a web server with the LAMP stack.
Note: If you already have LAMP stack installed, skip directly to the Download phpMyAdmin section.
Step 1.1: Update Software Packages and Install wget
The wget utility allows downloading files directly from the terminal. Before installing wget, open the terminal and update your repository package information to ensure getting the latest available version:
sudo apt updateWhen the process completes, install wget by running:
sudo apt install wget -yWait for the installation to complete.
Step 1.2: Install Apache
Apache is a web server software that processes requests and transmits data over an HTTP. Run the following command to install Apache:
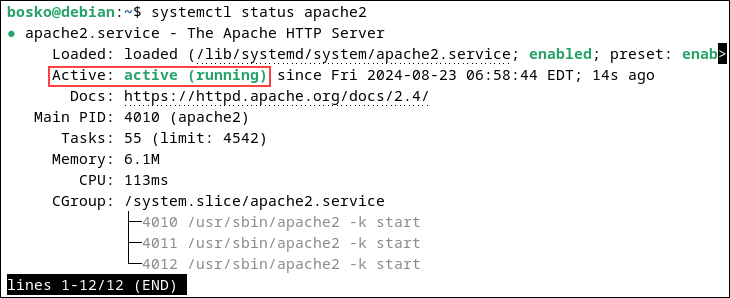
sudo apt install apache2 -yConfirm that the Apache service is running:
systemctl status apache2The report should show a green status message that says active (running):
Press Ctrl+z to return to the command prompt.
Step 1.3: Install PHP on Debian 12
The PHP programming language and development environment are essential for running a web application like phpMyAdmin. Install core PHP packages and Apache/MySQL plugins with the following command:
sudo apt -y install php php-cgi php-mysqli php-pear php-mbstring libapache2-mod-php php-common php-phpseclib php-mysqlOnce the installation process completes, verify that PHP has been installed:
php --version
The system displays the current PHP version and its release date.
Step 1.4: Install and Set Up MariaDB on Debian 12
This guide uses the MariaDB open-source relational database management system (RDBMS) instead of MySQL. MariaDB and MySQL are compatible, and many commands and features are identical.
Install MariaDB with the following command:
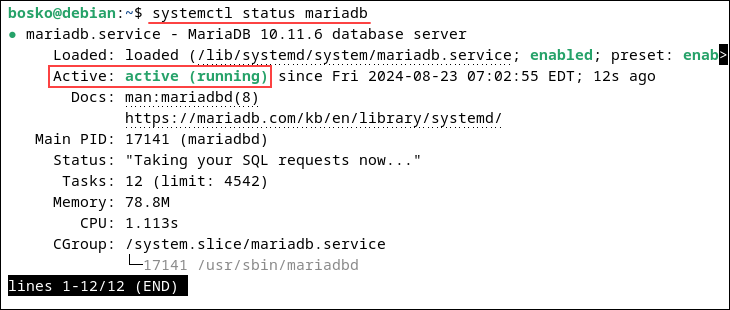
sudo apt install mariadb-server mariadb-client -yOnce the process is complete, verify the MariaDB installation:
systemctl status mariadbThe output shows an active (running) status.
Before installing phpMyAdmin, configure the MariaDB database. The sections below outline how to secure MariaDB and create a new user.
Secure MariaDB
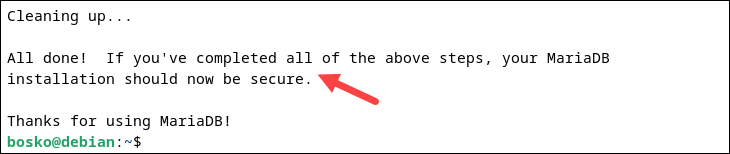
Configure basic MariaDB security features by launching a built-in script:
sudo mysql_secure_installationHit Enter to skip the initial query. Complete the following queries:
- Switch to unix_socket authentication [Y/n]. Enter n to skip.
- Set root password? [Y/n]. Type y and press Enter to create a strong root password for the database. If a root password already exists, enter n to answer the Change the root password question.
- Remove anonymous users? [Y/n]. Type y and press Enter.
- Disallow root login remotely? [Y/n]. Type y and press Enter.
- Remove test database and access to it? [Y/n]. Type y and confirm with Enter.
- Reload privilege tables now? [Y/n]. Type y and confirm with Enter.
The output shows that the MariaDB installation is now secure.
Create New MariaDB User
The phpMyAdmin utility needs a designated user to connect to the database. Creating a new MariaDB user improves security and allows the administrator to control the permissions granted to that user.
Use our detailed guide to create a new MariaDB user and grant privileges. Once you set up a MariaDB user, start the phpMyAdmin installation process.
Step 2: Download phpMyAdmin
Use the wget command to retrieve the latest stable version of phpMyAdmin:
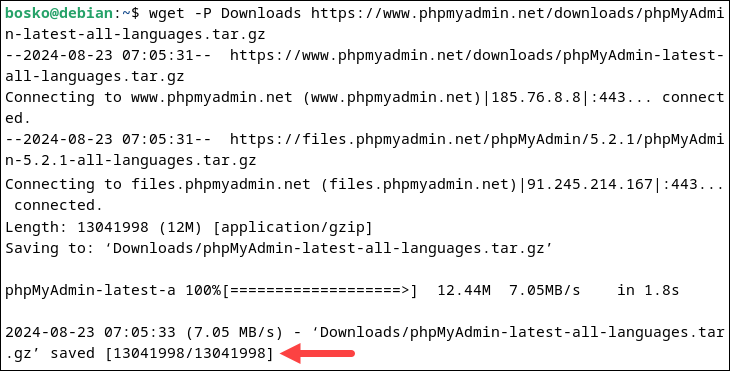
wget -P Downloads https://www.phpmyadmin.net/downloads/phpMyAdmin-latest-all-languages.tar.gzTo download the English version only, use the following command instead:
wget -P Downloads https://www.phpmyadmin.net/downloads/phpMyAdmin-latest-english.tar.gzThe -P option instructs wget to save the files directly in the Downloads directory. Use any directory to download the file and remember the path.
Note: To download a specific version, or to check the latest version, please refer to the developer's phpMyAdmin page.
Step 3: Check phpMyAdmin GPG Key
Each downloaded archive includes an ASC file containing its unique key signature. The signature can be verified once both files are in the same directory.
To verify the GPG key for phpMyAdmin:
1. Download the phpMyAdmin keyring to the previously chosen directory. The example below uses the Downloads directory:
wget -P Downloads https://files.phpmyadmin.net/phpmyadmin.keyring2. Access the directory and import the keyring:
cd Downloadsgpg --import phpmyadmin.keyring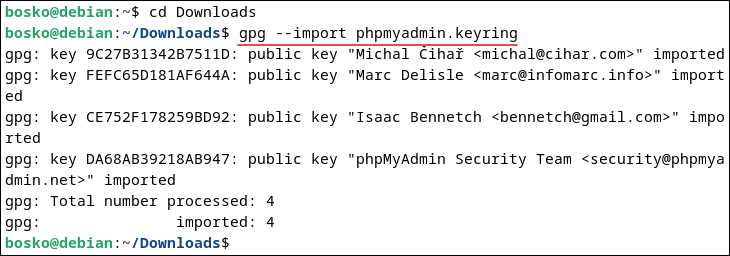
3. Download the corresponding GPG ASC file for the correct version of phpMyAdmin:
wget https://www.phpmyadmin.net/downloads/phpMyAdmin-latest-all-languages.tar.gz.asc4. Verify the ASC file against the keyring you downloaded:
gpg --verify phpMyAdmin-latest-all-languages.tar.gz.ascThe system responds by displaying GPG key information.
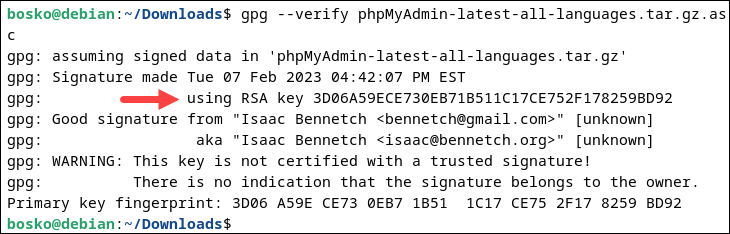
Compare the GPG key to the developer credentials on the phpMyAdmin documentation page.
Step 4: Unpack and Configure phpMyAdmin
After verifying the phpMyAdmin GPG key, unpack the phpMyAdmin archive. Follow the steps below:
1. Create a phpMyAdmin directory in the Apache web root directory:
sudo mkdir /var/www/html/phpMyAdmin2. Access the Downloads directory and unpack phpMyAdmin tar.gz to the newly created directory:
sudo tar xvf phpMyAdmin-latest-all-languages.tar.gz --strip-components=1 -C /var/www/html/phpMyAdminThe terminal shows no response when the file is unpacked.
Step 5: Secure phpMyAdmin Instance
Secure the phpMyAdmin instance to reduce the risk of unauthorized access and protect data integrity and confidentiality. Follow the steps below:
1. Create a default configuration file:
sudo cp /var/www/html/phpMyAdmin/config.sample.inc.php /var/www/html/phpMyAdmin/config.inc.php2. Use the nano text editor (or your preferred text editor) to edit the phpMyAdmin configuration file:
sudo nano /var/www/html/phpMyAdmin/config.inc.phpLocate the following line and add a complex passphrase between the single quotes:
$cfg['blowfish_secret'] = '';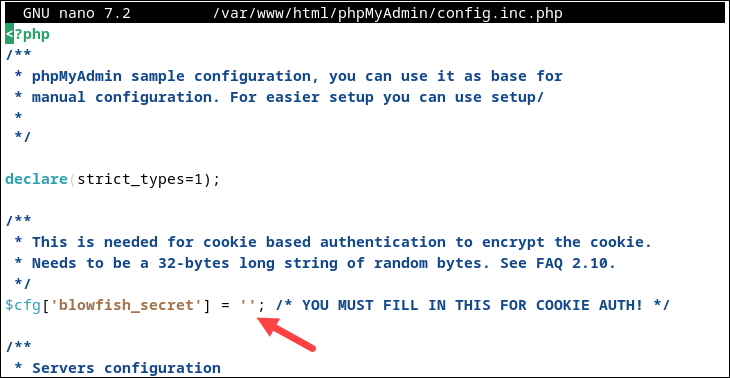
For example:
$cfg['blowfish_secret'] = 'My_Secret_Passphras3!';Save and exit the file.
3. Change the permissions for the config.inc.php file:
sudo chmod 660 /var/www/html/phpMyAdmin/config.inc.php4. Change ownership of the phpMyAdmin directory:
sudo chown -R www-data:www-data /var/www/html/phpMyAdminThe permission and ownership settings are used for sensitive configuration files to ensure that only authorized users can access or modify them.
5. Restart Apache:
sudo systemctl restart apache2Step 6: Access phpMyAdmin from Browser
Use a web browser and navigate to the localhost/your_phpMyAdmin_directory address to access phpMyAdmin. For example:
localhost/phpMyAdminThe system displays the phpMyAdmin login screen and establishes a connection to the local Apache, MariaDB, and PHP files.
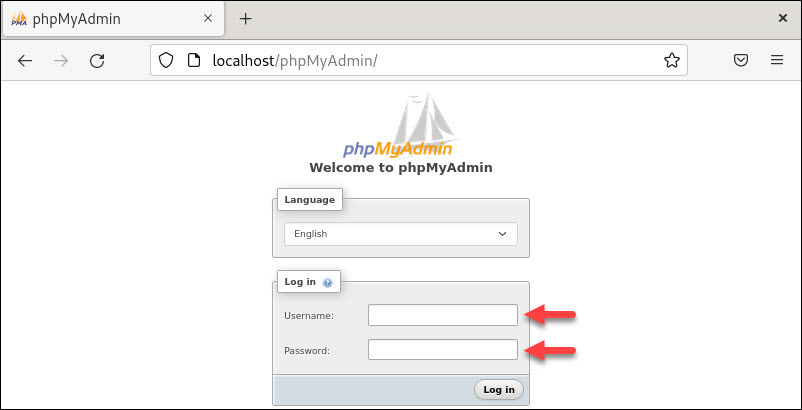
Log in to phpMyAdmin with the username and password created for the MariaDB user.
Conclusion
You have now installed phpMyAdmin on your Debian 12 system. Access the GUI from a browser and start administering your databases more efficiently.
Next, see how to install phpMyAdmin on Ubuntu or learn to back up and restore a MySQL database.