Elasticsearch is a real-time scalable search engine deployed in clusters. When combined with Kubernetes orchestration, Elasticsearch is easy to configure, manage and scale.
Deploying an Elasticsearch cluster by default creates three pods. Each pod serves all three functions: master, data, and client. However, the best practice would be to deploy multiple dedicated Elasticsearch pods for each role manually.
This article explains how to deploy Elasticsearch on Kubernetes on seven pods manually and using a prebuilt Helm chart.
Prerequisites
- A Kubernetes cluster (we used Minikube).
- The Helm package manager.
- The kubectl command line tool.
- Access to the command line or terminal.
How To Deploy Elasticsearch on Kubernetes Manually
The best practice is to use seven pods in the Elasticsearch cluster:
- Three master pods for managing the cluster.
- Two data pods for storing data and processing queries.
- Two client (or coordinating) pods for directing traffic.
Deploying Elasticsearch on Kubernetes manually with seven dedicated pods is a simple process that requires setting Helm values by role.
Note: Quickly spin up as many Bare Metal Cloud server instances as you need, and when you need them. With BMC, create a Kubernetes cluster that is easy to configure, scale, and manage. There are multiple billing methods to choose from to fit any budget.
Step 1: Set up Kubernetes
1. The cluster requires significant resources. Set the Minikube CPUs to a minimum of 4 and memory to 8192MB:
minikube config set cpus 4
minikube config set memory 8192
2. Open the terminal and start minikube with the following parameters:
minikube start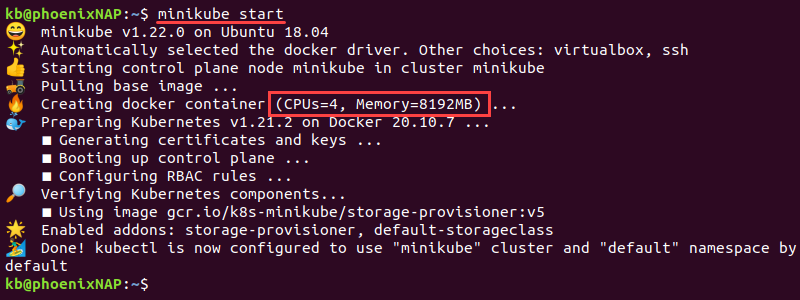
The instance starts with the configurated memory and CPUs.
3. Minikube requires a values.yaml file to run Elasticsearch. Download the file with:
curl -O https://raw.githubusercontent.com/elastic/helm-charts/master/elasticsearch/examples/minikube/values.yaml
The file contains information used in the next step for all three pod configurations.
Step 2: Set Up the Values by Pod Role
1. Copy the contents of the values.yaml file using the cp command into three different pod configuration files:
cp values.yaml master.yaml
cp values.yaml data.yaml
cp values.yaml client.yaml
2. Check for the four YAML files using the ls command:
ls -l *.yaml3. Open the master.yaml file with a text editor and add the following configuration at the beginning:
# master.yaml
---
clusterName: "elasticsearch"
nodeGroup: "master"
roles:
  master: "true"
  ingest: "false"
  data: "false"
replicas: 3
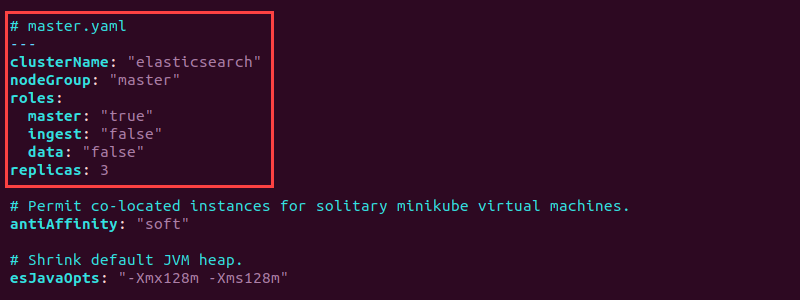
The configuration sets the node group to master in the elasticsearch cluster and sets the master role to "true". Additionally, the master.yaml creates three master node replicas.
The full master.yaml looks like the following:
# master.yaml
---
clusterName: "elasticsearch"
nodeGroup: "master"
roles:
  master: "true"
  ingest: "false"
  data: "false"
replicas: 3
# Permit co-located instances for solitary minikube virtual machines.
antiAffinity: "soft
# Shrink default JVM heap.
esJavaOpts: "-Xmx128m -Xms128m"
# Allocate smaller chunks of memory per pod.
resources:
  requests:
    cpu: "100m"
    memory: "512M"
  limits:
    cpu: "1000m"
    memory: "512M"
# Request smaller persistent volumes.
volumeClaimTemplate:
  accessModes: [ "ReadWriteOnce" ]
  storageClassName: "standard"
  resources:
    requests:
      storage: 100M
4. Save the file and close.
5. Open the data.yaml file and add the following information at the top to configure the data pods:
# data.yaml
---
clusterName: "elasticsearch"
nodeGroup: "data"
roles:
  master: "false"
  ingest: "true"
  data: "true"
replicas: 2
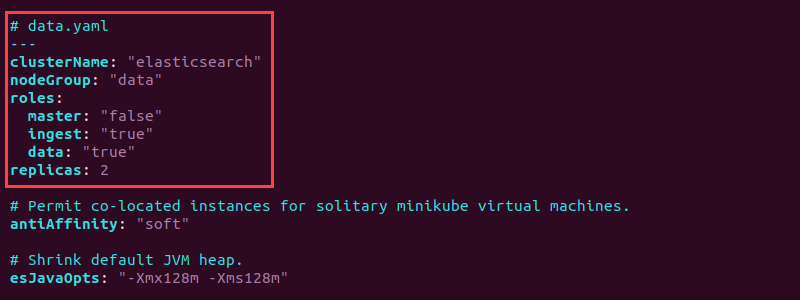
The setup creates two data pod replicas. Set both the data and ingest roles to "true". Save the file and close.
6. Open the client.yaml file and add the following configuration information at the top:
# client.yaml
---
clusterName: "elasticsearch"
nodeGroup: "client"
roles:
  master: "false"
  ingest: "false"
  data: "false"
replicas: 2
service:
  type: "LoadBalancer"
7. Save the file and close.
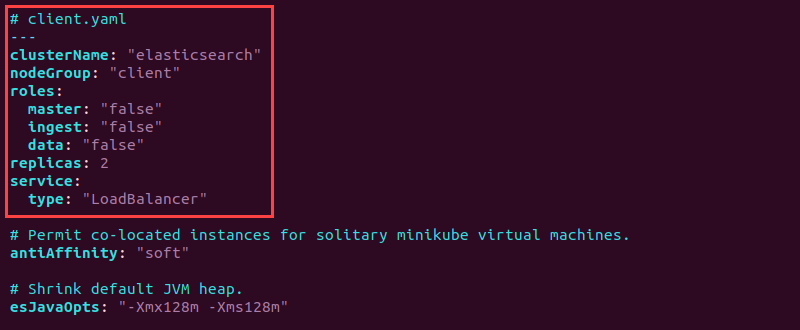
The client has all roles set to "false" since the client handles service requests. The service type is designated as "LoadBalancer" to balance service requests evenly across all nodes.
Step 3: Deploy Elasticsearch Pods by Role
helm repo add elastic https://helm.elastic.co
2. Use the helm install command three times, once for each custom YAML file created in the previous step:
helm install elasticsearch-multi-master elastic/elasticsearch -f ./master.yaml
helm install elasticsearch-multi-data elastic/elasticsearch -f ./data.yaml
helm install elasticsearch-multi-client elastic/elasticsearch -f ./client.yaml

The output prints the deployment details.
3. Wait for cluster members to deploy. Use the following command to inspect the progress and confirm completion:
kubectl get pods
The output shows the READY column with values 1/1 once the deployment completes for all seven pods.
Step 4: Test Connection
1. To access Elasticsearch locally, forward port 9200 using the kubectl port-forward command:
kubectl port-forward service/elasticsearch-master
The command forwards the connection and keeps it open. Leave the terminal window running and proceed to the next step.
2. In another terminal tab, test the connection with:
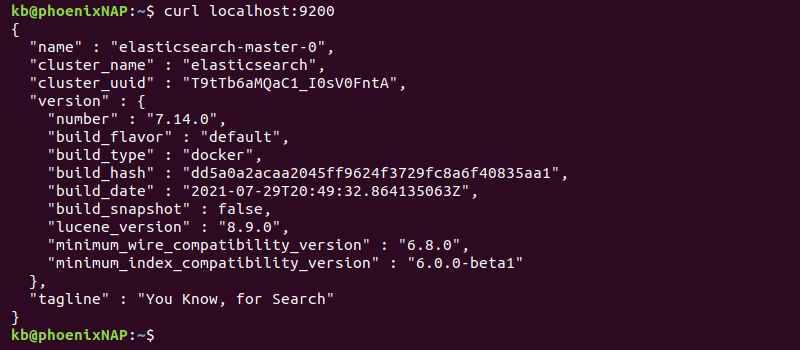
curl localhost:9200The output prints the deployment information.
Alternatively, access localhost:9200 from the browser.
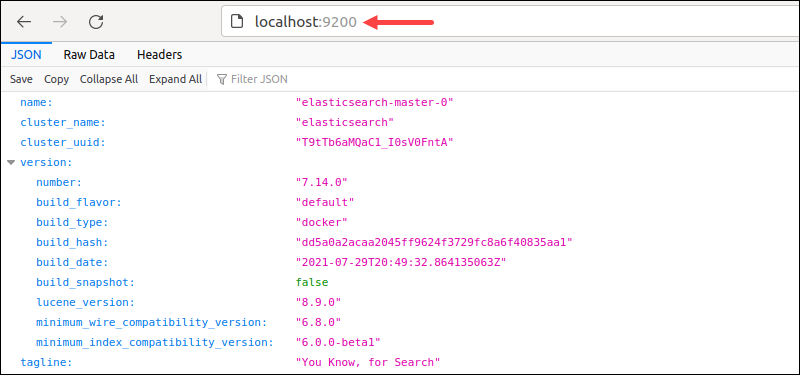
The output shows the cluster details in JSON format, indicating the deployment is successful.
How to Deploy Elasticsearch with Seven Pods Using a Prebuilt Helm Chart
A prebuilt Helm chart for deploying Elasticsearch on seven dedicated pods is available in the Bitnami repository. Installing the chart this way avoids creating configuration files manually.
Step 1: Set up Kubernetes
1. Allocate at least 4 CPUs and 8192MB of memory:
minikube config set cpus 4
minikube config set memory 8192
2. Start Minikube:
minikube startThe Minikube instance starts with the specified configuration.
Step 2: Add the Bitnami Repository and Deploy the Elasticsearch Chart
1. Add the Bitnami Helm repository with:
helm repo add bitnami https://charts.bitnami.com/bitnami
2. Install the chart by running:
helm install elasticsearch --set master.replicas=3,coordinating.service.type=LoadBalancer bitnami/elasticsearch
The command has the following options:
- Elasticsearch installs under the release name
elasticsearch. master.replicas=3adds three Master replicas to the cluster. We recommend sticking with three master nodes.coordinating.service.type=LoadBalancersets the client nodes to balance the service requests evenly across all nodes.
3. Monitor the deployment with:
kubectl get pods
The seven pods show 1/1 in the READY column when Elasticsearch deploys fully.
Step 3: Test the Connection
1. Forward the connection to port 9200:
kubectl port-forward svc/elasticsearch-master 9200Leave the connection open and proceed to the next step.
2. In another terminal tab, check the connection with:
curl localhost:9200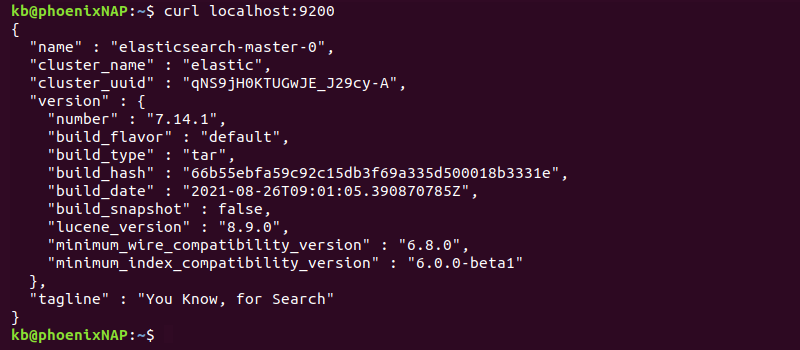
Alternatively, access the same address from the browser to view the deployment information in JSON format.
Conclusion
After following this tutorial, you should have Elasticsearch deployed on seven dedicated pods. The roles for the pods are either set manually or automatically using a prebuilt Helm chart.
Go through our ELK stack tutorial to continue setting up the complete Elastic stack.

