Arch Linux is one of the most popular Linux distributions due to its versatility and low system requirements. It features a rolling release model, ensuring that users always have access to the latest Linux kernel and software updates.
This article is a step-by-step guide on how to install and configure Arch Linux on your computer.
Prerequisites
- At least 1GB of RAM and 20GB of free hard drive space.
- Internet connection.
- A USB drive or DVD with at least 2GB of free space for the ISO image.
Important: The installation requires formatting your hard drive. Doing this removes all saved data. Make sure to back up relevant data before starting the installation process.
How to Install Arch Linux from Scratch
Installing Arch Linux from scratch gives you complete control over what is installed, allowing you to tailor the system to your needs. The installation process also helps you understand how Linux works, from partitioning your disk to configuring the bootloader (GRUB).
You will end up with a minimal installation that ensures no unnecessary software is running, which boosts system performance. Follow the steps outlined below to install Arch Linux.
Step 1: Download the Arch Linux ISO
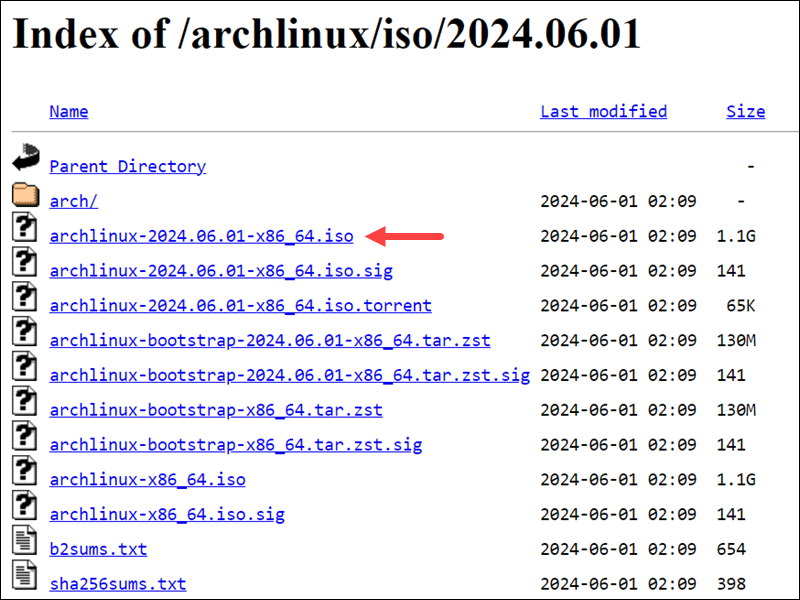
Download the ISO from the Arch Linux download page. There are two ways to do so:
- Via BitTorrent
- As a direct download
To download the ISO via torrent, choose between adding a magnet link to your BitTorrent app or downloading the torrent file. Alternatively, scroll down the page until you find a mirror closest to your current location and download the ISO file:
Step 2: Create a Live USB or DVD
Once you have the Arch Linux ISO file, create a live USB or burn it to a DVD.
Create an Arch Linux Live USB
The simplest way to create the Arch Linux live USB is to use an app like Etcher GUI. The app is available for Linux and Windows systems.
If you are using Linux, you can also create a live USB using the dd command. The syntax is:
dd bs=4M if=/[path_to_archlinux.iso] of=/dev/[path_to_usb_device] status=progress && syncReplace [path_to_archlinux.iso] with the actual path to your Arch Linux ISO file and [path_to_usb_device] with the correct path to your USB device. For example:
dd bs=4M if=/home/user/downloads/archlinux.iso of=/dev/sdX status=progress && sync
Warning: Be very careful when specifying the path to a USB device. Using the wrong device path can result in data loss as dd will overwrite the specified device without any warning. If you are not sure of the USB device path, check it by running:
lsblk | grep mediaBurn the Arch Linux ISO to a DVD
You can also install Arch Linux from a DVD. Use a tool like Brasero or AnyBurn to burn the ISO you downloaded onto a blank DVD.
Step 3: Boot up Arch Linux
Start the installation process by booting Arch Linux from the installation media. Follow the steps below:
1. Insert the installation media into your machine and restart.
2. Depending on your system, press F2, F10, or F12 to enter the boot menu and select the device from which the system will boot.
3. With the boot menu open, select the preferred installation media (live USB or DVD). The following screen shows up after Arch Linux boots:

Select Arch Linux install medium (x86_64) and press Enter to start the setup process.
Step 4: Set the Keyboard Layout
The default keymap is set to US. To list other available layouts, run:
ls /usr/share/kbd/keymaps/**/*.map.gzTo change the layout, use the appropriate layout file name with the loadkeys command. For example, run the following command to select a German keyboard layout:
loadkeys de-latin1Step 5: Check Your Internet Connection
Check your Internet connection using the ping command:
ping -c 3 google.comTo install Arch Linux over a wireless network, consult the Arch Linux wiki's wireless network configuration section.
Step 6: Enable Network Time Protocols (NTP)
Next, enable Network Time Protocols (NTP) and allow the system to update the time via the Internet:
timedatectl set-ntp trueTo check the NTP service status, use:
timedatectl status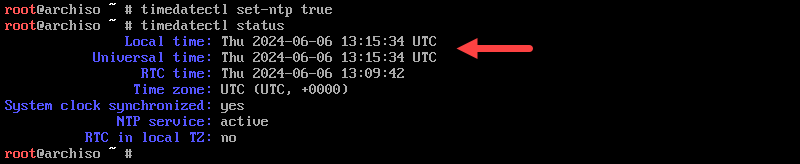
Step 7: Partition the Disks
For this tutorial, we will create an EFI and root partition. Other partition schemas are available, depending on the firmware (BIOS or UEFI) and user preferences. Follow the steps below:
1. Use fdisk to list all available disk drives:
fdisk -l2. Find the name of the disk you want to partition. The name is displayed in the /dev/sdX format, where X is the drive letter.
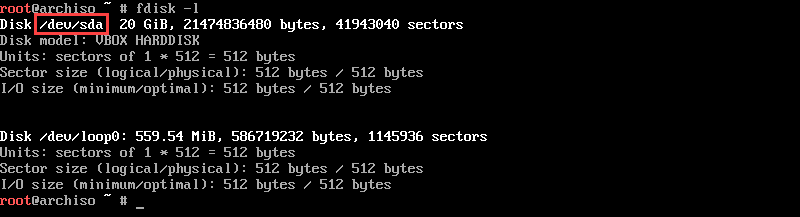
Note: When reviewing the list of available disk drives, ignore the ones ending in rom (read-only devices), loop (loopback devices), or airoot (root filesystem used by the Arch Linux live environment).
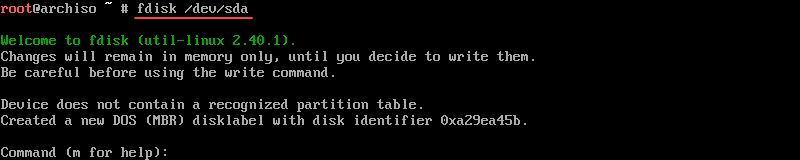
3. Partition the drive by adding the drive name to fdisk. The syntax is:
fdisk /dev/sdXReplace X with the drive letter of the disk you want to partition. For example:
4. Create an EFI partition at the beginning of the disk. Type n and press Enter to create a new partition. The system prompts you for the disk number, the block size, and the partition size. For the first two, keep the default values and press Enter.
For the partition size, type 512M, then press Enter to confirm. You can allocate more space, but 512 MB should be enough.

5. Change the EFI partition type from Linux filesystem to EFI system. Type t and press Enter. When prompted, type ef and press Enter to format the partition as an EFI partition.

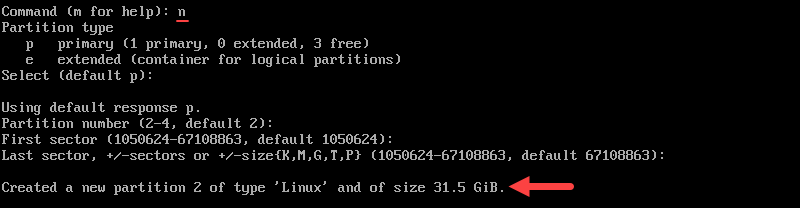
6. The next step is to create the root partition from the remaining free space. Type n and press Enter to create a new partition. Keep pressing Enter to accept all the default values until the system creates a new partition from the remaining free space.
7. Finally, when you finish partitioning the disk, type w and press Enter to write the changes to the disk.

To quit fdisk, type q and press Enter.
Step 8: Create Filesystem
The next step is to format the new partitions to install Arch Linux. To do this, create a file system for each partition. Follow the steps below:
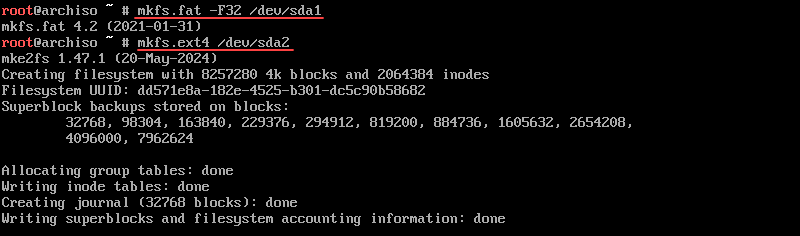
1. Use the mkfs command to create a FAT32 filesystem for the EFI partition:
mkfs.fat -F32 /dev/sdX1Replace X with the drive letter of the disk to which the partition belongs.
2. Next, create an ext4 file system for the bootable partition:
mkfs.ext4 /dev/sdX2Again, replace X with the drive letter of the disk to which the partition belongs.
For example:
Step 9: Check the Mirror List for an Appropriate Mirror
The Arch Linux installation downloads the necessary files through a mirror. Downloading files from a mirror far from your location slows the process, eventually causing the installation to fail.
To speed up the download, set up the mirror list so that the fastest mirrors are at the top.
1. Start by syncing the pacman repository:
pacman -Syy
2. Install reflector to be able to update the mirrors and sort them by download speed. Add reflector by running:
pacman -S reflector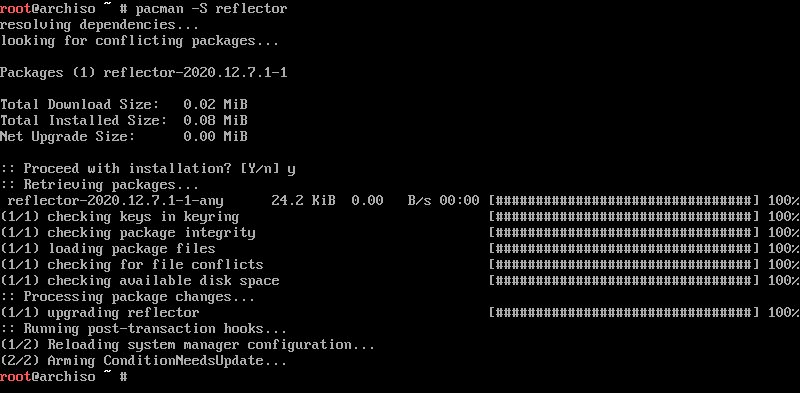
3. If necessary, back up the mirror list with:
cp /etc/pacman.d/mirrorlist /etc/pacman.d/mirrorlist.bak4. Use the reflector to update the mirror list:
reflector -c "XX" -f 12 -l 10 -n 12 --save /etc/pacman.d/mirrorlistReplace "XX" with the code of your country (for example, enter "US" if you are located in the United States).
Note: The mirror list is located in /etc/pacman.d/mirrorlist.
Step 10: Install Arch Linux
Follow the steps below to install Arch Linux:
1. Mount the root partition with the following syntax:
mount /dev/sdX2 /mntReplace X with your drive letter.
2. Next, use the pacstrap script to install the necessary packages to the bootable partition:
pacstrap /mnt base linux linux-firmware nanoDepending on your download speed, the installation process might take some time.
Step 11: Configure Arch Linux
Once the Arch Linux installation is complete, you must configure some settings.
Generate the fstab File
The fstab file defines the order in which disk partitions, block devices, remote devices, and other data sources are mounted.
Create a fstab file by running:
genfstab -U /mnt >> /mnt/etc/fstabUse Arch-Chroot and Enter the Mounted Disk as Root
Change the root to the newly installed Arch Linux system with the arch-chroot command:
arch-chroot /mnt
Set the Time Zone
Setting the correct time zone ensures the system clock reflects the accurate local time. Follow the steps below:
1. List all the available time zones:
ls /usr/share/zoneinfoYou can also list the subdirectories using the following syntax:
ls /usr/share/zoneinfo/[continent]2. Find your time zone and make a note of the name.
3. Use the ln command to create a symbolic link from your desired timezone to /etc/localtime. Replace [Zone/SubZone] with your actual timezone:
ln -sf /usr/share/zoneinfo/[Zone/SubZone] /etc/localtimeFor example, to set the timezone to America/New_York, run:
ln -sf /usr/share/zoneinfo/America/New_York /etc/localtimeSet the Locale
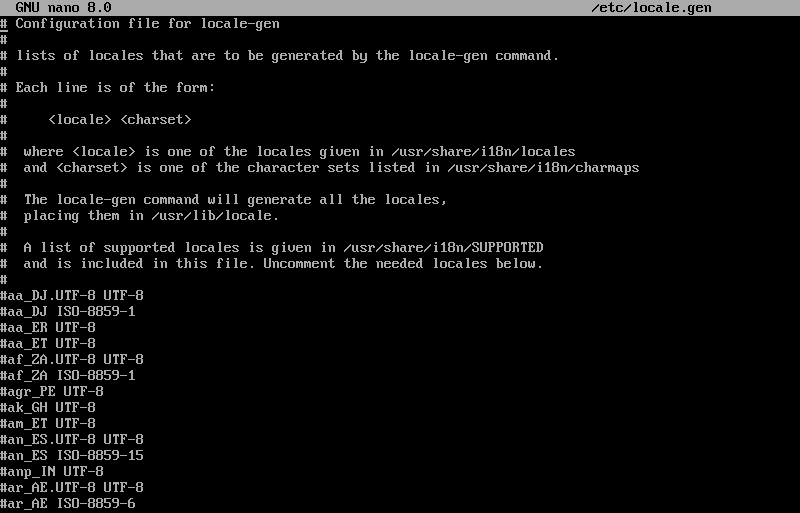
Set up the locale to determine the language, date, numbering, and currency format for your system. The locale.gen file contains a list of all available locales.
1. Open the file with nano and find the name of your preferred locale:
nano /etc/locale.gen2. Uncomment the name (remove the #) of your preferred locale and any other you would like to use.
3. Press Ctrl + X to exit and type Y to save the changes.
4. Generate a locale configuration file by running the following commands:
locale-genecho [locale_name] > /etc/locale.confexport [locale_name]Replace [locale_name] is the name of your preferred locale. For example:

Note: You can also change the time zone and locale later while using your Arch Linux system.
Set the Hostname File
The hostname is a unique identifier for a machine within a network. It is especially important in environments with multiple devices, as it helps differentiate between various systems.
1. Create a hostname file and add your hostname with the following syntax:
echo [your_hostname] > /etc/hostname2. Create a hosts file via touch command:
touch /etc/hosts3. Edit the hosts file and add the following content:
127.0.0.1	localhost
::1		localhost
127.0.1.1	[your_hostname]
4. To enable the Dynamic Host Configuration Protocol (DHCP), type:
systemctl enable dhcpcdSet the Root Password
Set up a new root password with the passwd command:
passwdRunning this command prompts you to type your new password, then retype it.
Tip: Simplify and speed up password creation with our strong password ideas or our free password generator.
Step 12: Install Grub Bootloader
Next, install the GRUB bootloader. There are two ways to install GRUB, depending on whether you are using a non-UEFI or UEFI system.
Install GRUB Bootloader on a Non-UEFI System
A non-UEFI system uses the traditional Basic Input/Output System (BIOS) firmware interface for booting and system initialization, rather than the newer Unified Extensible Firmware Interface (UEFI) standard.
1. Add the GRUB bootloader packages with the pacman package manager:
pacman -S grub os-prober2. Install the GRUB bootloader:
grub-install /dev/sdXReplace X with the letter of the drive you want to install GRUB on. For example:

3. Create a GRUB configuration file with:
grub-mkconfig -o /boot/grub/grub.cfg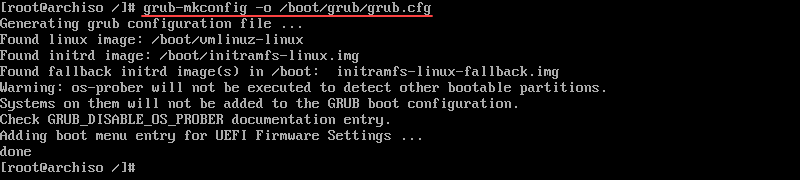
Install GRUB Bootloader on a UEFI System
A UEFI system is a modern firmware standard that replaces the traditional BIOS. It provides enhanced boot, security, and system management capabilities.
1. Add the GRUB bootloader packages with the pacman manager:
pacman -S grub efibootmgr2. Create a directory for the EFI partition:
mkdir /boot/efi3. Mount the EFI partition to the directory you created:
mount /dev/sdX1 /boot/efiReplace X with the drive letter of the disk the partition belongs to.
4. Install GRUB with:
grub-install --target=x86_64-efi --bootloader-id=GRUB --efi-directory=/boot/efi
5. Finally, create a GRUB configuration file:
grub-mkconfig -o /boot/grub/grub.cfg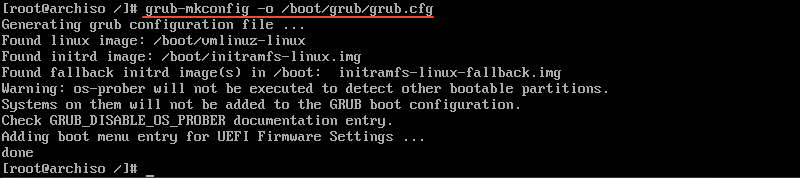
Step 13: Create a New User and Set up Privileges
This step is optional but recommended. A system with only the root user requires no authentication for changes, making it vulnerable and prone to failure.
Follow the steps below to create a new user:
1. Install sudo before adding a new user:
pacman -S sudo2. Create a new user with this syntax:
useradd -m [username]Replace [username] with the user name you want to create.
3. Create a password:
passwd [username]4. Add the user to a group of users that grants specific permissions:
usermod -aG wheel,audio,video,storage [username]5. Lastly, edit the visudo file, specifically the line referring to the wheel group and uncomment it:
EDITOR=nano visudo
6. Save the changes and exit the file.
Step 14: Exit Arch-Chroot Environment and Reboot
Finally, reboot the machine to load the new Arch Linux installation.
1. Exit the arch-chroot environment:
exit2. Unmount the root partition with:
umount -l /mnt3. Then, remove the USB or DVD and reboot the system with:
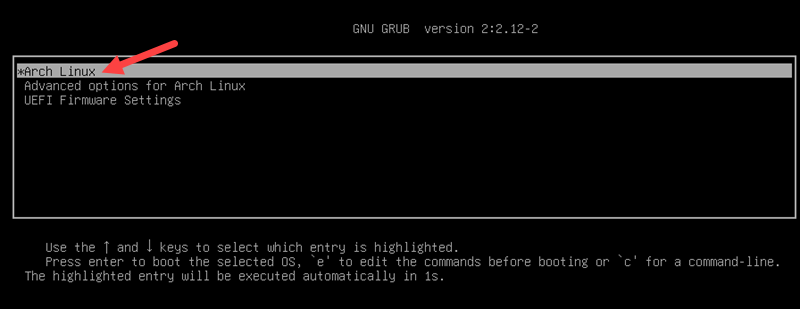
sudo rebootStep 15: Log in to Arch Linux
Once the system reboots, GRUB loads and lets you boot Arch Linux. Press Enter to load the system. Use the password you set up to log in.
Conclusion
After following this guide, you have installed and configured Arch Linux on your computer. Arch Linux is a highly customizable, minimalist, and up-to-date system that allows users full control over their operating environment and software. It is ideal for advanced users who want a tailored computing experience.
Next, if you need an Arch Linux desktop environment, refer to our guide on how to install GNOME in Arch Linux.