Arch Linux is a popular Linux distribution known for its versatility and minimalism. It requires users to set up the system manually via the command line, which can be challenging for beginners.
GNOME is a desktop environment that provides a stable GUI solution for Arch Linux, improving its usability.
Learn how to install GNOME in Arch Linux and make your system more user-friendly.
Prerequisites
- Arch Linux installed and configured.
- An account with sudo privileges.
- Access to the command line.
Arch Linux GNOME Installation Guide
Complete the steps in the sections below to install GNOME in Arch Linux.
Step 1: Update Arch Linux
Update Arch Linux to ensure the system has the latest dependencies and to prevent conflicts between software versions:
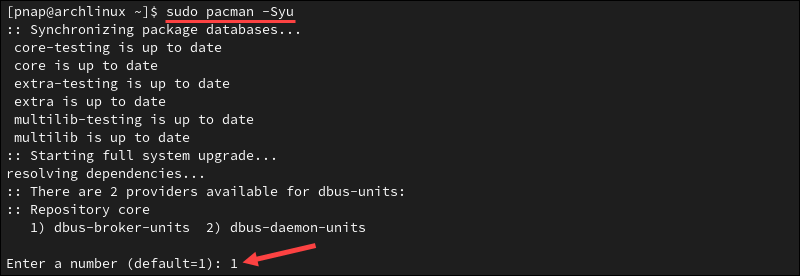
1. Access the Arch Linux console and update your system using the following command:
sudo pacman -Syu2. If a package has multiple providers, pacman prompts you to select one. It is recommended that you select the default choice. It is safe for general use and helps maintain system stability.
3. Pacman displays a list of packages to be updated and the total download size for the updates. Press y and then Enter to complete the update.

4. Reboot the system for the update to take effect:
sudo rebootA reboot ensures that all components run on their latest versions without conflicts from old processes.
Step 2: Install Xorg
Xorg, part of the X Windows System, is a display server that manages graphical output for applications on Arch Linux.
1. Use the following command to install Xorg and its server component:
sudo pacman -S xorg xorg-server2. The package manager presents a list of available Xorg components. If you are unsure what to choose and your system has no specific requirements, install the default set.
Press Enter to select all (default) components available for installation.
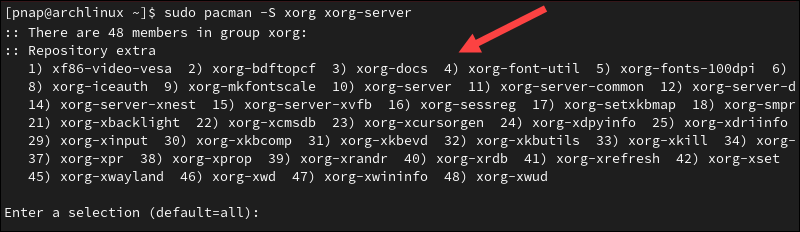
3. When prompted to proceed with the installation, type y and press Enter to finalize the process.

Note: A GUI consumes significantly more disk space than a minimal installation. Read the following guide to learn how to check disk space in Linux.
Step 3: Install GNOME
1. Install the GNOME desktop environment using the following command:
sudo pacman -S gnome2. Press Enter to select all available components. This installs the full GNOME desktop, including extras and applications.
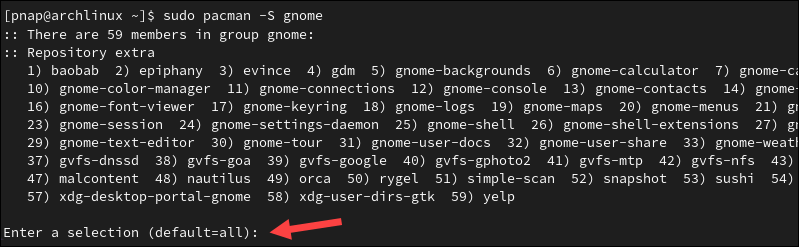
3. (Optional) Some dependencies may have multiple providers. In such instances, pacman prompts you to select a provider for each. Use the number keys to select a suitable dependency provider, and press Enter to continue.
4. After selecting components and dependencies, proceed with the installation by typing y and pressing Enter.
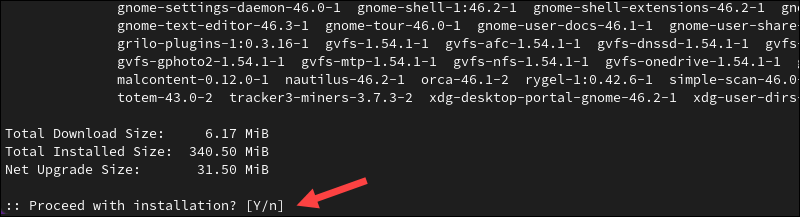
Once the installation is complete, the system returns to the command line without a confirmation message.
Step 4: Install Display Manager
To use GNOME on Arch Linux, you must set up a display manager to handle user logins, manage sessions, and initialize the graphical environment on system startup. Popular display managers include GDM (default for GNOME), LXDM, MDM, and XDM.
Note: Multiple active display managers can conflict. Before installing GDM, check for and disable other active display managers on your system.
1. To install GDM via pacman, enter the following command:
sudo pacman -S gdmWhen prompted, select the default components and dependencies and confirm that you want to proceed with the installation.
2. Verify that the installation was successful using the following command:
pacman -Qs gdm
3. Enter the command to enable GDM at boot and start the service immediately:
sudo systemctl enable --now gdm.serviceEnabling GDM at boot ensures that screen and session management are handled correctly every time the system starts.
4. Check the status of the service to confirm it has started successfully and is running without issues:
sudo systemctl status gdm.service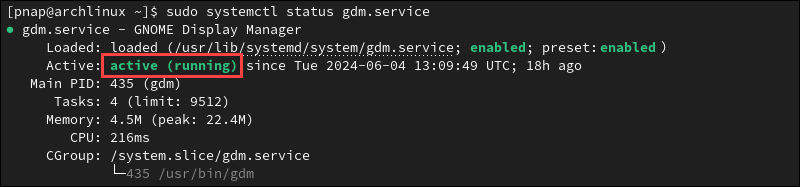
The output confirms that the GDM service is active (running).
Step 5: Install Applications
The new desktop environment provides opportunities to install additional applications that enhance the user experience. For example, enter the following command to install Firefox, VLC Player, and Leafpad:
sudo pacman -S firefox vlc leafpadWhen installing new applications, confirm the package names are correct and check if they are available in the official Arch repositories. For packages not found in the official repositories, look in the Arch User Repository (AUR) using an AUR helper like yay or paru.
Step 6: Reboot
Reboot Arch Linux to verify that the installed services start correctly and that the new desktop environment loads as expected on boot. Enter the following command:
sudo rebootAfter rebooting, you can access Arch Linux and start customizing the GNOME desktop environment.
Note: Another popular desktop environment for Linux is KDE Plasma. Check out our GNOME vs. KDE Plasma comparison and find out why some users choose one over the other.
Conclusion
You have installed and configured GNOME and the GDM display manager on Arch Linux.
The new desktop environment is highly customizable and well-suited for both new and experienced Linux users. To further optimize your system, learn how to check memory usage in Linux via the CLI and the GUI.