Rancher provides a web UI and proxy for managing Kubernetes clusters. Using Rancher is an easy way to streamline cluster deployment on bare metal and private/public clouds.
This article shows you how to set up a Rancher-controlled cluster using the phoenixNAP BMC portal.
Prerequisites
- phoenixNAP BMC portal credentials (If you are a new client, create a BMC account. Watch the video instructions for BMC account creation if you need more instructions.)
- SSH key pair (For instructions, read how to generate SSH keys.)
Step 1: Create a Kubernetes Cluster
1. Log in to the BMC portal.
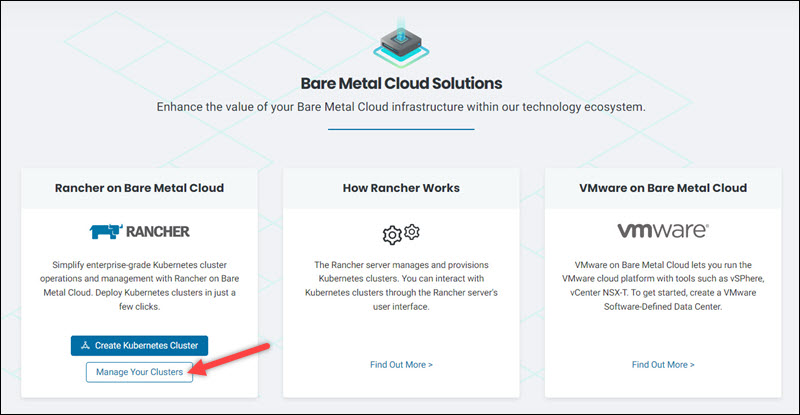
2. Select Solutions in the menu on the left side of the screen.
3. Click the Create Kubernetes Cluster button in the Rancher on Bare Metal Cloud tile.
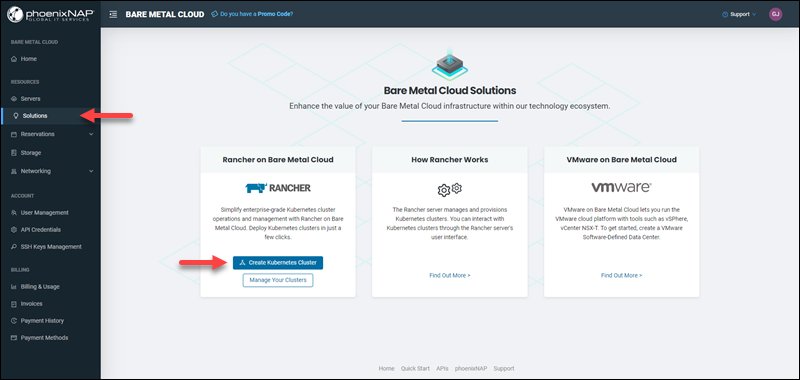
Alternatively, select the Create Cluster button on the Bare Metal Cloud Home page.
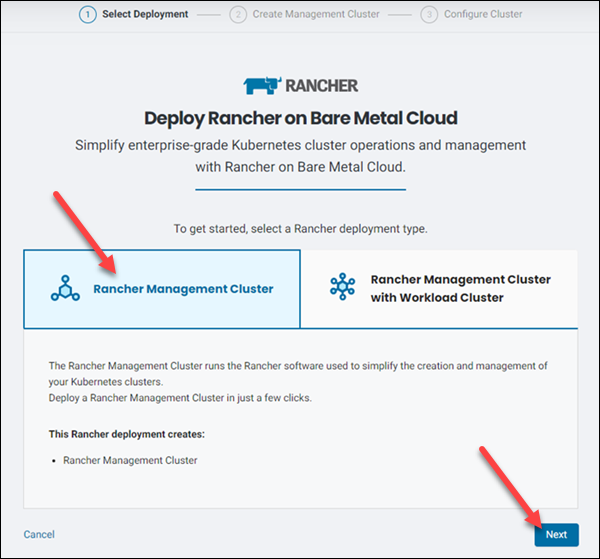
The Deploy Rancher on Bare Metal Cloud dialogue appears. Available deployment types are:
- A Rancher management cluster only.
- A Rancher management cluster with a workload cluster.
Note: This tutorial covers the steps to deploy a Rancher management cluster only. For instructions on deploying a workload cluster alongside a management cluster, read how to Deploy and Manage Rancher Management Cluster with Workload Cluster in BMC.
4. Select the Rancher Management Cluster option and click Next.
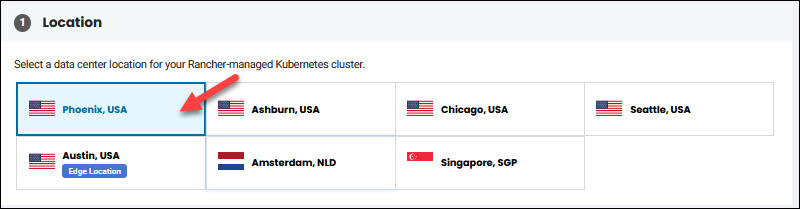
5. Select a data center location for the cluster in the Location section.
6. Use the dropdown menu to choose the number of nodes for your cluster in the Nodes section. You can choose between a single-node and a three-node cluster.

7. Select a BMC server configuration. There are multiple BMC server instances available. Use the availability toggle and the tabs to filter the results.
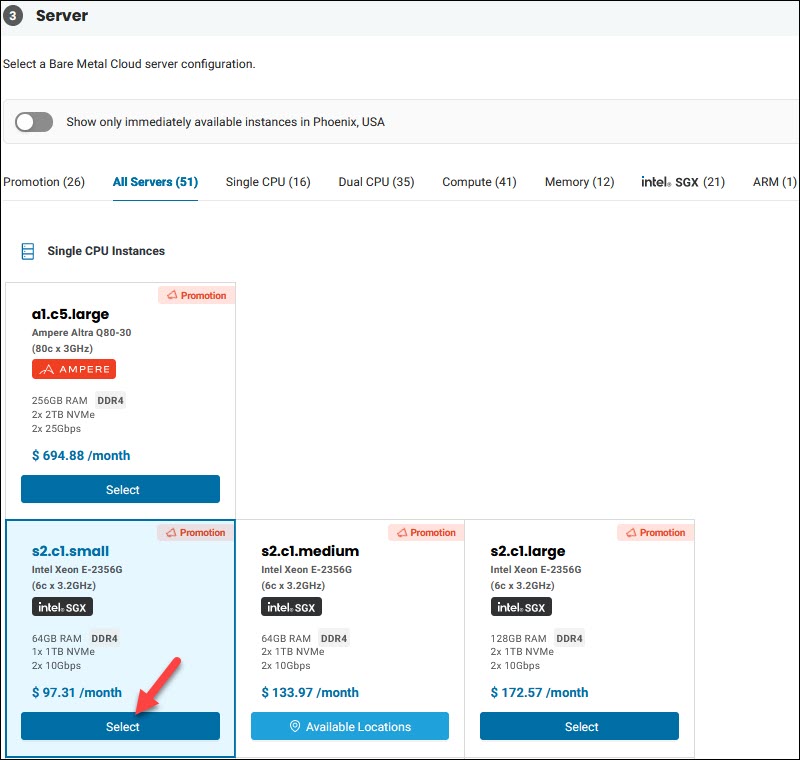
If the server instance you wish to use is unavailable at the location you chose, the tile is grayed out. Click the Available Locations button to see the data centers where the instance is available. Choose the new data center location, and click Select to confirm.
8. Click Next in the overview on the right side to move to the Configure Cluster page.
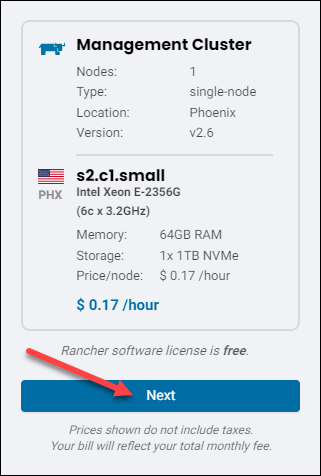
Note: The prices listed in this guide are for illustrative purposes only.
Step 2: Configure Cluster Settings
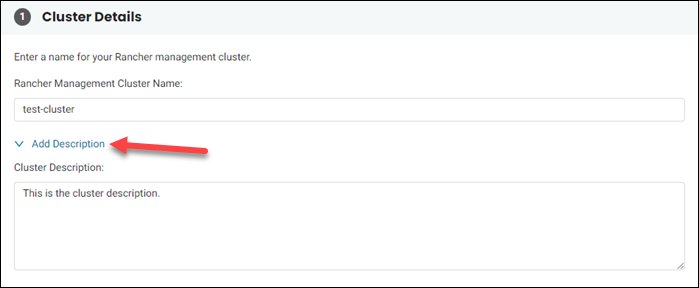
1. Give a name to your cluster in the Cluster Details section. Click Add Description to add cluster description.
2. Add one or more previously generated SSH keys in the Access section by typing the key name. If you need to add more than one key, click Add a new Public SSH Key.
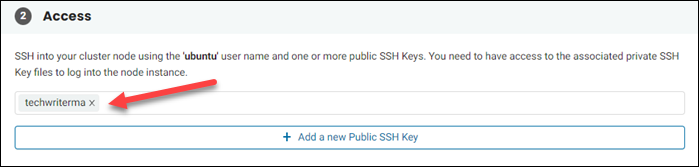
Note: At least one public SSH key is needed to continue with the Rancher setup.
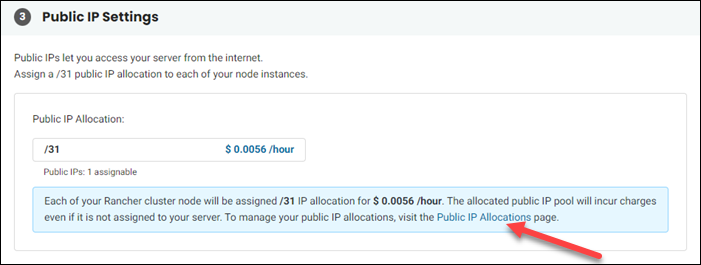
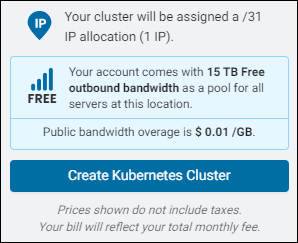
3. A Rancher server must be publicly accessible. The Public IP Settings section informs you what type of IP allocation your server will be assigned. If you need to purchase additional public IP allocations, click the link at the bottom of the section to visit the Public IP Allocations page.
4. To modify Rancher settings before the installation, select the checkbox next to the "Yes, configure advanced Rancher settings" option in the Advanced Configuration Settings section. Leave the box unchecked to use the default settings.
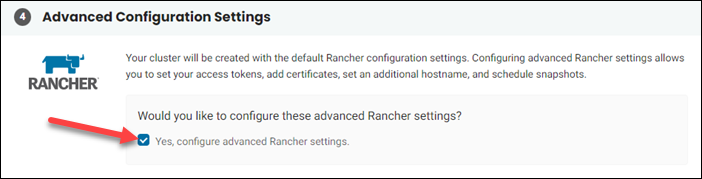
5. If you do not opt for advanced configuration, click the Create Kubernetes Cluster button in the overview on the right side to start the installation process. Rancher installs with the default settings.
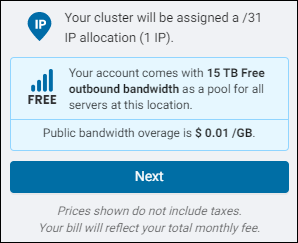
If you choose the advanced configuration, the Next button appears instead. Click the button to modify the settings.
Step 3 (Optional): Advanced Configuration Settings
The Advanced Configuration Settings page has six sections.
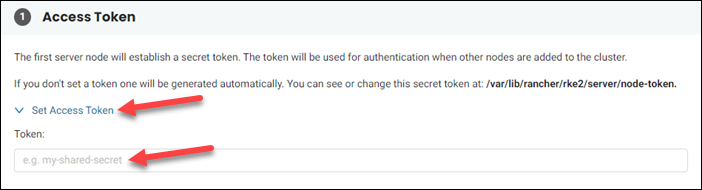
Access Token
The first server node uses the access token to authenticate all subsequent nodes added to the cluster. To set the access token manually:
1. Click Set Access Token. The section expands.
2. Set the token in the text box.
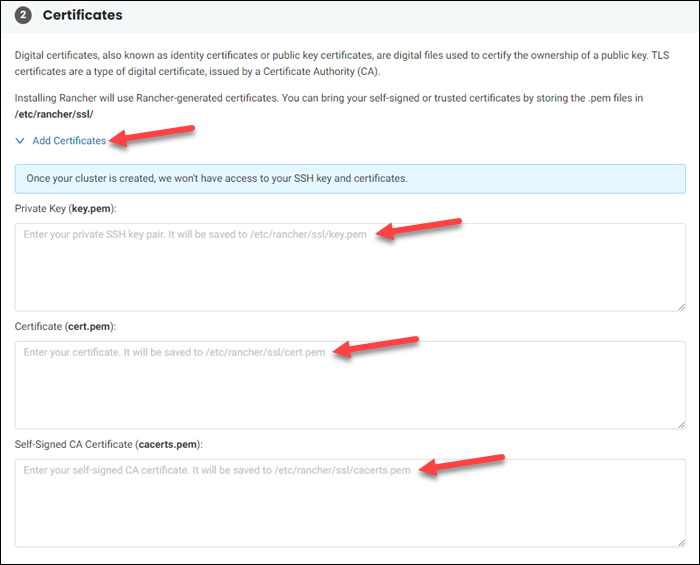
Certificates
Rancher uses Rancher-generated digital certificates to confirm public key ownership. If you have other trusted certificates:
1. Click Add Certificates.
2. Enter your private SSH key pair, a certificate, or a self-signed CA certificate.
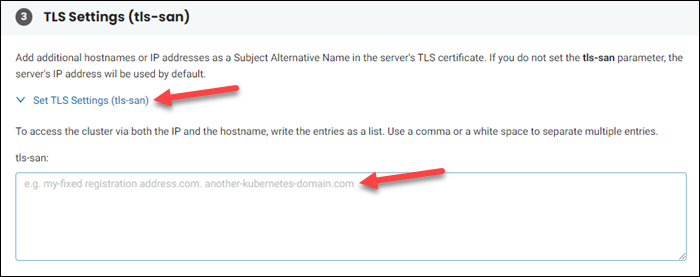
TLS Settings
The tls-san parameter lets you list alternative hostnames and IP addresses on your TLS certificate. To set the tls-san parameter:
1. Select Set TLS Settings (tls-san).
2. Enter the hostnames or addresses in the text box. Separate multiple entries with a comma or a white space.
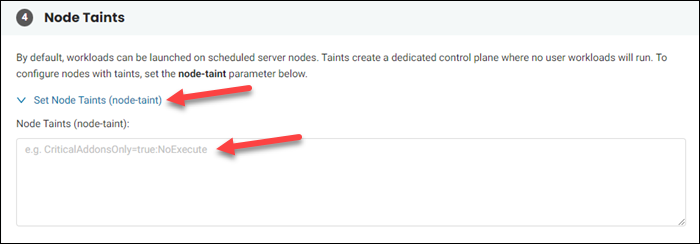
Node Taints
Placing a node taint prevents pods from scheduling on the node unless they have declared toleration in the pod specification. This feature lets you specify the nodes where you don't want workloads to run.
To place a node taint:
1. Click Set Node Taints (node-taint)
2. Type the node-taint parameter into the text box.
Cluster Domain
The default name for your cluster is cluster.local. To use a different name, set the cluster-domain parameter:
1. Select Set Domain Name (cluster-domain).
2. Provide the wanted cluster domain in the text box.

Backup Snapshots
Configure backup snapshots for your cluster to protect it against data loss:
1. Select Schedule Snapshots.
2. Use cron format to provide the time interval for taking snapshots.
3. Provide the number of snapshots to keep.

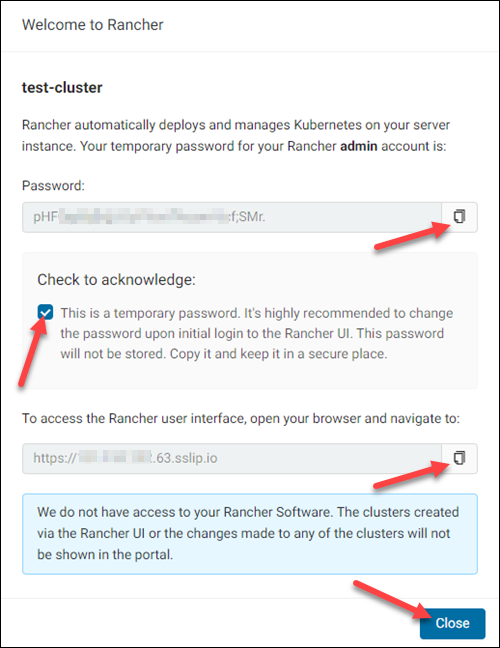
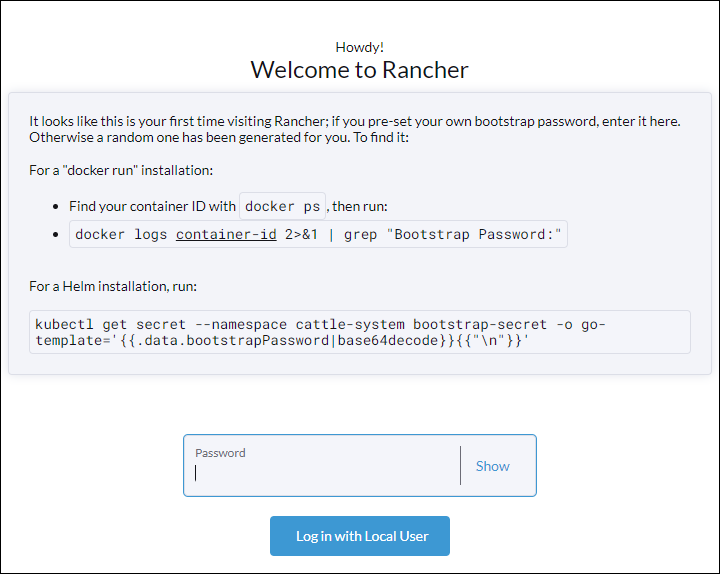
When you finish the advanced setup, click Create Kubernetes Cluster at the bottom of the page. The Welcome to Rancher dialogue appears.
Step 4: Start Rancher
1. Click the icon to copy the password for your Rancher administrative account. You need this password when logging into Rancher for the first time.
2. Select the checkbox to acknowledge that the password you received is temporary.
3. The IP address of your Rancher server is at the bottom of the dialogue box. You will use the address or the hostname to access your Rancher server. Copy the IP address by clicking the icon.
4. Click Close. The cluster appears on the list of available Rancher clusters.
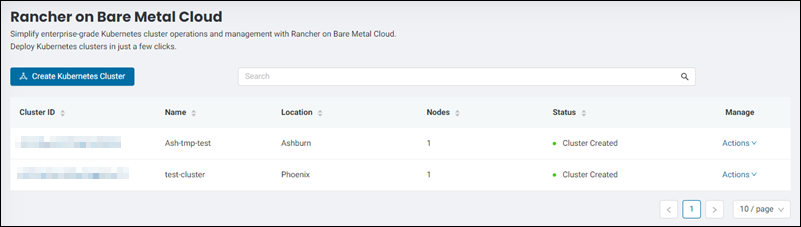
The dashboard has a number of columns for sorting available clusters according to their cluster ID, name, location, number of nodes, and status.
Step 5: Start Rancher UI
To start using Rancher on your cluster:
1. Enter the IP address obtained in Step 4 in a new browser tab. The Rancher login page appears.
2. Log in with the password from Step 4 to start using the Rancher options.
Manage Rancher Clusters
After you create your first cluster, the Manage Your Clusters link appears in the Solutions section. Click the link to access the Rancher cluster dashboard.
The dashboard enables you to view the details of your cluster and to delete it.
Note: Rolling updates are crucial aspects of the development life cycle as users expect zero downtime. Learn how to configure Kubernetes clusters for rolling updates. Follow our guide to navigate through updates with zero downtime.
View Cluster Details
To view details of your cluster:
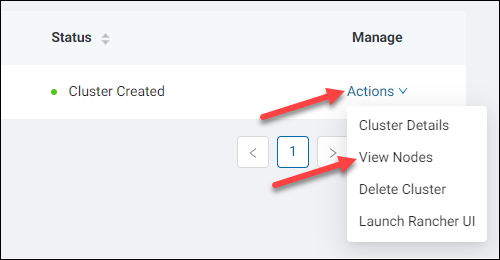
1. Click the Actions link of the relevant cluster in the Manage column.
2. Select Cluster Details.
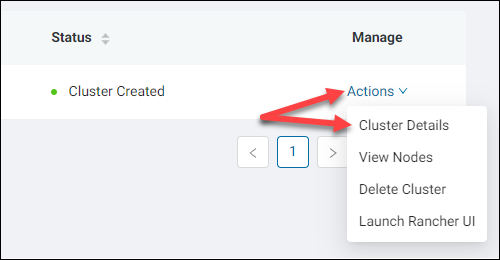
The Cluster Details page opens.
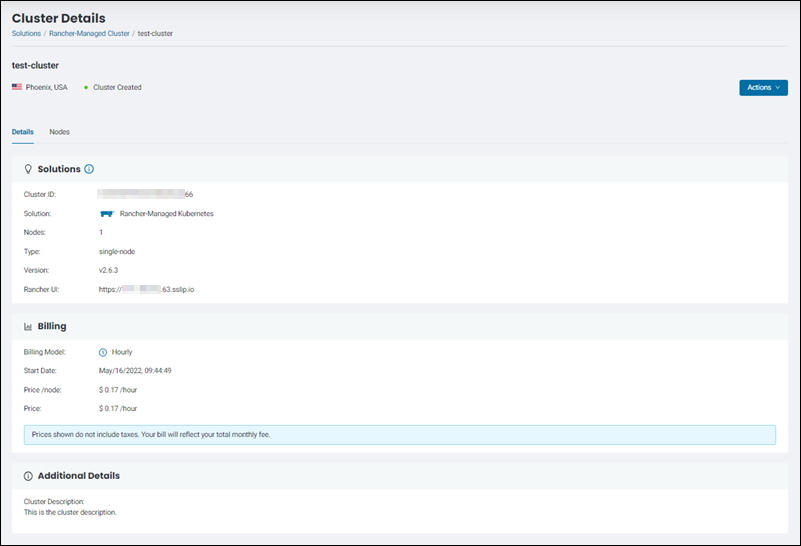
The page lists the information, such as the Rancher version, billing, and additional details.
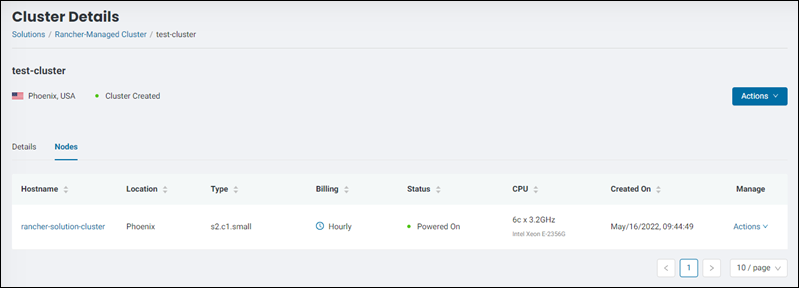
View Nodes
To view details about cluster nodes, including their hostnames, locations, and billing details:
1. Click the Actions link of the relevant cluster in the Manage column.
2. Select View Nodes.
The nodes dashboard appears.
Delete a Cluster
To permanently delete a cluster:
1. Click the Actions link of the relevant cluster in the Manage column.
2. Select Delete Cluster.
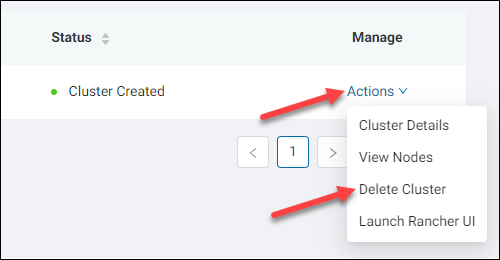
3. Enter the name of the cluster into the text box to confirm the deletion.
4. Click Delete Cluster.
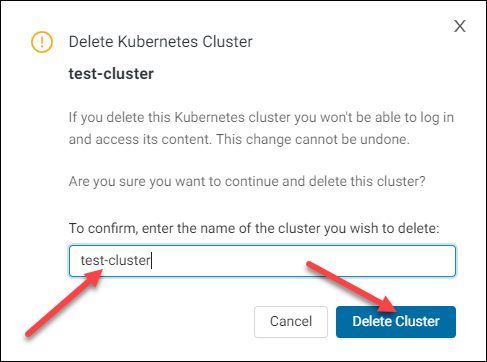
Warning: Deleting the cluster cannot be reversed.
Launch Rancher UI
To start Rancher UI from the Rancher cluster dashboard:
1. Click the Actions link of the relevant cluster in the Manage column.
2. Select Launch Rancher UI.

Highly Available RKE clusters
Rancher Kubernetes Engine clusters can be set up for high availability. Highly available (HA) clusters provide continuous availability by featuring software redundancy. Multiple machines are configured to perform the same function, so they are ready to provide backup in case one component fails.
HA clusters are used in database management, transaction processing, eCommerce, and other applications that require constant availability.
Highly available architectures are designed to:
- Detect a failure within the system.
- Perform application failover to an available backup host.
- Automatically restart or repair the failed server.
Note: At this moment, RKE clusters can be highly available, but worker nodes cannot. Worker nodes can be post configured for higher availability.
Conclusion
This tutorial walked you through the steps necessary to set up Rancher integration on the BMC portal. If you need further assistance regarding your BMC Rancher setup, contact our Support Team.