Rolling updates are an important part of the lifecycle of a modern app, with users constantly expecting new features and zero downtime. While Kubernetes used Replication Controllers to enable this functionality in the past, newer versions recommend using Deployments.
This tutorial shows you how to perform rolling updates using Kubernetes Deployments. This method allows you to quickly update your apps and achieve zero downtime while ensuring rollback support.
Prerequisites
- A Kubernetes cluster
- Access to a terminal window
- The kubectl command-line tool
Enable Rolling Updates
Kubernetes Deployments act as wrappers around ReplicaSets, which are Kubernetes controllers in charge of pod management. Deployments provide additional functionality to ReplicaSets - they perform health checks, rolling updates, and rollbacks.
1. First, create a yaml file with deployment specifications using a text editor, such as Nano:
nano nginx-test.yamlThe sample file below contains the basic declarations necessary for a Kubernetes Deployment:
apiVersion: apps/v1
kind: Deployment
metadata:
  name: nginx-deployment
  labels:
    app: nginx
spec:
  replicas: 4
  selector:

    matchLabels:
      app: nginx
  template:
    metadata:
      labels:
        app: nginx
    spec:
      containers:
      - name: nginx
        image: nginx:1.14.2

        ports:
        - containerPort: 80
2. Save and exit the file.
3. Then, create the deployment using the kubectl create command and the yaml file you have just created:
kubectl create -f nginx-test.yaml
4. Check the deployment:
kubectl get deploymentThe output should confirm the deployment is ready:

4. Next, check the ReplicaSets by running the command:
kubectl get rsThe sample file specified four replicas, which all show as ready:

5. Finally, check if the pods are up:
kubectl get podThe output shows pods as ready and running:

Ensure Zero Downtime
To configure rolling updates with zero downtime, you need to specify the update strategy.
1. Add the following declaration to the deployment yaml file under the spec category:
minReadySeconds: 5
strategy:
  type: RollingUpdate
  rollingUpdate:
    maxSurge: 1
maxUnavailable: 1minReadySecondstells Kubernetes how long it should wait until it creates the next pod. This property ensures that all application pods are in the ready state during the update.maxSurgespecifies the maximum number (or percentage) of pods above the specified number of replicas. In the example above, the maximum number of pods will be 5 since 4 replicas are specified in the yaml file.maxUnavailabledeclares the maximum number (or percentage) of unavailable pods during the update. IfmaxSurgeis set to 0, this field cannot be 0.
Adding the above specification to the deployment yaml file is enough to start performing Kubernetes rolling updates. However, it does not guarantee zero downtime. Kubernetes cannot tell when a new pod is ready - it eliminates the old pod as soon as the new one is created. This problem causes downtime until the new pod becomes able to accept requests.
To fix this problem, Kubernetes features the concept of Readiness Probes. The probes check the state of pods and allow for rolling updates to proceed only when all of the containers in a pod are ready. Pods are considered ready when the readiness probe is successful and after the time specified in minReadySeconds has passed.
2. To set up Readiness Probes, add the following lines to the spec.template.spec category in the deployment file:
readinessProbe:
  httpGet:
    path: /
    port: 8080
    initialDelaySeconds: 5
    periodSeconds: 5
successThreshold: 1initialDelaySecondsspecifies how long the probe has to wait to start after the container starts.periodSecondsis the time between two probes. The default is 10 seconds, while the minimal value is 1 second.successThresholdis the minimum number of consecutive successful probes after a failed one for the entire process to be considered successful. The default and minimal values are both 1.
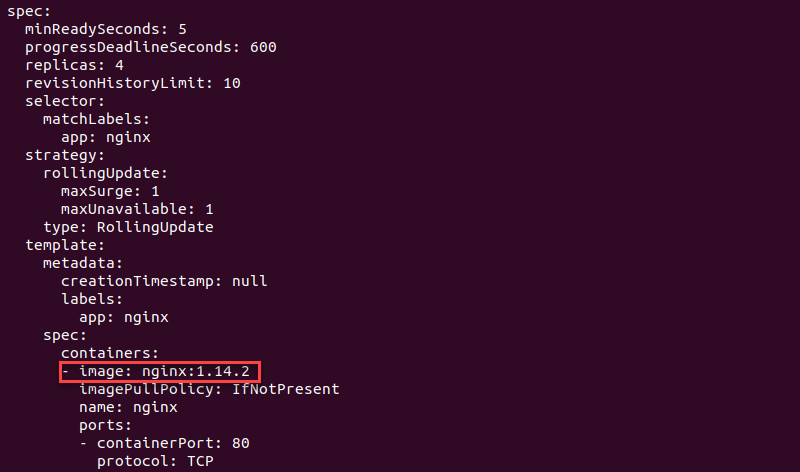
The entire deployment file properly configured for rolling updates should look like this:
apiVersion: apps/v1
kind: Deployment
metadata:
  name: nginx-deployment
  labels:
    app: nginx
spec:
  replicas: 4
  selector:

    matchLabels:
      app: nginx
  minReadySeconds: 5
  strategy:
    type: RollingUpdate
    rollingUpdate:
      maxSurge: 1
      maxUnavailable: 1
  template:
    metadata:
      labels:
        app: nginx
    spec:
      containers:
      - name: nginx
        image: nginx:1.14.0

        ports:
        - containerPort: 80
        readinessProbe:
          httpGet:
            path: /
            port: 8080
            initialDelaySeconds: 5
            periodSeconds: 5
            successThreshold: 1
3. Save the file and exit.
4. Then, use kubectl apply to apply the changes:
kubectl apply -f nginx-text.yaml --recordThe --record flag will serve a purpose in the rollback process.

The output shows that the deployment has been configured successfully.
Perform Rolling Update
There are three ways to perform rolling updates.
For example, to change the app image:
Option 1: You can use kubectl set to perform the action on the command line:
kubectl set image deployment nginx-deployment nginx=nginx:1.14.2 --record
Option 2: Alternatively, modify the image version in the spec.templates.spec.containers section of the yaml file. Then, use kubectl replace to perform the update:
kubectl replace -f nginx-test.yaml
Option 3: You can also use kubectl edit to edit the deployment directly:
kubectl edit deployment nginx-deployment --recordMake the necessary changes in the editor that opens:
The changes are applied when you close the editor.
Check Rollout Status
Check the rollout status of the deployment using the following syntax:
kubectl rollout status deployment nginx-deploymentThe output confirms the successful rollout:

Pause and Resume Rolling Update
Pause and resume rolling updates with the respective kubectl rollout commands.
To pause the update, run:
kubectl rollout pause deployment nginx-deployment
To resume the update, run:
kubectl rollout resume deployment nginx-deployment
Schedule Pods for Deployment
Use affinity and anti-affinity properties to control on which nodes Kubernetes schedules specific pods in your deployment.
Pod Affinity
There are two types of affinity currently available in Kubernetes:
requiredDuringSchedulingIgnoredDuringExecutiontells Kubernetes to only run pods on nodes that satisfy certain criteria, such as a specific processor type.preferredDuringSchedulingIgnoredDuringExecutionallows pods to be run elsewhere, if and only if no nodes satisfy given criteria.
These properties are listed in the PodSpec file. For example, a pod may be specified as follows:
apiVersion: v1
kind: Pod
metadata:
  name: affinity-test
spec:
  affinity:
    nodeAffinity:
      requiredDuringSchedulingIgnoredDuringExecution:
        nodeSelectorTerms:
        - matchExpressions:
          - key: kubernetes.io/test-name
            operator: In
            values:
            - test1
            - test2
      preferredDuringSchedulingIgnoredDuringExecution:
      - weight: 1
        preference:
          matchExpressions:
          - key: example-node-label-key
            operator: In
            values:
            - example-node-label-value
  containers:
  - name: affinity-test
    image: k8s.gcr.io/pause:2.0
The file above tells Kubernetes to run the pod only on a node with a label whose key is kubernetes.io/test-name and whose value is either test1 or test2. Furthermore, Kubernetes will prefer nodes whose key is example-node-label-key, with the example-node-label-value value.
Pod Anti-Affinity
Pod anti-affinity is useful if you do not want all the pods to run on the same node. It functions similarly to affinity, with the same two types available - requiredDuringSchedulingIgnoredDuringExecution and preferredDuringSchedulingIgnoredDuringExecution.
The following example specifies an anti-affinity rule that tells Kubernetes to preferably avoid scheduling the "test" app pods to nodes that already have the "test" pods:
podAntiAffinity:
  preferredDuringSchedulingIgnoredDuringExecution:
  - weight: 100
    podAffinityTerm:
      labelSelector:
        matchExpressions:
        - key: app
          operator: In
          values:
          - test
      topologyKey: Kubernetes.io/hostname
Rollback Changes
If something goes wrong with the update process, you can rollback changes and revert to a previous version of the app. To do so, use the following kubectl rollout command:
kubectl rollout history deployment nginx-deploymentThe output lists the available revisions, created by adding the --record flag when performing an update:

Choose the revision you want and type the following command to rollback the changes:
kubectl rollout undo deployment nginx-deployment --to-revision=1The command above rolls back to revision 1 and produces the following output:

Note: Read about testing optimization of new software with Kubernetes on BMC.
Conclusion
After reading this tutorial, you should be able to perform zero-downtime rolling updates using Kubernetes Deployments.
If you wish to expand your knowledge about deployment types in Kubernetes, read How to do Canary Deployments on Kubernetes.