Remote login is turned off by default in MySQL to enhance security and prevent unauthorized access from external sources.
However, in a modern, distributed, cloud-based environment, remote MySQL database access is necessary to perform routine tasks, optimize servers, and monitor performance.
Learn how to configure a MySQL server for remote connections and securely manage your databases from any location.
Prerequisites
- Access to a terminal window/command line.
- Remote MySQL server.
- Sudo or root privileges on local and remote machines.
Enable MySQL Server Remote Connection
Access the remote MySQL server and complete the following steps to enable remote connections:
Note: If you do not have direct access to your MySQL server, you must establish a secure SSH connection. In case you need assistance, we have prepared a comprehensive tutorial on how to use SSH to connect to a remote server. This article is a must-read for anyone new to the process.
Step 1: Edit MySQL Config File
You need to modify the MySQL configuration file to configure the remote MySQL server to listen for connections on an external IP address.
The name and location of the MySQL configuration file vary based on the Linux distribution and MySQL version. In Ubuntu/Debian, the file is named mysqld.cnf, while in other distributions, it is often named my.cnf.
The examples in this guide are presented using Ubuntu 22.04 and MySQL 8.0.37.
1. Access mysqld.cnf File
Use your preferred text editor, such as nano, to open the MySQL config file, mysqld.cnf. Enter the following command in your command-line interface to access the MySQL server configuration file:
sudo nano /etc/mysql/mysql.conf.d/mysqld.cnfIf the MySQL configuration file is not in its default location, use the Linux find command to detect it.
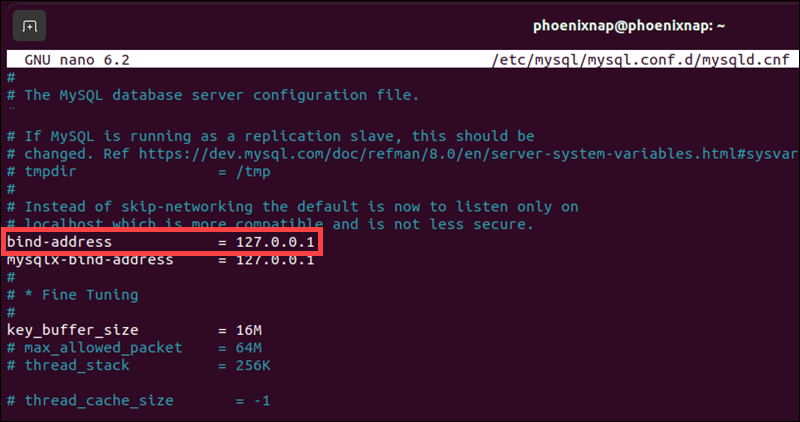
2. Change bind-address IP
Locate the bind-address line in the MySQL server configuration file. The current default IP address is 127.0.0.1, which limits MySQL connections to the local machine.
Replace the existing IP with the IP address of the machine that needs to access the MySQL server remotely.
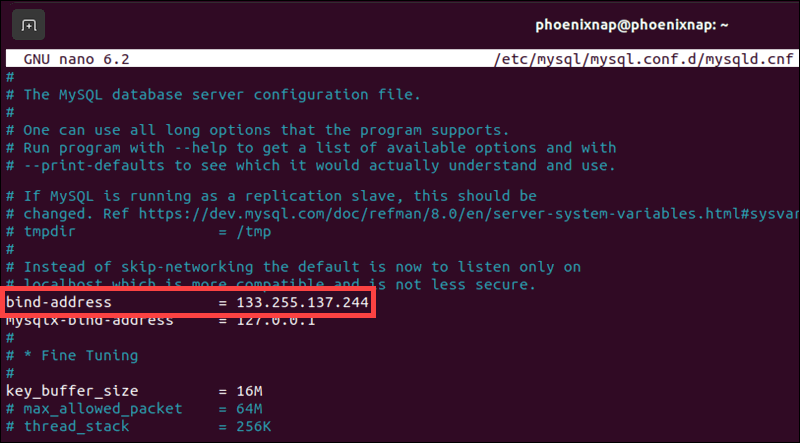
After making these changes, press Ctrl+X, then Y to confirm and save the modifications, and then press Enter to exit the configuration file.
Note: Remote access is additionally verified by using the correct credentials and user parameters defined for your MySQL users.
3. Restart MySQL Service
Use the following command to restart the MySQL service and apply the changes made to the MySQL config file:
sudo systemctl restart mysqlNext, adjust the firewall settings to allow traffic to the default MySQL port.
Step 2: Configure Firewall to Allow Remote MySQL Connection
The default MySQL port number is 3306. If you have already configured a firewall on your MySQL server, open traffic for this specific port. Follow the instructions for the firewall service active on the server.
Option 1: Open Port 3306 using UFW (Uncomplicated Firewall)
UFW is the default firewall tool in Ubuntu. In a terminal window, type the following command to allow traffic and match the IP and port:
sudo ufw allow from remote_ip_address to any port 3306Replace remote_ip_address with the actual IP of the system that needs to access MySQL.

The system confirms that the rules were successfully updated.
Option 2: Open Port 3306 via Firewalld
Firewalld is the default firewall tool in Fedora and other Red Hat-based distributions. Use the following commands to allow traffic to MySQL port 3306:
sudo firewall-cmd --zone=public --add-service=mysql --permanentsudo firewall-cmd --reload
The system confirms you have successfully opened port 3306 in Firewalld.
Option 3: Open Port 3306 with iptables
The iptables utility is available by default on most Linux distributions. Run the following command to open MySQL port 3306 to unrestricted traffic:
sudo iptables -A INPUT -p tcp --dport 3306 -j ACCEPTTo limit access to a specific IP address, use the following command instead:
sudo iptables -A INPUT -p tcp -s 133.255.137.244 --dport 3306 -j ACCEPTThis command grants access to IP 133.255.137.244. Substitute it with the actual IP address for your remote connection.
After configuring iptables rules, save them to persist across reboots. In Ubuntu-based distributions, enter the following commands:
sudo netfilter-persistent savesudo netfilter-persistent reloadIn Fedora and Red Hat-based distributions, enter:
sudo service iptables saveStep 3: Connect to Remote MySQL Server
Use the following command to establish a connection with your remote MySQL server:
mysql -u username -h mysql_server_ip -pReplace username with your MySQL username and mysql_server_ip with the server's IP address or hostname. The -p option prompts you to enter the password for the MySQL username.
After entering the command, the terminal displays the following message:
Connection to mysql_server_ip 3306 port [tcp/mysql] succeeded!This message confirms a successful connection to your MySQL server on port 3306.
How to Grant Remote Access to an Existing MySQL Database?
Access the MySQL client on the remote server and execute the following two commands to grant remote access to a user for an existing database:
UPDATE mysql.db SET Host='133.255.137.244' WHERE Db=yourDB;UPDATE mysql.user SET Host='133.255.137.244' WHERE User='user1';
Replace 133.155.44.103 with the actual IP address from which you want to allow remote access, yourDB with the database name, and user1 with your MySQL username.
Note: Read our detailed guide on connecting to a MySQL database on Windows, macOS, and Linux.
How to Grant Remote Access to a New MySQL Database?
Type the following command in your MySQL shell to create a new database:
CREATE DATABASE yourDB;Enter this command to grant remote user access to the new database:
GRANT ALL PRIVILEGES ON yourDB.* TO 'user1'@'133.255.137.244' IDENTIFIED BY 'password1';Substitute yourDB for your database name, user1 for the MySQL username, 133.255.137.244 for the actual remote IP address, and password1 with the password associated with user1.
Conclusion
By following the steps in this guide, you have successfully enabled remote connections to your MySQL server. With the appropriate credentials, a user originating from the specified IP address can now access your MySQL server and database from a remote machine.
If you are new to MySQL, download this comprehensive MySQL Commands Cheat Sheet.