As CentOS 8 reached EOL, there are many reasons to consider switching to a CentOS alternative. A straightforward option is to migrate to CentOS Stream, an upstream RHEL source.
CentOS Stream is a Linux distribution released in parallel with CentOS 8, and the two projects have many similarities.
This article lists reasons to migrate from CentOS 8 to CentOS Stream and provides a step-by-step guide to execute the migration.
Prerequisites
- Access to the command line/terminal.
- Administrator (sudo) privileges.
- At least 20GB storage and 2GB RAM (4GB or more is recommended for a better experience).
Why Choose CentOS Stream?
CentOS Stream is a rolling release distribution with ongoing updates. There are several benefits when migrating from CentOS 8 to this dynamic distribution, including:
- Continuous updates. CentOS Stream serves as a CI/CD platform for developing RHEL. As a rolling release distribution, it continually provides the latest features, updates, and bug fixes. Security patches and improvements are directly available due to the agile software development lifecycle (SDLC).
- Upstream integration. This integration type creates a collaborative environment where users actively participate in the improvements. Users are encouraged to contribute to an innovative and dynamic platform by delivering early features and enhancements.
- Smooth transition. The key reason for switching is the seamless transition from CentOS 8. The familiar environment, package management system, and configuration simplify migrating. The similarities minimize the typical learning curve when migrating to a different Linux distribution.
CentOS Stream is a viable option for users seeking a development-based distribution similar to CentOS 8. While there are many advantages, the system is unsuitable for production servers and projects requiring high dependability.
How to Migrate CentOS 8 to CentOS Stream
Migrating CentOS 8 to CentOS Stream is a straightforward process, but there are several things to do and consider before committing. The dnf utility provides a simple and convenient way to perform the migration.
The sections below provide the details for each step of the migration.
Step 1: Prepare for Migration
Before starting the migration, there are a few preliminary steps:
- See minimum requirements. Check to see if the system meets the minimum requirements for CentOS Stream. Ensure the system meets the hardware requirements.
- Check compatibility. See if all packages and third-party applications are compatible with CentOS Stream.
- Create backups. Back up any critical data and configuration to avoid data loss during migration.
Ensure you are running a CentOS 8 system. Check the current operating system and version with the following command:
cat /etc/centos-release
The command shows the current Cent OS version and release information.
Continue to the next step to start the migration process.
Step 2: Update System
Update CentOS 8 with the latest updates and security patches:
sudo dnf updateWait for the update to complete. The CentOS 8 version may be using outdated packages if the command shows an error. Use sed to replace the links in the repo list and switch to the vault repository:
sudo sed -i 's/mirrorlist/#mirrorlist/g' /etc/yum.repos.d/CentOS-*sudo sed -i 's|#baseurl=http://mirror.centos.org|baseurl=http://vault.centos.org|g' /etc/yum.repos.d/CentOS-*The commands show no output. They switch the repository links and provide access to older packages. Retry the update after the sed commands.
Step 3: Install CentOS Stream Package and Swap Repositories
The CentOS stream package contains repository configuration and enables system updates from the CentOS Stream repository. Do the following:
1. Install the CentOS Stream package with:
sudo dnf install centos-release-stream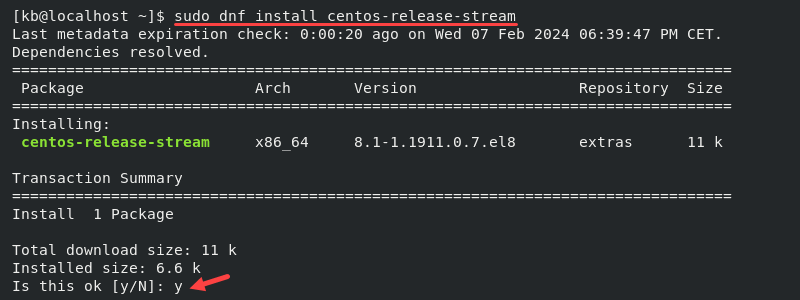
Press y when prompted to confirm the package installation.
2. Swap the current repositories for the stream ones with the following command:
sudo dnf swap centos-{linux,stream}-repos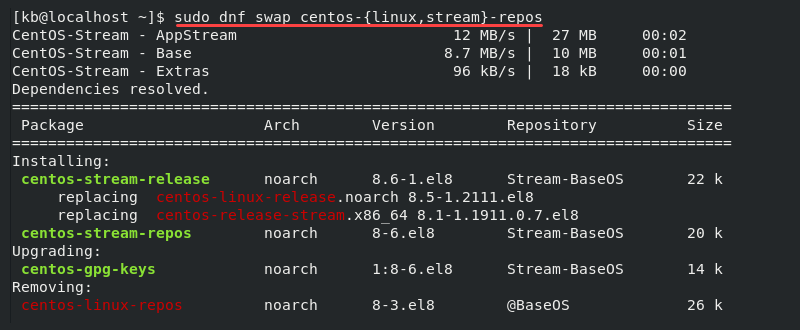
The system now uses CentOS Stream repositories for package installation and updates.
Step 4: Sync Distributions
This step is critical as it syncs the installed packages. There are three options in the migration process:
- Upgrade packages manually. This approach avoids having any package conflicts but leaves a partially upgraded system.
- Distribution sync. A distribution sync is done through a command. It upgrades packages that can be upgraded and removes any conflicting ones. Some packages may be lost during the upgrade.
- Force switch. Adding a --force switch to the distribution sync command forces an update on all packages. It ignores any upgrade conflicts and may result in broken packages.
The distribution sync command is:
sudo dnf distro-sync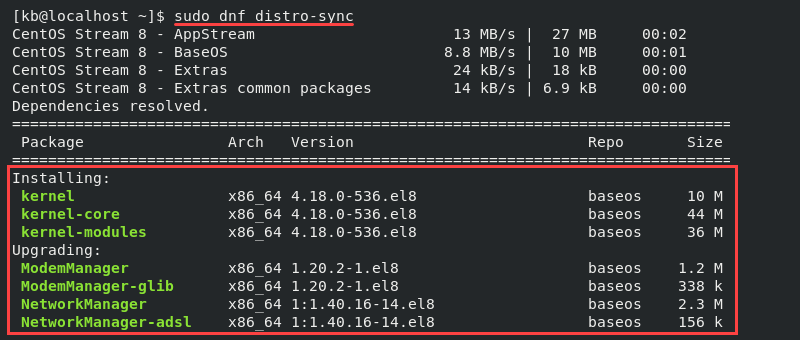
Review the updates in the command output carefully before committing since it results in significant system changes.
Step 5: Reboot into CentOS Stream
Force a system reboot to complete the migration:
sudo reboot -fRecheck the release with the following:
cat /etc/centos-release
The command shows CentOS Stream release 8, indicating the migration was successful. Review packages from the previous release and continue monitoring for any potential migration issues.
Conclusion
After reading this guide, you know the main differences between CentOS 8 and CentOS Stream. The guide also showed how to migrate to CentOS Stream through simple steps.
CentOS Stream is not a good fit if you're looking for a CentOS 7 alternative. A better choice is Rocky Linux or AlmaLinux.
See our guides on How to Migrate CentOS 7 to Rocky Linux 9, How to Migrate CentOS to AlmaLinux, and How to Migrate CentOS to Ubuntu.
