With CentOS 7 reaching end-of-life, administrators are looking for suitable CentOS alternatives. One option is Ubuntu, the most popular Linux distribution.
Switching from CentOS to Ubuntu is more complex than migrating to Rocky Linux, AlmaLinux, or CentOS Stream. However, there are many reasons to switch to Ubuntu, and its benefits make it a compelling choice.
This article provides the steps for migration and reasons to migrate from CentOS to Ubuntu.
Prerequisites
- Access to the command line/terminal.
- Access to the root account on CentOS.
- Internet connection.
- A server/machine for the migration.
Why Choose Ubuntu?
Ubuntu is a strong choice for organizations that require a well-supported and stable Linux distribution. Its features, community support, and versatility make it an ideal CentOS alternative.
The main benefits when switching to Ubuntu are:
- Long-Term Support (LTS). Ubuntu LTS releases have a five-year support. The LTS release ensures security updates, third-party software compatibility, and bug fixes over this period. The predictable and continuous nature of Ubuntu's LTS releases contrasts with CentOS, which switched to a rolling release model.
- Active community. Ubuntu has a large user community with active developers and contributors, which improves the overall user experience. These supporters share knowledge and assist in resolving issues. The community contributes to all the available resources, including forums and documentation.
- Simplicity. Ubuntu has a user-friendly interface and is accessible to new users. Installation is straightforward, and there are many built-in sysadmin tools. Administrators switching from CentOS to Ubuntu will find it easy to learn and simple to use.
- Vast repository. The package repository on Ubuntu has diverse applications and tools. The wide selection simplifies software installation and management.
- Compatibility. Ubuntu is compatible with various modern technologies, frameworks, and platforms. Frequent updates ensure Ubuntu keeps track of the latest advancements. Compared to CentOS, it is more developer-centric.
For a more in-depth comparison, see our CentOS vs. Ubuntu guide, which compares the two solutions for web servers.
How to Migrate CentOS to Ubuntu
Transitioning from CentOS to Ubuntu requires creating a structured migration plan. Before proceeding, prepare an additional server machine to perform the migration.
Note: If you don't have a spare server available, consider deploying a Bare Metal Cloud instance to test the process. The small instance goes for as low as $0.08 per hour and has different Ubuntu versions available.
Below are essential steps to execute the migration. Use the steps to create an outline and execute the procedure carefully to ensure a smooth transition.
Step 1: Backup Data
Since the installation is not on the same machine, creating a backup is optional. However, it is highly recommended to do so as a safety net. In unexpected events, it prevents data loss and simplifies reverting to the CentOS setup quickly.
Include any critical data, user files, configurations, and databases. Use a reliable backup and restore solution, such as rsync, or do a bare metal restore for comprehensive data protection.
Step 2: Download, Configure, and Install Ubuntu
To prepare and install Ubuntu, follow these steps:
1. Download the Ubuntu ISO image from the official Ubuntu website. Choose a version based on the available system architecture (32-bit or 64-bit) and requirements (desktop, server, IoT, or cloud).
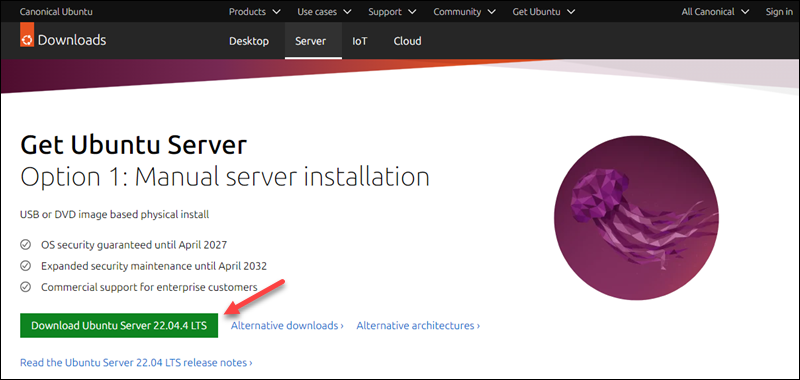
Perform this step on the destination server or the local CentOS machine.
2. Create a bootable installation media using the downloaded ISO file. Use a tool like dd to create a bootable USB drive.
3. Insert the bootable media into the server machine and follow the step-by-step installation process. The steps include choosing the language, time zone, disk partitioning, and user account setup.
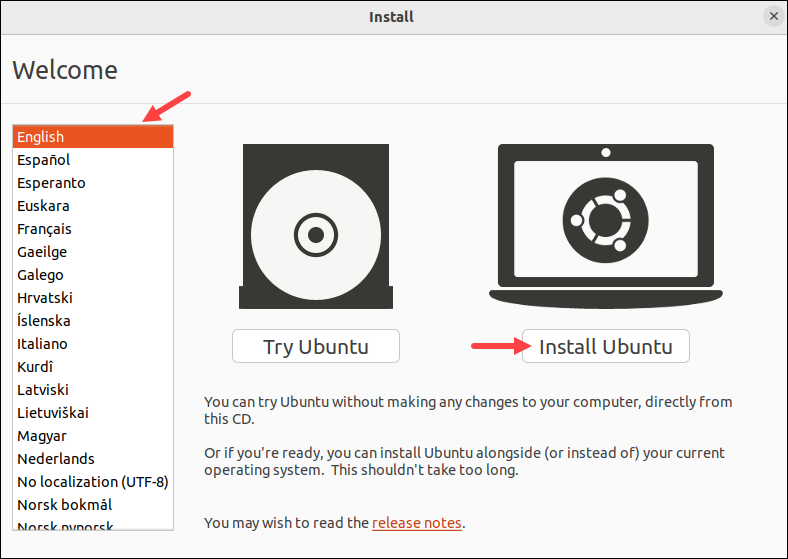
The user created during installation is automatically granted sudo rights, which differs from CentOS. The user has elevated access to perform administrator tasks, whereas CentOS uses a root account.
4. When the installation completes, reboot the server. It should boot up into Ubuntu automatically.
Step 3: Compare and Install Packages
After installing Ubuntu, install previously used packages on the CentOS system. This step ensures the Ubuntu system will have all available software and dependencies.
To compare and install packages, do the following:
1. List installed packages on CentOS. Use a package management tool, such as RPM or YUM. For example, if using yum, run:
yum list installed
Alternatively, if using RPM, run the following command to list installed packages sorted by installation date:
rpm -qa --last
Both commands generate a comprehensive list of installed packages on CentOS. Use other commands, such as yum history list, to differentiate between user-installed packages and those that are part of the CentOS system.
Use this list to compare packages in the following step.
2. Compare the list with the available Ubuntu packages. Use the following command to search for an equivalent package:
apt search [package_name]
Note differences between distributions in package names, versions, and program availability.
3. Install an equivalent package with:
sudo apt install [package_name]Review the installation details, and press Y to confirm when prompted. Wait for the installation to complete.
4. Verify the package installation and test the software to ensure compatibility. Address any migration issues before moving on to the following step.
Step 4: Transfer Configuration Files and Data
After installing the required packages and applications, transfer configuration files and data from the CentOS system. Moving these critical files and data ensures the Ubuntu system mirrors the CentOS configuration.
The transfer is a two-step process:
1. Determine the files and data to transfer to Ubuntu, such as system settings, application configuration, and any custom settings. The /etc directory and its subdirectories contain program configurations, while the /home directory has user files.
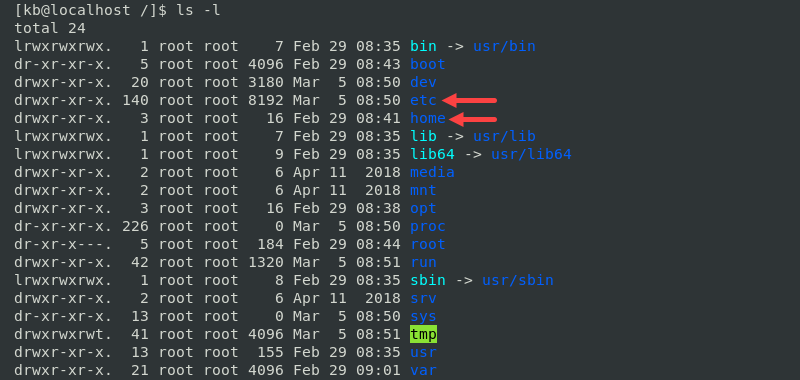
Create a comprehensive list to ensure all essential data and configurations are accounted for.
2. Copy the files and directories using a file copying or synchronization tool. For example, use the rsync command to synchronize directories recursively:
rsync -avz [source_directory] [destination_directory]The command performs a recursive transfer and preserves directory permissions and ownership to avoid access issues on Ubuntu. Replace the source directory with an appropriate location on the CentOS system and the destination with an Ubuntu location.
Note: You can also transfer files using rsync over SSH, which is especially useful for remote servers.
Step 5: Test, Verify and Clean Up
Testing and verifying ensures the Ubuntu system's data integrity, stability, and functionality. Split the process into smaller tasks, as outlined in the list below:
- Test functionality. Plan and conduct comprehensive system testing to ensure all applications and packages are functional. Use network diagnostics tools (such as ping and traceroute) to test connections. Verify that critical services are running with
systemctland use application-specific frameworks to test system operability. - Confirm data integrity. Use cryptographic checksum algorithms to verify data integrity for files and directories transferred during the CentOS to Ubuntu migration. Compare the source and destination values to detect data corruption or loss during transfers.
- Review logs. Monitor and analyze system, application, and dmesg logs for errors, warnings, and additional information. Examine log entries related to package installations and diagnose any migration issues. Use tools such as grep or awk to find relevant information and troubleshoot problems.
- Perform cleanup. Remove any temporary files, leftover configurations, and unused packages. Use package management tools (apt, dpkg) to uninstall redundant packages or remove orphaned files.
Conclusion
After reading this guide, you have a thorough overview of the CentOS to Ubuntu migration steps.
Next, grab our free Linux commands cheat sheet to streamline the migration process further.
