CentOS underwent a significant change in 2020 and announced a shift in its focus from CentOS Linux to CentOS Stream. CentOS Stream is a rolling-release distribution, diverging from the traditional CentOS model of providing a stable, downstream version of Red Hat Enterprise Linux (RHEL).
As a response, the community has created alternative distributions that maintain the traditional CentOS model. One of the prominent distributions is AlmaLinux.
This guide will show you how to migrate from CentOS to the latest AlmaLinux version.
Prerequisites
- A system running CentOS 7.
- A user account with root privileges.
- A working internet connection.
Why Choose AlmaLinux?
CentOS has been a popular Linux server distribution since its beginning in 2004. Following its acquisition by Red Hat in 2014 and IBM's acquisition of Red Hat in 2019, CentOS underwent significant changes.
It is facing its end-of-life in June 2024 and has transitioned to CentOS Stream with shorter release cycles, raising concerns about stability for enterprise usage. AlmaLinux emerged as a stable alternative for server and enterprise environments.
Note: See how CentOS differs from Rocky Linux, another viable alternative to CentOS.
Some key features of AlmaLinux are:
- Active Community. It boasts a vibrant community of developers and enthusiasts, ensuring continuous improvement.
- Strong Security. AlmaLinux prioritizes security with regular updates and built-in tools.
- Optimized Performance. Engineered for efficiency and scalability, AlmaLinux maximizes system performance.
- Broad Compatibility. It supports a wide range of software and industry-standard protocols.
- Transparent Governance. AlmaLinux follows a transparent governance model for fair decision-making.
- Scalable Infrastructure. Designed for scalable deployments, AlmaLinux meets evolving business needs.
- Comprehensive Documentation. It offers detailed documentation for easy configuration and management.
If you have decided to migrate your server from CentOS to AlmaLinux, follow the steps below.
How to Migrate CentOS 7 to AlmaLinux 8
To upgrade to AlmaLinux 9, it is first necessary to upgrade to AlmaLinux 8. Skipping major versions when performing upgrades is not recommended, as it can lead to compatibility issues and system instability.
Follow the steps below to upgrade to AlmaLinux 8:
Step 1: Update the System
Update your system to ensure everything is up to date before upgrading the OS. Run the following command:
sudo yum update -yWait for the update to finish and reboot your system. Use the GUI or run the command below:
sudo rebootStep 2: Install Migration Package
The ELevate package enables users to migrate their system between major versions of RHEL derivatives. Install ELevate, the project repository, and the appropriate GPG key by running the command below:
sudo yum install -y http://repo.almalinux.org/elevate/elevate-release-latest-el$(rpm --eval %rhel).noarch.rpmWait for the download to complete.
Step 3: Install Necessary Packages
One of the necessary packages for the migration is the Leapp tool. Leapp facilitates the migration process when transitioning between Linux distributions by handling the changes in system configuration, software packages, and other system aspects that may differ between major releases.
Install Leapp and the necessary migration data for AlmaLinux by running the command below:
sudo yum install -y leapp-upgrade leapp-data-almalinux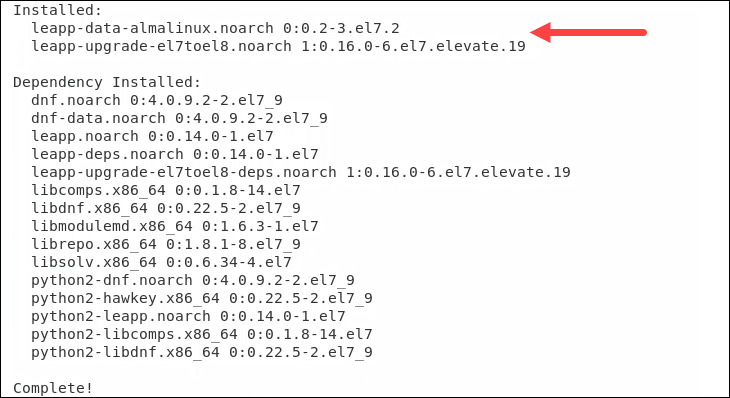
Wait for the installation to complete.
Step 4: Start Pre-Upgrade Check
Next, we must perform pre-upgrade checks and preparations before initiating a system upgrade using the Leapp tool. The tool collects system data, assesses upgradability, and generates a pre-upgrade report.
Run the command below:
sudo leapp preupgrade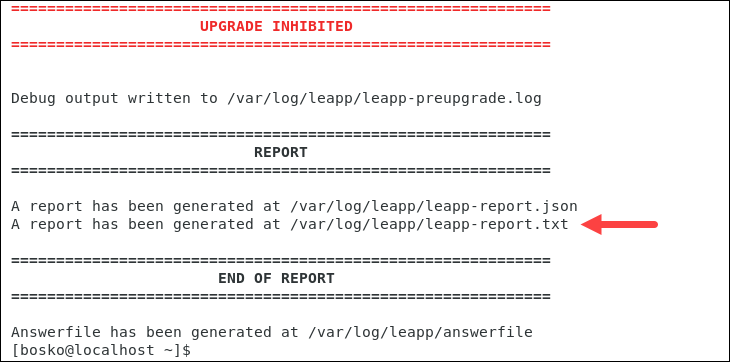
In most cases, the pre-upgrade check fails and generates a report with potential problems. The report suggests how to resolve them before the upgrade.
Open the report using cat or any text editor of your choice:
cat /var/log/leapp/leapp-report.txtIn some systems, Leapp also creates a /var/log/leapp/answerfile with true/false questions. Check if the file exists and answer all those questions to proceed with the upgrade.
The following commands are the most common fixes from the /var/log/leapp/leapp-report.txt file in CentOS 7:
sudo rmmod pata_acpiThe command removes the pata_acpi module from the kernel.
echo PermitRootLogin yes | sudo tee -a /etc/ssh/sshd_configThis command enables root login via SSH by appending the PermitRootLogin yes configuration option to the sshd_config file:
sudo leapp answer --section remove_pam_pkcs11_module_check.confirm=TrueThe command above provides answers to questions asked by the Leapp tool during the upgrade process.

In this instance, the question is related to the removal of the pam_pkcs11 module.
Note: Make sure to resolve all the issues to ensure that the upgraded system functions correctly. Inhibitor problems prevent the upgrade until you resolve them. If you encounter other issues, check the ELevate Frequent Issues page for other known issues and steps for resolving them.
Step 5: Start Upgrade
After resolving all the issues from the pre-upgrade process, you are ready to upgrade the system. Run the following command:
sudo leapp upgrade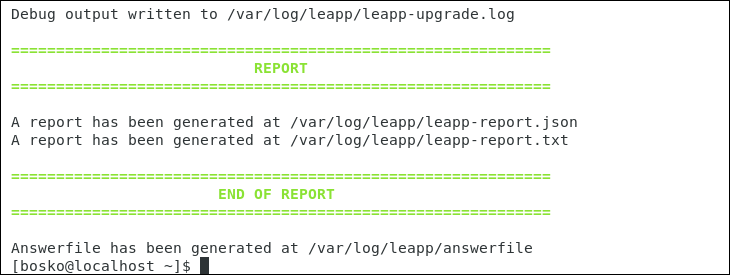
The process downloads all the required data and packages and prepares the system for upgrade. Wait for it to complete without any inhibitors, and then reboot the system:
sudo rebootA new entry appears in the GRUB loader called ELevate-Upgrade-Initramfs:
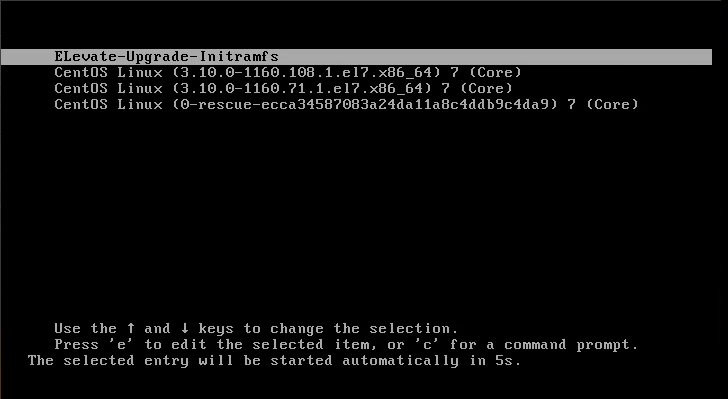
Press Enter to start the upgrade process. The console shows the upgrade progress and lets you know when it is finished.
Step 6: Check Migration Details
After the upgrade, log in to the system and check if the migration was successful. Run the following command to verify that the current OS is the one you need:
cat /etc/os-release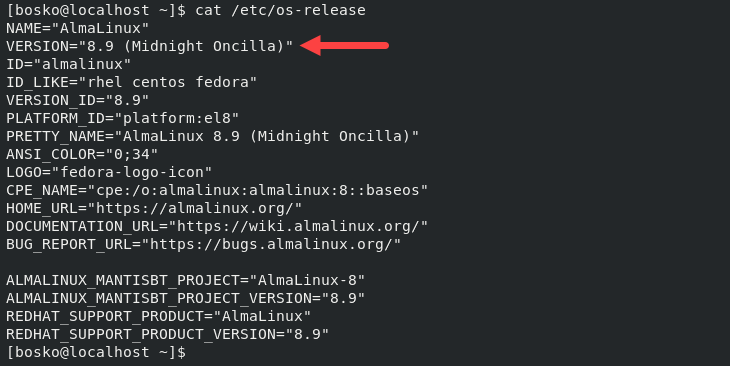
Upgrade AlmaLinux 8 to AlmaLinux 9
After upgrading to AlmaLinux 8 and cleaning up the unnecessary packages, you are ready to upgrade to AlmaLinux 9. Follow the steps in the sections below.
Step 1: Prepare System for Migration
After a successful migration to AlmaLinux 8, prepare your system for migrating to AlmaLinux 9 by configuring these system settings:
1. Open the /etc/yum.conf file as an administrator and remove everything from the exclude line:
sudo nano /etc/yum.conf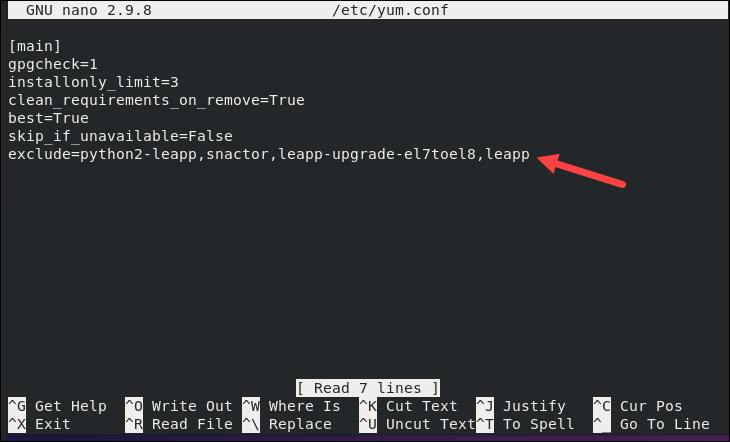
2. Save the file and exit the editor.
3. Do the same for the /etc/dnf/dnf.conf file:
sudo nano /etc/dnf/dnf.conf4. Clean up the system by updating or removing the packages left from the previous OS version. Run the following command to list the packages:
rpm -qa | grep el7
The output shows any leftover CentOS packages. Remove the packages or update them using your preferred package manager.
5. Use the rm command to delete the /root/tmp_leapp_py3 directory if it exists:
sudo rm -fr /root/tmp_leapp_py36. Run the command below to delete any cached package files and metadata downloaded previously:
sudo dnf clean allThe command frees up disk space and ensures that dnf fetches fresh metadata from the repositories the next time you run it.
Step 2: Install ELevate Package
Again, install the ELevate package on the new system with the corresponding repository and GPG key:
sudo yum install -y http://repo.almalinux.org/elevate/elevate-release-latest-el$(rpm --eval %rhel).noarch.rpmStep 3: Install Leapp
We will use the Leapp utility again to upgrade to AlmaLinux 9. Install the tool and migration data using the following command:
sudo yum install -y leapp-upgrade leapp-data-almalinuxStep 4: Start Pre-Upgrade
Start a pre-upgrade check using Leapp to assess upgradability and generate a pre-upgrade report:
sudo leapp preupgradeThe pre-upgrade check fails as the system does not yet meet all the requirements for migration. The Leapp utility creates a report file containing a list of migration inhibitors that must be resolved. Open the file to check what needs to be fixed:
nano /var/log/leapp/leapp-report.txtThe following fixes are the most common ones for RHEL8-based OSes:
sudo sed -i "s/^AllowZoneDrifting=.*/AllowZoneDrifting=no/" /etc/firewalld/firewalld.confThe command above edits the firewalld.conf file to set the AllowZoneDrifting parameter value to no. The parameter determines whether firewalld allows network zones to drift from their expected settings, which the command above disables.
sudo leapp answer --section check_vdo.no_vdo_devices=TrueThis command indicates that no VDO devices are present as part of the upgrade process, allowing you to automate the upgrade process.
Again, check the Frequent Issues page if you encounter problems that the commands above do not solve.
Step 5: Start Upgrade
Start the upgrade to AlmaLinux 9 by running the command below:
sudo leapp upgrade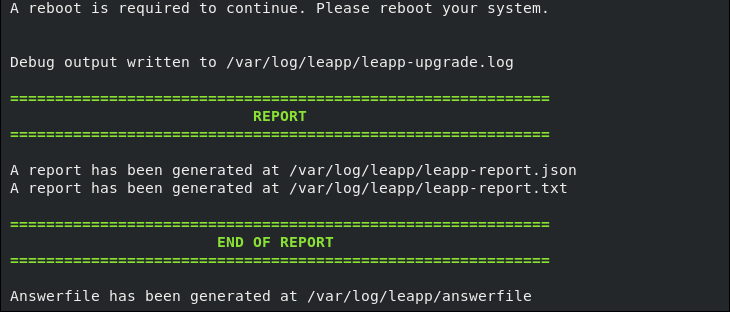
The process will take some time as it needs to download the necessary packages and data for the migration. After it is completed, reboot the system to finish the upgrade:
sudo rebootThe GRUB loader shows a new entry called ELevate-Upgrade-Initramfs and automatically boots into it:
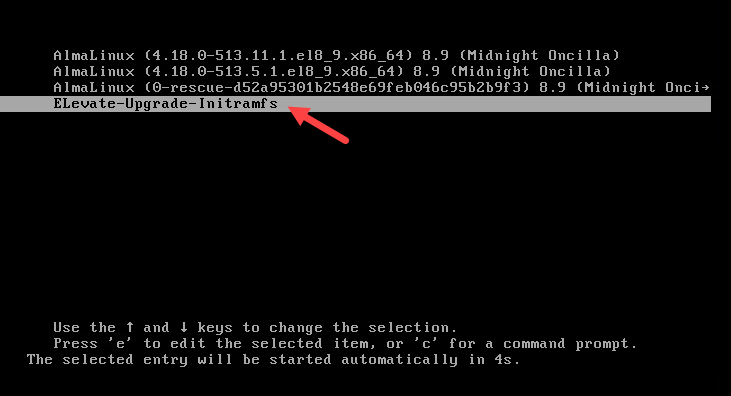
After it boots, the upgrade process starts, and the console shows the update progress. After the upgrade completes, log in to the system and check if the upgrade was successful:
cat /etc/os-release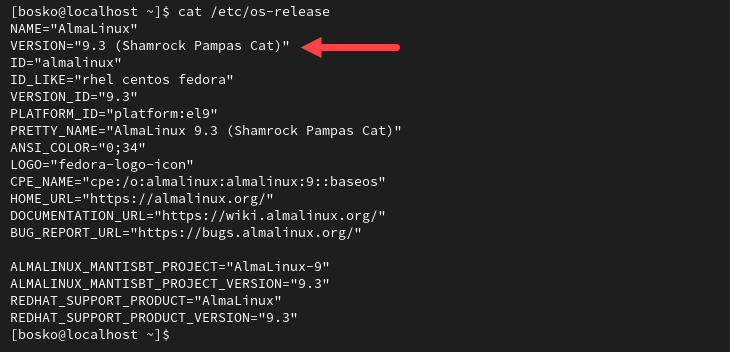
If the upgrade is successful, clean up the system by following the same process as before. To check for any packages left from the previous OS, run:
rpm -qa | grep el8Consider deleting or upgrading the packages manually and cleaning the dnf cache. You can also delete the packages related to the ELevate tool. To list the packages, enter:
rpm -qa | grep elevate
Conclusion
By following the steps outlined in this guide and completing the pre-upgrade checklist, you should have your CentOS system upgraded to AlmaLinux 9. Since CentOS reaches its end of life in 2024, most businesses will seek alternatives for CentOS Stream, and AlmaLinux is one of them.
Next, see how to migrate CentOS 7 to Rocky Linux 9, another great alternative, or upgrade Rocky 8 to Rocky 9 if you already have it installed.
