In Linux, viewing the contents of a file is a fundamental task for system administration, programming, and general file management. Whether you need to inspect configuration files, check logs, or verify data, Linux provides multiple commands and tools to efficiently read files.
This article will cover the most common methods for displaying file contents.

How to View File Contents in Linux
Linux provides multiple command-line methods for displaying file contents. Some commands are designed to quickly view the entire file, while others enable paginated navigation, pattern searching, or selective line display.
Before exploring specific commands, create a simple multi-line text file using the echo command:
echo -e "Line 1: Welcome to Linux\nLine 2: This is an example file\nLine 3: You can view it using commands\nLine 4: Each command has different features\nLine 5: End of file" > example.txtThis command doesn't produce output, but creates a file named example.txt with multiple lines.
The following sections explain the most common methods with examples.
Show File Contents with cat or tac
The cat command is the simplest way to display the entire contents of a file in the terminal. It is ideal for small files or when you want to quickly view everything at once. Its counterpart, tac, shows the file contents in reverse order, which is useful for checking recent entries at the end of logs.
The command syntax is:
cat [file_name]tac [file_name] To view the contents of example.txt from top to bottom, run:
cat example.txt
The output displays all five lines in the order they appear in the file. To see the same file in reverse, run:
tac example.txt
The command shows the lines starting from the last line to the first.
Show File Contents with grep
The grep command is used to search for specific text patterns within a file. Instead of displaying the entire file, it shows only the lines that match the search term, making it ideal for quickly locating information.
The command syntax is:
grep [pattern] [file_name]To search for the word Linux in example.txt, run:
grep Linux example.txt
The output displays only the line or lines that contain the word Linux, filtering out everything else.
You can also perform case-insensitive searches using the -i option, or show line numbers with -n to quickly identify where the match occurs.
For example, to search for linux without worrying about case and display the matching line numbers, run:
grep -in linux example.txt
This command highlights any matches regardless of case and shows the line number alongside the result.
Show File Contents with awk
The awk command is a powerful tool for processing and displaying text from files. It is particularly useful for extracting specific columns, filtering lines based on patterns, or performing simple data transformations.
The command syntax is:
awk [options] '[pattern]{action}' [file_name]To display all lines of example.txt, run:
awk '{print $0}' example.txt
The output shows each line of the file, similar to cat, because $0 represents the entire line.
You can also extract specific columns or fields. For example, to display only the third word of each line in example.txt, run:
awk '{print $3}' example.txt
This shows only the third word from each line, making it useful for structured text or column-based files.
Show File Contents with sed
The sed command is a stream editor that can display, modify, or filter text in a file. It is ideal for showing specific lines or ranges without opening the entire file in a text editor.
The command syntax is:
sed [options] '[address]{command}' [file_name]To display all lines of example.txt, run:
sed '' example.txt
The output shows the full file content, similar to cat.
You can also display specific line ranges. For example, to view only lines two through four of example.txt, run:
sed -n '2,4p' example.txt
This prints only lines two, three, and four, which is helpful for focusing on a particular section of a file.
Show File Contents with nl
The nl command is used to display a file with line numbers added. This is helpful when you need to reference specific lines or track the structure of a file.
The command syntax is:
nl [options] [file_name]To view example.txt with line numbers, run:
nl example.txt
The output shows each line of the file preceded by its line number, making it easy to identify the position of each entry.
You can also customize numbering options, such as starting from a specific number or skipping blank lines, using appropriate nl flags.
Show File Contents with head
The head command is useful for quickly viewing the beginning of a file, which is useful for checking headers, configuration settings, or the first few lines of a log. By default, it displays the first 10 lines, but you can adjust the number as needed.
Since the previous file for testing, example.txt, only has five lines, it doesn't effectively demonstrate this and some of the following commands. We will create a longer sample file to illustrate partial output and scrolling behavior.
Generate it with the following bash for loop:
for i in {1..20}; do echo "Line $i: Example content for testing"; done > long_example.txtThis command creates a file named long_example.txt containing 20 lines. Each line is numbered and has sample text, which makes it easier to demonstrate commands that show only the start, end, or pages of a file.
The head command syntax is:
head [options] [file_name]To see the first few lines of long_example.txt, run:
head long_example.txt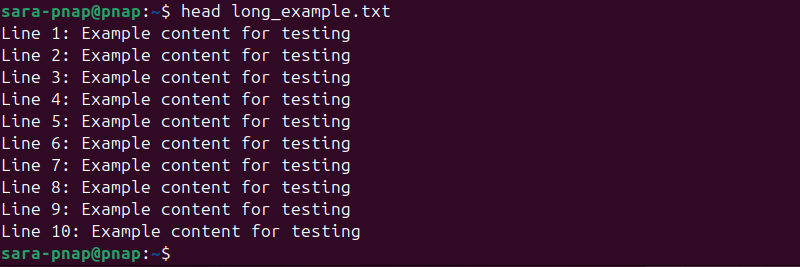
The output shows the top lines of the file, allowing you to inspect the beginning without scrolling. By default, it displays the first 10 lines.
You can also specify the number of lines to display using -n. For example, to display only the first three lines, run:
head -n 3 long_example.txt
Show File Contents with tail
The tail command is used to display the end of a file. It is helpful when checking recent log entries or the last part of long text files. By default, it shows the last 10 lines.
The command syntax is:
tail [options] [file_name]To view the final lines of long_example.txt, run:
tail long_example.txt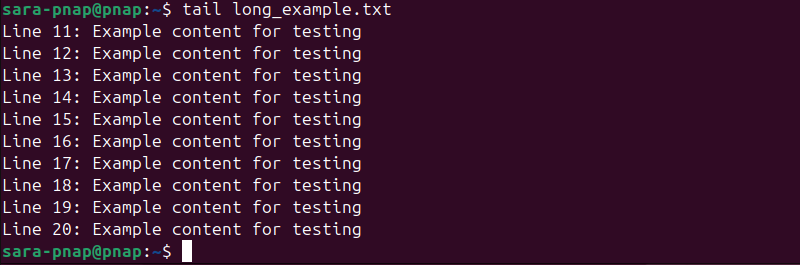
The output reveals the bottom part of the file, showing the last 10 lines of the 20-line file. This makes it easy to inspect recent entries without scrolling through the entire file.
You can also control how many lines appear by adding the -n option. For example, to show only the last two lines, run:
tail -n 2 long_example.txt
Show File Contents with more or less
The more and less commands are designed for viewing long files that don't fit on one screen. They let you scroll through the content page by page instead of dumping everything at once. While more is older and simpler, less offers more navigation features and is generally preferred.
The command syntax is:
more [file_name]less [file_name]To open long_example.txt with more, run:
more long_example.txt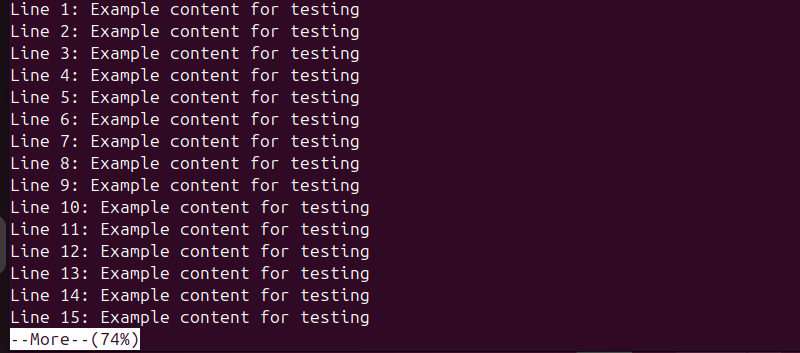
The output displays the file one screen at a time. You can press the spacebar to move forward and view the next set of lines, which is useful for long files.
To view the same file with less, run:
less long_example.txt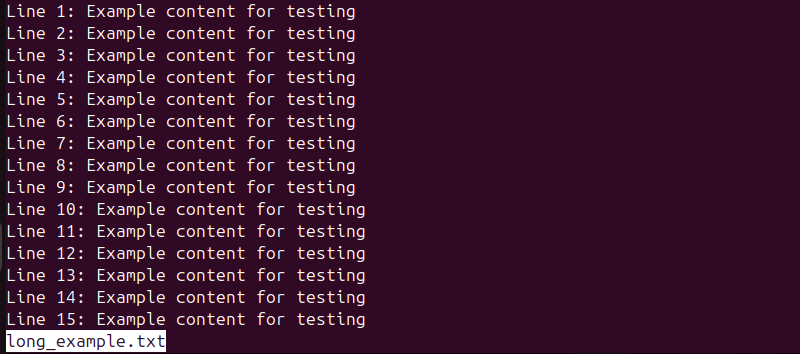
This opens the file in a scrollable viewer where you can move up and down using the arrow keys, making it flexible for navigating larger files.
Show File Contents with Text Editors
Linux offers multiple text editors for viewing and editing files, including Vim, Gedit, and Nano. Among these, Nano is beginner-friendly and ideal for quickly opening and reading files without complex commands.
The command syntax is:
nano [file_name]To open example.txt in Nano, run:
nano example.txt
The output opens the file in an interactive editor within the terminal. You can scroll through the content using the arrow keys.
While in Nano, you can also make edits, search for text, or save changes. To exit, press Ctrl + X. This method is particularly useful when you want both viewing and editing capabilities in a single tool.
Conclusion
This article explained how to show the contents of a file in Linux using different terminal commands. It also elaborated on how to view files using a text editor.
Next, learn how to determine the type and content of a file in Linux using the file command.