Docker is a platform enabling users to package and run applications in containers. Containers are isolated, similar to virtual machines, but more portable and resource-friendly. The isolation allows for the execution of many containers simultaneously on a single host.
Docker uses a client-server architecture and relies on the Docker daemon to manage the containers.
In this tutorial, you will learn to install and use Docker on Ubuntu 20.04.

Prerequisites
- Ubuntu 20.04 installed
- A user account with administrator privileges.
- Access to the terminal (Ctrl + Alt + T).
Installing Docker on Ubuntu
Ubuntu is the number one platform for managing Docker or Kubernetes containers. This is because Ubuntu runs the containers at scale, it is fast, secure, and open-source, powering millions of machines worldwide.
This article will cover two options for installing Docker on Ubuntu:
- From the official Docker repository - ensuring the latest Docker version.
- From the default Ubuntu repositories - providing a simpler installation.
Follow the steps below and install Docker on Ubuntu 20.04 using the method of your choice.
Important: Make sure to remove any older Docker installations before installing a new one. Removing previous Docker versions doesn't delete the images, containers, volumes, or networks you have created. Run the following command to uninstall previous versions:
sudo apt-get remove docker docker-engine docker.io containerd runcInstalling Docker from the Official Repository (Option 1)
Install Docker from the official Docker repository to ensure you get the latest stable program version. To access the official Docker repository, add the new package source to Ubuntu and then install Docker. Follow the steps below:
Step 1: Update the Package Repository
Run the following command to update the system's package repository and ensure the latest prerequisite packages are installed:
sudo apt updateWhen prompted, enter your root password and press Enter to proceed with the update.
Step 2: Install Prerequisite Packages
The apt package manager requires a few prerequisite packages on the system to use packages over HTTPS. Run the following command to allow Ubuntu to access the Docker repositories over HTTPS:
sudo apt install apt-transport-https ca-certificates curl software-properties-common -y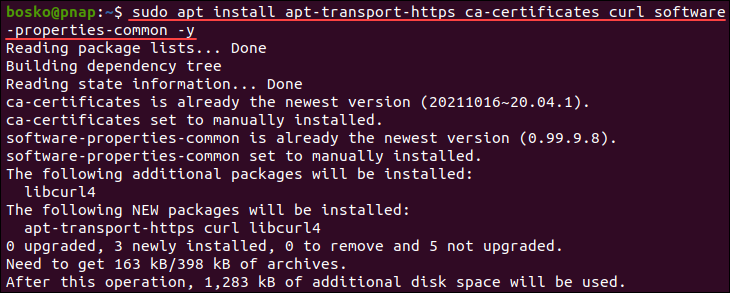
The command above:
- Allows
aptto transfer files and data over https. - Allows the system to check security certificates.
- Installs curl, a data-transfer utility.
- Adds scripts for software management.
Step 3: Add GPG Key
A GPG key verifies the authenticity of a software package. Add the Docker repository GPG key to your system by running:
curl -fsSL https://download.docker.com/linux/ubuntu/gpg | sudo apt-key add -
The output should state OK, verifying the authenticity.
Step 4: Add Docker Repository
Run the following command to add the Docker repository to apt sources:
sudo add-apt-repository "deb [arch=amd64] https://download.docker.com/linux/ubuntu $(lsb_release -cs) stable"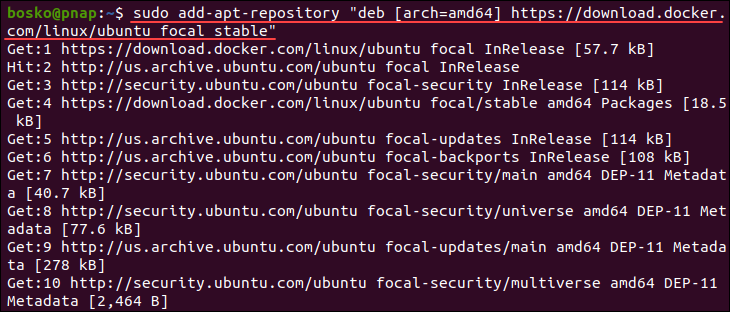
The command adds the official Docker repository and updates the package database with the latest Docker packages.
Step 5: Specify Installation Source
Execute the apt-cache command to ensure the Docker installation source is the Docker repository, not the Ubuntu repository. The apt-cache command queries the package cache of the apt package manager for the Docker packages we have previously added.
Run the following command:
apt-cache policy docker-ce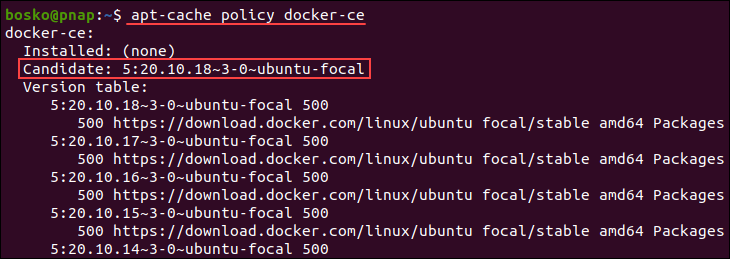
The output states which version is the latest in the added source repository.
Step 6: Install Docker
Install Docker by running:
sudo apt install docker-ce -y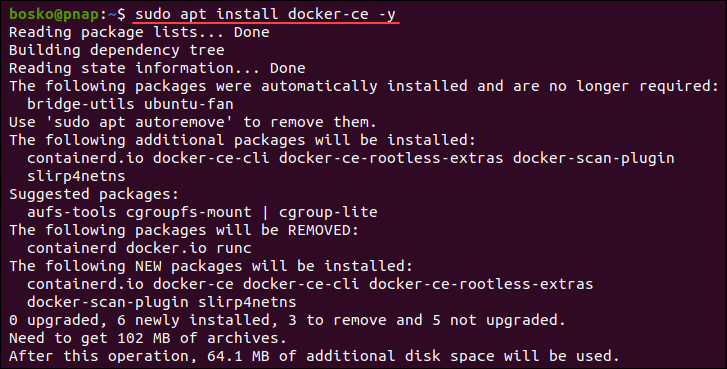
Wait for the installation process to complete.
Step 7: Check Docker Status
Check if Docker is installed, the daemon started, and the process is enabled to start on boot. Run the following command:
sudo systemctl status docker
The output states that the Docker daemon is up and running.
Installing Docker from the Default Repositories (Option 2)
Another way to install Docker on Ubuntu is to use the default Ubuntu repository. Although the installation process is more straightforward, the Docker package may be outdated. If you don't care about having the latest Docker version, follow the steps below and install Docker using the default repository.
Step 1: Update the Repository
Ensure that the local system package repository is updated by running:
sudo apt updateEnter the root password when prompted and wait for the process to finish.
Step 2: Install Docker
Run the following command to install Docker:
sudo apt install docker.io -y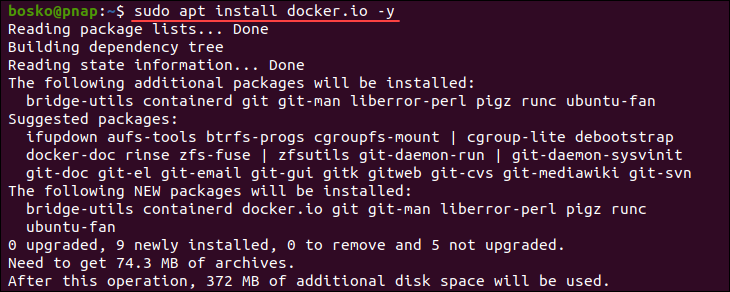
Specifying the -y flag automatically answers yes to any prompt during the installation.
Step 3: Install Dependencies
Install all the Docker dependency packages by running the following command:
sudo snap install docker
The command installs all the dependencies using the Snap package manager.
Step 4: Check Installation
Check whether Docker was properly installed by running the status command or checking the program version. To see the Docker daemon status, run:
sudo systemctl status dockerAlternatively, check the program version by running:
docker --version
How to Use Docker on Ubuntu
All Docker information, including the syntax, options, and commands, is available by running the docker command in the terminal:
docker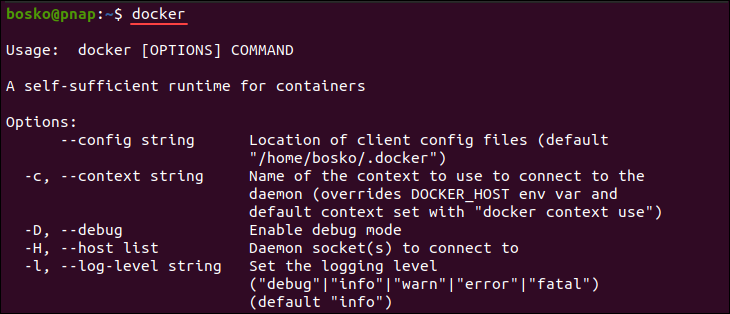
Start using Docker by downloading Docker images, creating containers, and managing Docker volumes.
Important: Docker commands can only be run with the sudo prefix on Ubuntu.
Working With Docker Images
Docker images are the base for building Docker containers. The images are located on Docker Hub, which is a Docker repository. The repository allows all users to host their images on Docker hub, resulting in many images to choose from, including applications and Linux distributions.
The sections below show different ways of working with Docker images.
Note: See how to update a Docker image or container to the latest version available.
Search for Docker Images
Search for available images on Docker Hub using the docker search command. The syntax is:
sudo docker search [keyword]For [keyword], specify the keyword you want to search for. For example, to show all Ubuntu images, run:
sudo docker search ubuntu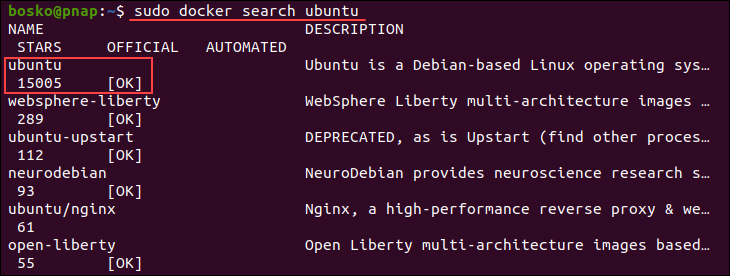
The output is a list of all images containing the Ubuntu keyword. If the OFFICIAL column contains the [OK] parameter, the image was uploaded by the official company that developed the project.
Pull a Docker Image
After deciding which image you want, download it using the pull option. The syntax is:
sudo docker pull [image-name]For example, download the official Ubuntu image by running:
sudo docker pull ubuntu
After downloading the image, use it to spin up a container. Alternatively, trying to create a container from an image that hasn't been downloaded causes Docker to download the image first and then create the container.
See Downloaded Images
Check which images you have downloaded by running:
sudo docker images
The command outputs a list of all downloaded images on your machine. In our case, it is a Ubuntu and MySQL Docker image.
Working With Docker Containers
A Docker container is an isolated virtual environment created from a Docker image. Use an image you previously downloaded or specify its name in the docker run command to automatically download the image and create a container.
For example, use the hello-world image to download a test image and spin up a container. Run the following command:
sudo docker run hello-world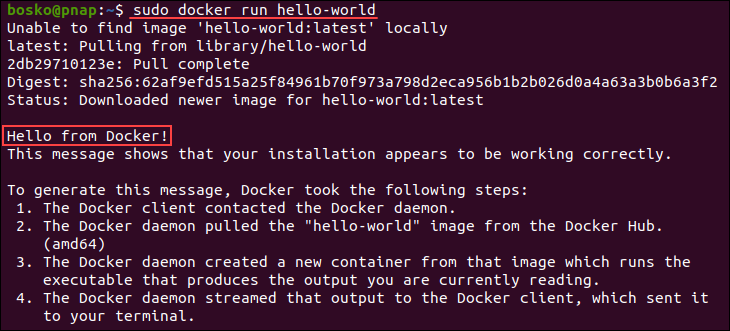
The command instructs Docker to download the image from Docker Hub and spin up a container. After creation, the "Hello from Docker" message appears, along with the explanation of how the container works, and then Docker shuts it down.
Note: Check out the best container practices in How to Manage Docker Containers.
Run a Docker Container
Like in the test container created in the previous section, running a Docker container utilizes the run subcommand. The syntax for creating a new Docker container is as follows:
sudo docker run [image-name] For [image-name], specify the name of the image to use as a base for the container. When creating a new container, Docker assigns it a unique name. Alternatively, start a new container and give it a name of your choice by passing the --name switch:
sudo docker run --name [container-name] [image-name]Note: The docker run command is an alias for docker container run. Before Docker version 1.13, only the docker run command was used, but later it was refactored to have the form docker [COMMAND] [SUBCOMMAND], where the [COMMAND] is container, and the [SUBCOMMAND] is run.
For example, run the following command to create a container using the Ubuntu image we pulled earlier:
sudo docker run ubuntu
The command creates a container from the specified image, but it is in non-interactive mode. To obtain interactive shell access to the container, specify the -i and -t switches. For example:
sudo docker run -it ubuntu
The terminal changes, stating that it is operating within the container, identifying it via the container ID. Use the container ID to remove, start, or stop the container.
After running the container in interactive mode, pass any command normally to interact with the system. Also, the access is root, so there is no need for sudo. Any changes made inside the container apply only to that container.
Exit the container by running the exit command in the prompt.
Note: For additional security, learn how to SSH into a running Docker container.
View Docker Containers
An active Docker container is a container that is currently running. Listing containers is useful as it outputs the unique ID and name required when starting, stopping, or removing a container.
To see only the active Docker containers, run:
sudo docker ps
The command outputs a list of active containers. If there are no containers in the list, they have all been shut down, but they still exist in the system.
To list all containers, including the inactive ones, add the -a flag:
sudo docker ps -a
The command outputs all existing containers and their details, including the container ID, image, command, creation time, the status, ports, and the unique name.
Alternatively, show only the latest container by passing the -l flag:
sudo docker ps -l
Start a Docker Container
Start a stopped container using the docker start command. The syntax is:
sudo docker start [container-ID | container-name]Provide either the container ID or the container name. The container name is a unique name that Docker assigns to the container during creation. Obtain the ID and name by listing all containers.
For example, the following command starts the Ubuntu container we previously created:
sudo docker start 5f9478691970Stop a Docker Container
Stop a running Docker container using the docker stop command. The syntax is:
sudo docker stop [container-ID | container-name]For example, to stop the running Ubuntu container, run:
sudo docker stop 5f9478691970Remove a Docker Container
Remove an unnecessary Docker container using the docker rm command. The syntax is:
sudo docker rm [container-ID | container-name]For example, the following command removes the hello-world test container we previously created:
sudo docker rm silly_hamiltonNote: Pass the --rm switch when creating a container to remove the container automatically when stopped.
Working With Docker Volumes
A Docker volume is a filesystem mechanism allowing users to preserve data generated and used by Docker containers. The volumes ensure data persistence and provide a better alternative to persisting data in a container's writable layer because they don't increase the Docker container size.
Note: See how to keep the Docker image size small.
Use Docker volumes for databases or other stateful applications. Since the volumes are stored on the host, they don't depend on the container but allow for easy data backups and sharing between multiple containers.
Create a Docker Volume
Create a Docker volume using the following syntax:
sudo docker volume create [volume_name]For [volume_name], specify a unique name for your volume.
For example:
sudo docker volume create example-volume
Remove a Docker Volume
Remove a Docker volume using the following syntax:
sudo docker volume rm [volume_name]For example:
sudo docker volume rm example-volumeCheck out our tutorial for detailed information and instructions on using Docker volumes.
Docker Network Commands
Networking is very tightly integrated with Docker and running Docker containers. Docker networking commands allow users to create and manage their networks within a container. The following table shows the basic subcommands used for Docker network management:
| Command | Description |
|---|---|
docker network connect [network-name] | Connects a container to a network. |
docker network create [network-name] | Creates a new network. |
docker network disconnect [network-name] | Disconnects a container from the specified network. |
docker network inspect [network-name] | Outputs detailed information on the specified network or networks. |
docker network ls | Lists all networks in a container. |
docker network prune | Removes all unused networks in a container. |
docker network rm [network-name] | Removes the specified network or networks. |
For example, run the following command to list all existing networks:
sudo docker network ls
Since this is a fresh installation, the output shows only a few automatically created networks. The information includes the unique network ID, an arbitrary name for each network, the network driver, and the network scope.
To obtain more detail on a particular network, use the inspect subcommand. For example, to get detailed information on the bridge network, run:
sudo docker network inspect bridge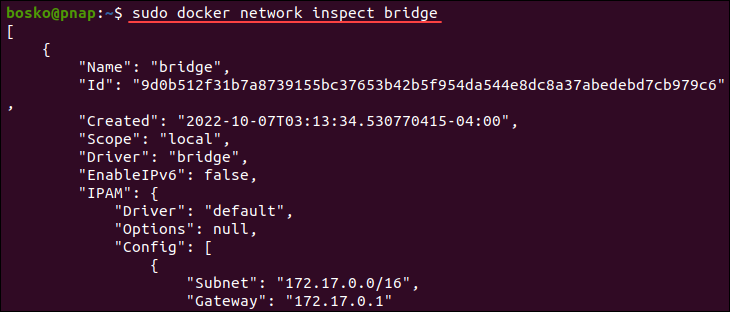
The output includes details such as all the containers attached to the network, the particular bridge it is connected to, and much more.
For more detail on Docker commands, refer to our Docker commands tutorial, which includes a downloadable cheat sheet with all the important commands in one place.
Conclusion
This guide showed how to install Docker on Ubuntu 20.04 and start using Docker to download images and spin up containers. For more Docker tutorials, see the How to Uninstall Docker on Ubuntu, Docker cmd and entrypoint commands, or learn to run the ELK stack on Docker.
