Ansible is an open-source IaC tool for infrastructure automation and application deployment. The product uses Ansible playbooks to create modules that define the system's desired state and push them to the machines in the inventory.
This article will show you how to install Ansible on Rocky Linux, a popular, enterprise-ready CentOS alternative.

Prerequisites
- Two or more systems running Rocky Linux.
- SSH access on all the systems.
- Python installed on all the systems (version 2.7 or 3.5 - 3.11)
- Python 3.9 or newer and Pip installed on the control node.
Install Ansible
The official Ansible installation procedure uses the pip package manager. However, the Ansible packages are also available in the AppStream base repository, so you can install them using DNF.
The following sections provide instructions for both installation methods.
Via pip
Pip is the package installer for Python and the recommended method for installing Ansible. Follow the steps below to install Ansible using pip.
1. Install the dependencies:
pip3 install setuptools-rust wheel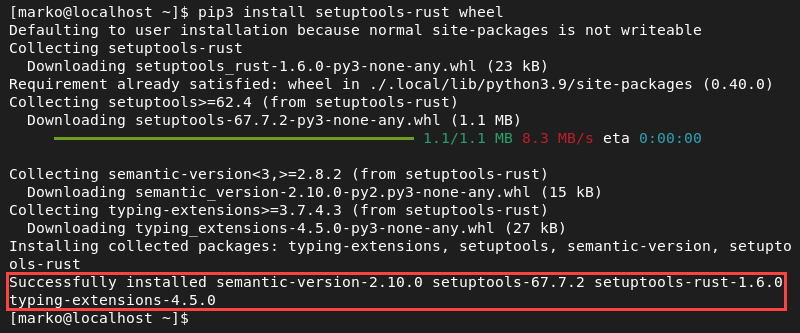
2. Upgrade pip by typing:
pip3 install --upgrade pip3. Install the main Ansible package:
pip3 install ansiblePip completes the installation and reports on the success.

Note: Alternatively, run only the core Ansible functionalities by installing the ansible-core package:
pip3 install ansible-core
You can now configure Ansible hosts.
Via dnf Command
Like many other RHEL-based distributions, Rocky Linux uses DNF as the default package management system. Use the steps below to install Ansible with DNF.
1. Update the repository information:
sudo dnf –y update
Note: Ansible packages are in the default AppStream package repository as of Rocky Linux 9. If you still use Rocky Linux 8, add the EPEL repository before executing the command to install Ansible. To add the repository, type:
sudo dnf -y install epel-release
2. Install the Ansible package:
sudo dnf -y install ansibleThe output confirms the success of the operation.

If you want to install the core package only, type:
sudo dnf -y install ansible-coreWith Ansible installed, proceed to host configuration.
Configure Ansible Hosts
The computer running an Ansible installation is called the control node. It uses SSH to pass Ansible modules to inventory machines. The following section explains how to configure the communication between the control node and the inventory.
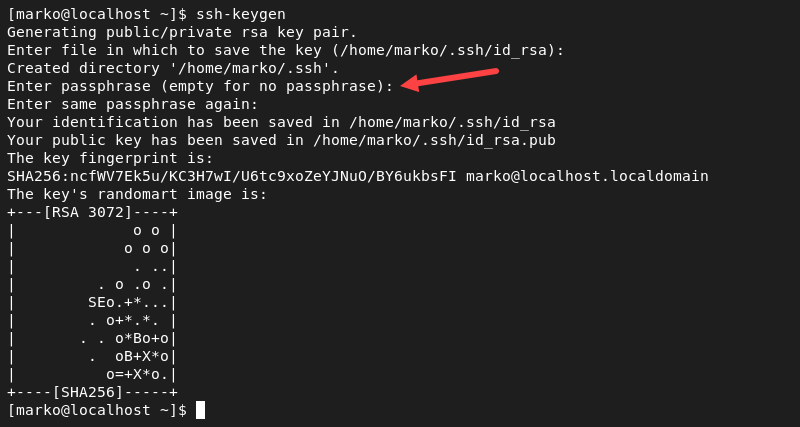
1. Generate an SSH key pair on the control node.
ssh-keygenWhen prompted, leave the passphrase empty by pressing Enter.
2. Copy the public key information to all Ansible hosts:
ssh-copy-id -i ~/.ssh/id_rsa.pub [username]@[host-ip]When prompted, enter yes.

Note: Run the ifconfig command on a host to discover its IP address.
3. Enter the password of the user on the inventory host.

4. Create a new project directory on the control node and navigate to it:
mkdir test && cd test5. Use a text editor to create an INI file for the inventory data:
nano inventory.ini6. Add the hosts' information to the file. Use the following format:
[group1]
[alias] ansible_host=[ip-address] ansible_user=[username]

[group2]
[alias] ansible_host=[ip-address] ansible_user=[username]

...
The screenshot below shows an example inventory file using the data from this article.

Save the file and exit.
Note: Alternatively, you can write the inventory file as a YAML:
[group1]:
  hosts:
    [alias]:
      ansible_host: [ip-address]
      ansible_user: [username]
Test Installation
To ensure the Ansible installation is functional, test the connection by pinging inventory hosts and deploying a simple test app.
1. Ping hosts to check the connectivity:
ansible -i [inventory-file] all -m ping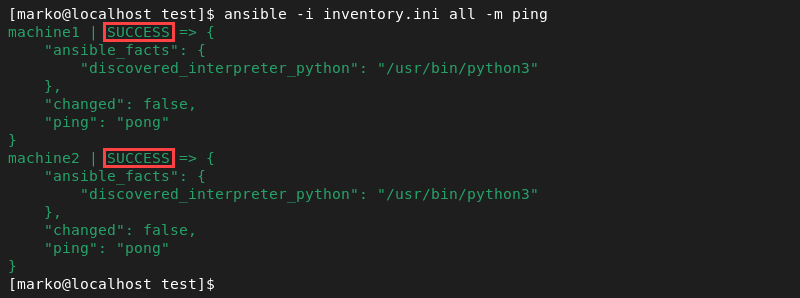
2. Create a YAML file for a test playbook:
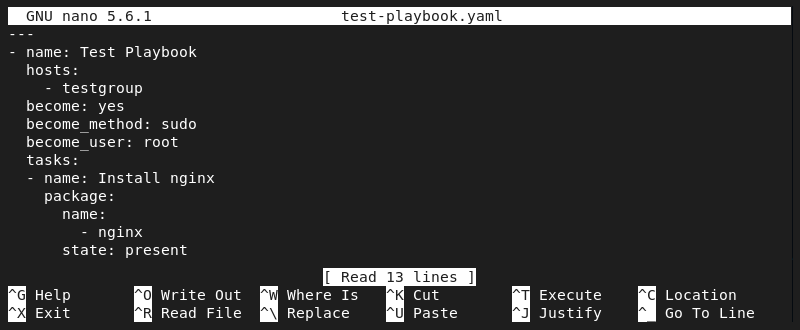
nano test-playbook.yaml3. Copy the code below and paste it into the file:
---
- name: Test Playbook
  hosts:
    - testgroup
  become: yes
  become_method: sudo
  become_user: root
  tasks:
  - name: Install nginx
    package:
      name:
	- nginx
      state: present
The code tells Ansible to log in as root and install the Nginx server on each machine belonging to the testgroup inventory group.
Save the file and exit.
4. Apply the playbook to the hosts listed in the inventory file. The -kK option tells Ansible to prompt for the remote user password.
ansible-playbook -i [inventory-file] test-playbook.yaml -kKOnce Ansible finishes all the requested operations, it prints the report in the PLAY RECAP section:
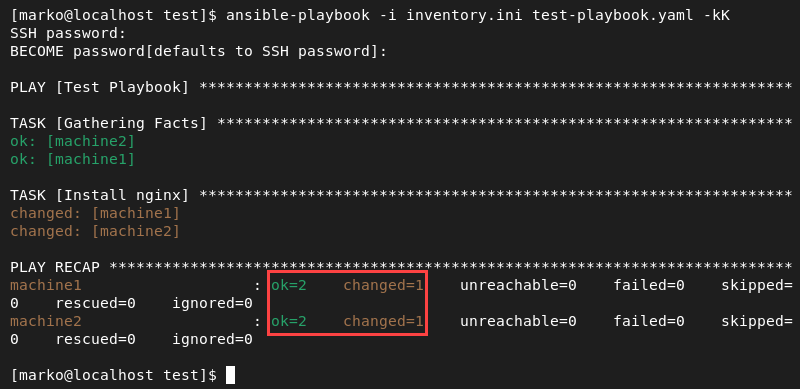
5. Switch to one of the inventory hosts, and execute an nginx command to confirm that Ansible has completed the installation successfully. For example, use the command that shows the current nginx version:
nginx -vThe output confirms that nginx exists on the system.

Note: phoenixNAP's Bare Metal Cloud comes with integrated support for Ansible and other popular Infrastructure-as-Code tools.
Conclusion
The article showed you how to install the Ansible automation engine on Rocky Linux.
Next, you may want to learn how to install Kubernetes on Rocky Linux or compare Ansible with other IaC tools such as Terraform and SaltStack.


