Data management and storage optimization are essential for creating a robust backup solution. Veeam Backup & Replication enables offloading data to cloud object storage.
phoenixNAP's object storage is an S3-compatible service that integrates with Veeam, enabling offloading virtual machine (VM) copies to improve local data redundancy. Creating redundancies prevents permanent data loss and is essential to a successful backup strategy.
This guide shows how to configure Veeam to offload data to object storage.
Prerequisites
- Veeam Backup & Replication installed.
- Access to a phoenixNAP object storage account.
Step 1: Set up Object Storage
Utilizing object storage and configuring Veeam requires creating or accessing the storage data (bucket name, access key, and secret key):
1. Log in to the Object Storage page using your credentials.
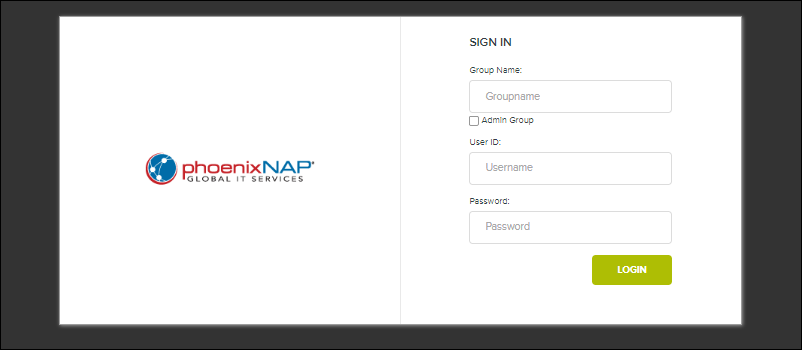
The link is available on the BMC portal Storage page.
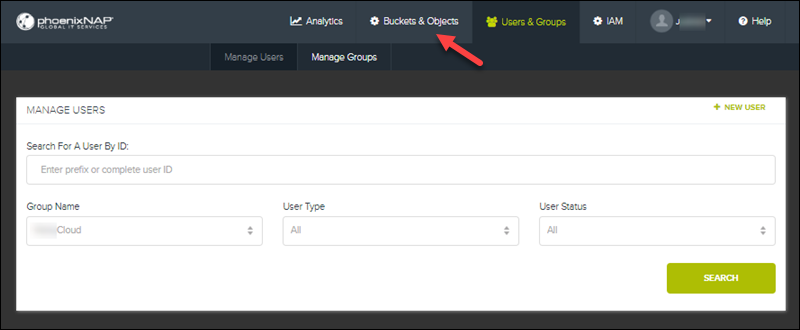
2. Navigate to the Buckets & Objects tab.
3. If you do not have an existing bucket, click Add New Bucket. Provide a unique bucket name, choose a region, and select the storage policy. Otherwise, note an existing bucket's name from the list and skip this step.
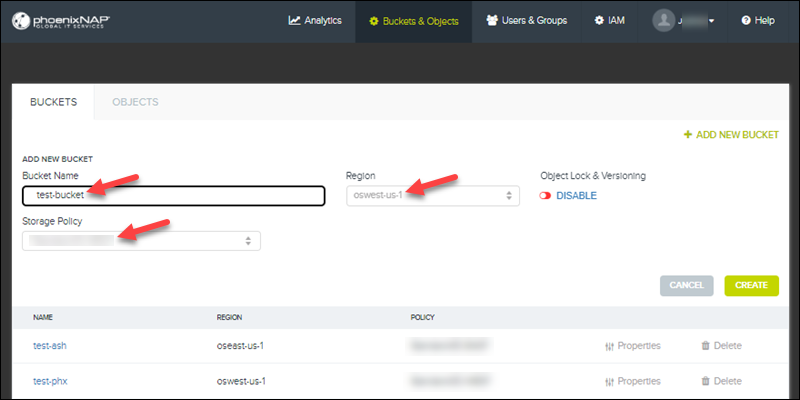
4. Once ready, click Create. The bucket appears on the list. Note the bucket name and region, which are required when configuring Veeam.
5. Access the User account->Security Credentials page from the top navbar.
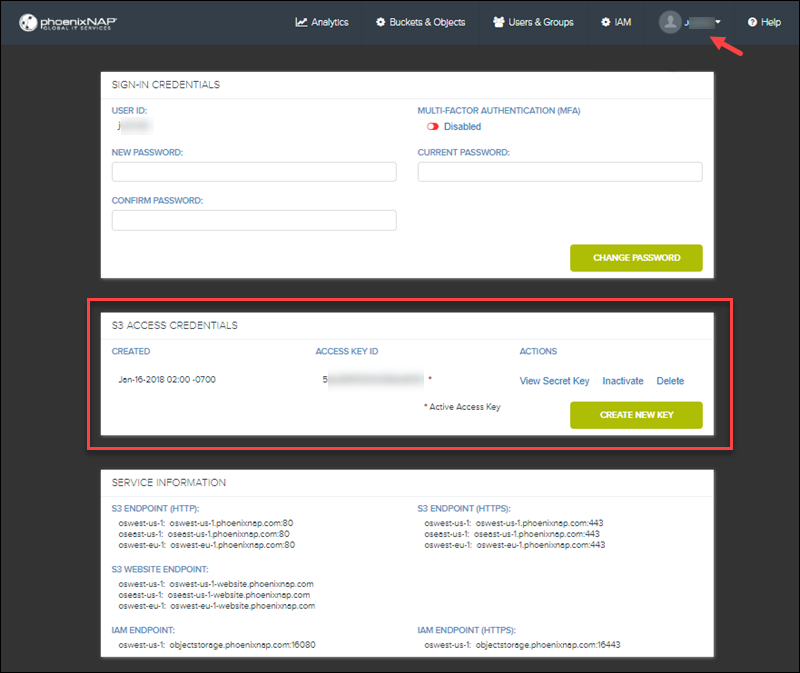
The page contains the S3 Access Credentials (access key and secret). Save both parameters and continue to the following section.
Note: For more information about the object storage service (OSS) API, see our OSS API guide.
Step 2: Add Object Storage as a Backup Repository
To add phoenixNAP object storage as a backup repository, open the Veeam Backup & Replication console and do the following in the Backup Infrastructure section:
1. Right-click Backup Repositories -> Add Backup Repository.
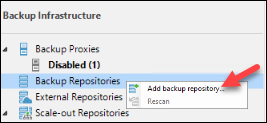
A backup repository is a server where Veeam stores backup files, copies, and VM metadata.
2. Choose the S3 Compatible as the object storage type.

3. Select the S3 Compatible as the S3 compatible storage type.

The action opens the new object storage repository wizard.
4. Specify the object storage name and provide a description.
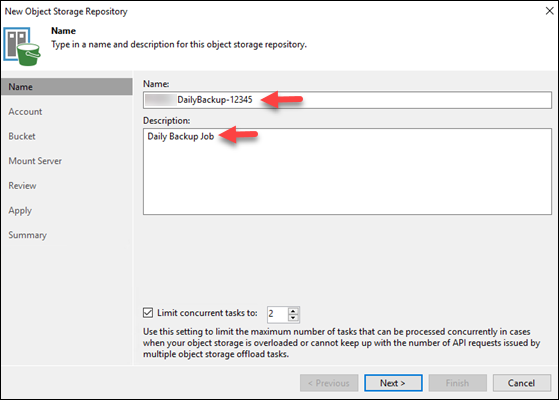
5. Enter the object storage details. Provide the service point URL and region. Add the S3 access credentials and choose the connection mode.
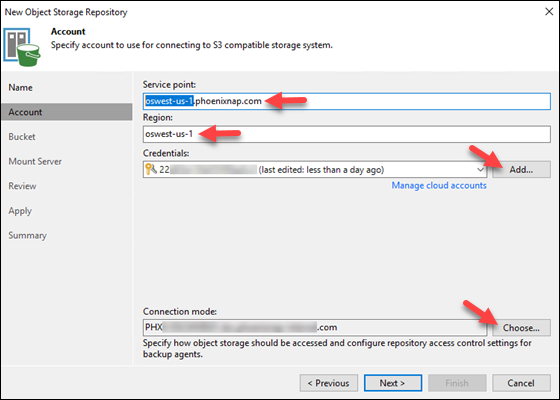
6. Click Browse and locate the bucket from Step 1.
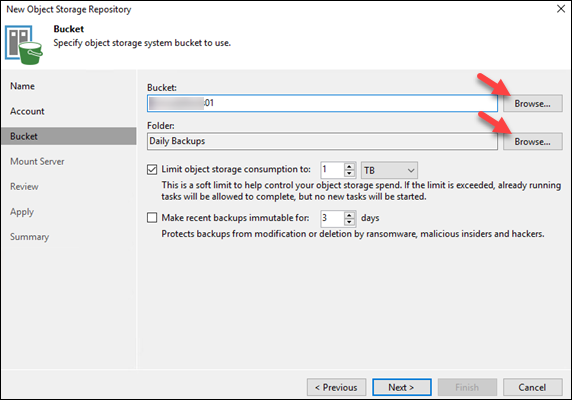
Optionally, specify the folder path to organize backups within the bucket and choose whether to limit the object storage spend.
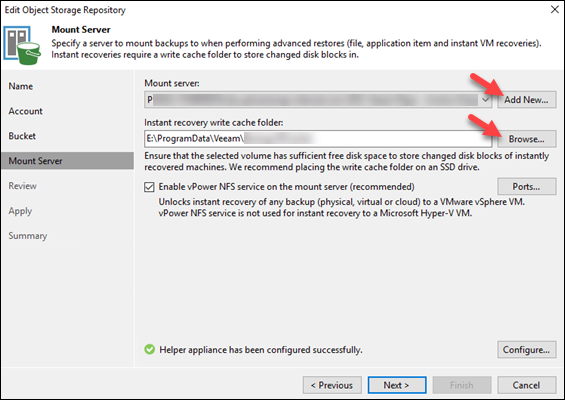
7. Choose a mount server for performing advanced restores and instant recoveries, and select the recovery write cache folder. Click Next to continue.
8. Review the settings and click Apply.
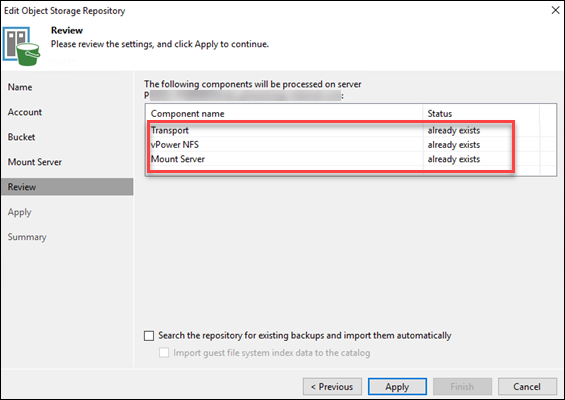
Veeam applies the settings and creates the backup infrastructure objects. Wait for the process to complete before continuing.
9. Click Next to view the summary or Finish to exit the wizard. The object storage is now available as a backup repository in Veeam.
Step 3: Configure Veeam Backup Job
To create a Veeam backup job, do the following in the Home view:
1. In the Jobs section, right-click Backup and choose Backup->Virtual machine.
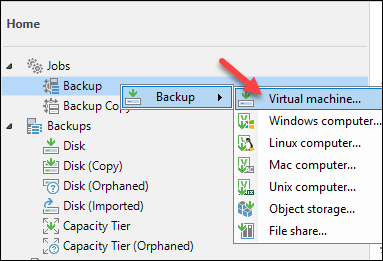
The action opens the New Backup Job wizard.
2. Provide a name and an optional description for the backup job.
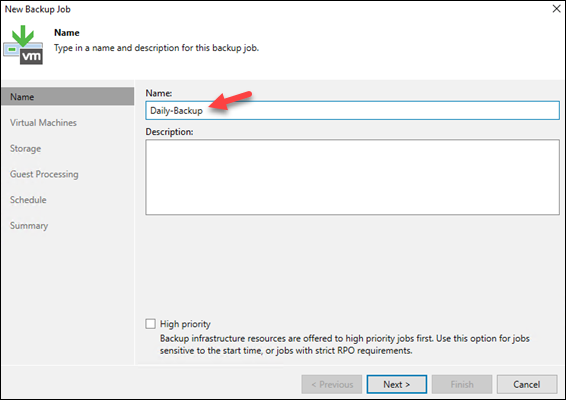
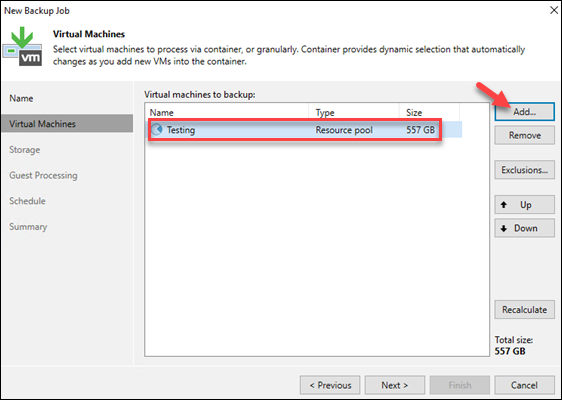
3. Select which virtual machine to process. Click Add to select the VMs or containers to back up.
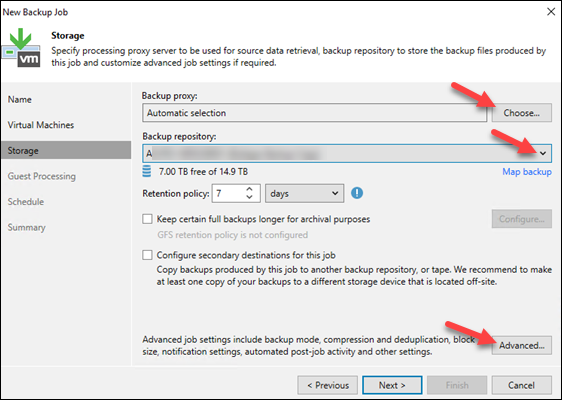
4. Specify the storage details. Choose the backup proxy and repository. Determine the retention policy and configure the storage settings. Click Advanced to set up the advanced storage settings.
5. Set the storage optimization to 4MB.
Important: Setting the storage optimization to 4MB is required and it ensures best practices are followed for object storage.
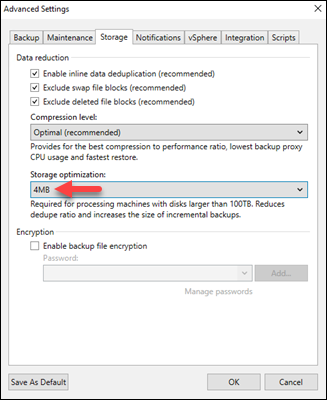
Click OK to close the window and continue the backup job creation.
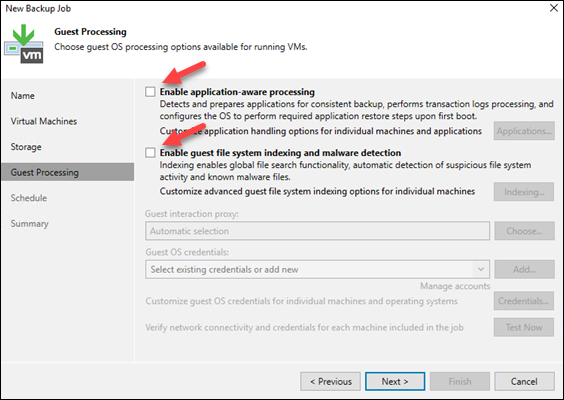
6. Choose whether to enable guest OS processing options, such as application-aware processing or guest file system indexing.
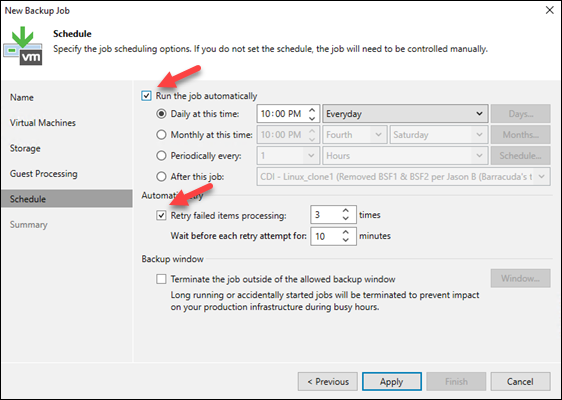
7. Optionally, schedule the automatic backup job. Define the scheduling options (such as the number of retries and the time between retry attempts) and whether the job runs daily, weekly, etc. Click Apply to save the configuration.
8. The final page shows the backup job configuration summary. Click Finish to complete the job creation.
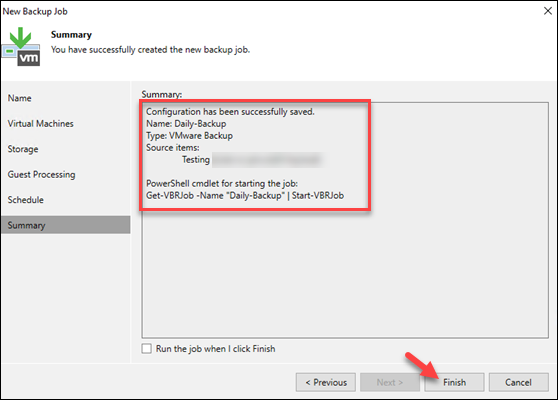
Do not run the job immediately; continue to the following configuration step.
Step 4: Configure Job to Offload to Object Storage
Create a backup copy job to configure the Veeam backup job to offload copies to object storage. Do the following in the Home view:
1. Right-click Backup Copy->Backup copy.

The action opens the new Backup Copy Job creation wizard.
2. Provide the backup copy name, add a description, and select the backup copy mode.
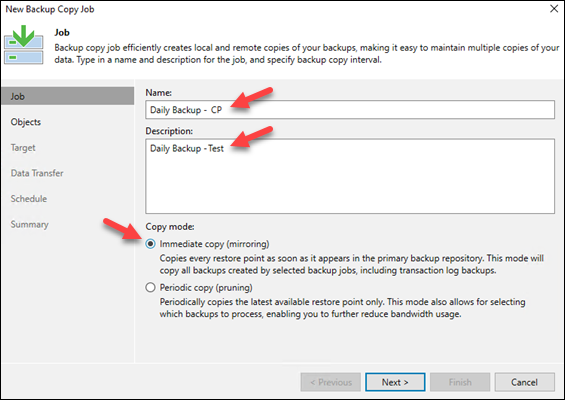
3. Click Add->From Jobs to select the job created in step 3.
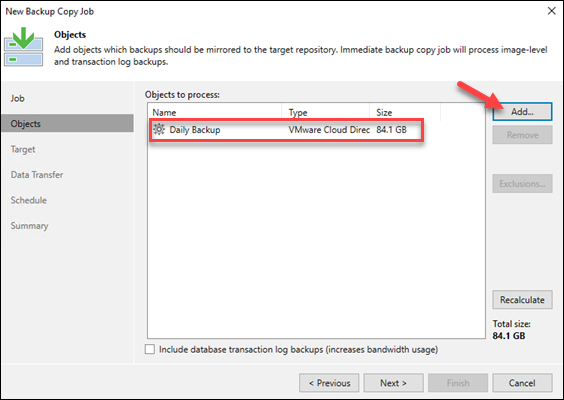
The restore points from VMs or objects defined in this job will be copied from the local repository and sent to the object storage.
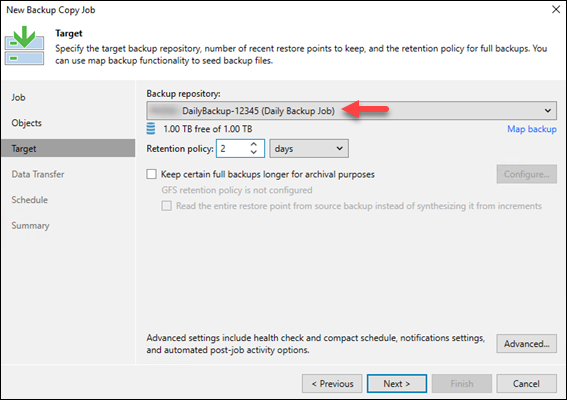
4. Select the destination backup repository. Choose the backup repository with the object storage bucket (added in step 2).
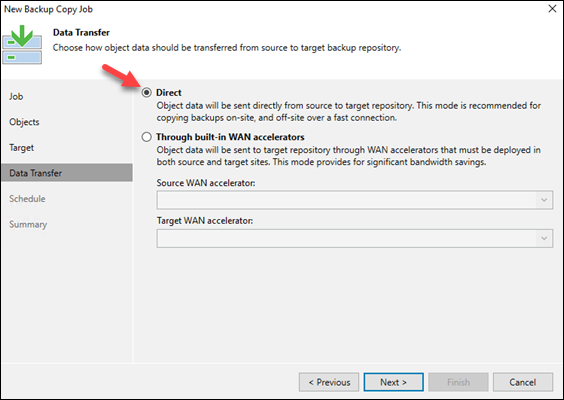
5. Leave the data transfer as Direct to directly send copies from source to destination. Continue to the next step.
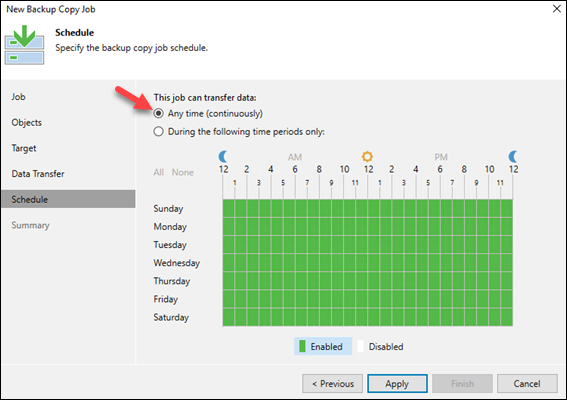
6. Schedule the time for the backup copy job. Decide between continuous or choose specific times in the table. Click Apply to save the backup copy job configuration.
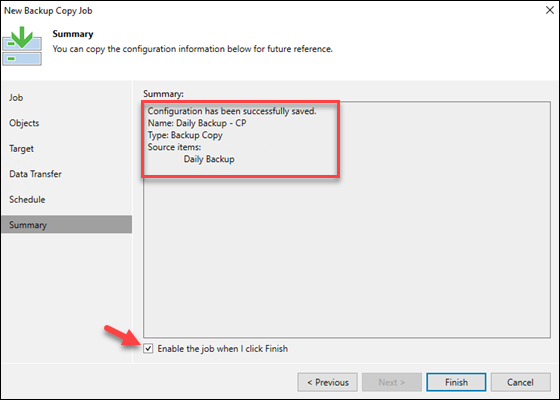
7. The final page shows the configuration summary. Choose whether to start the job immediately after completing the creation process and click Finish.
Once the offload starts, the job's status is visible on the Last 24 Hours page.

Conclusion
This guide showed how to utilize Veeam Backup & Replication and connect to phoenixNAP's object storage service to create a VM backup copy.
Next, read about whether to back up Office 365 data and how to leverage object storage with Veeam to back up Office 365 data.
