FTP (File Transfer Protocol) is a network protocol used to transfer files between two machines. Setting up an FTP server on Raspberry Pi is simple, but make sure you do not transfer sensitive data as this protocol does not use encryption.
In this tutorial, you will learn to set up an FTP server on your Raspberry Pi.
Prerequisites
- Raspberry Pi OS installed on your device
- Memory card
- Network connection
- Account with root privileges
Raspberry Pi FTP Server Setup Guide
Setting up the FTP server requires:
1. A server utility.
2. Changes in some configuration files.
3. Setting up the server directory.
4. Modifying permissions for the server user.
Note: When you want to make sure your file transfers are secured, it is better to use SFTP (Secure File Transfer Protocol) over SSH. Check out our tutorials to learn how SSH works or how to enable SSH on Raspberry Pi.
Follow these steps to set up an FTP server on your Raspberry Pi:
Step 1: Update System Packages
Before installing the FTP utility, update the system package repositories and run an upgrade:
sudo apt updatesudo apt full-upgradeConfirm with Y and wait for the upgrade to complete.
Step 2: Install FTP Server
There are several utilities available for setting up an FTP server on Raspberry Pi. In this tutorial, we will use the open-source vsftpd utility.
The vsftpd utility is lightweight, secure, and easy to use.
Install vsftpd on the Raspberry Pi by running:
sudo apt install vsftpdWait for the installation to complete.
Note: Learn how to install the vsftpd utility on Ubuntu and set up an FTP server on popular Linux distribution.
Step 3: Edit Configuration File
Before connecting to the FTP server, modify the vsftpd configuration file with a text editor, for example, nano.
1. Run the following command:
sudo nano /etc/vsftpd.conf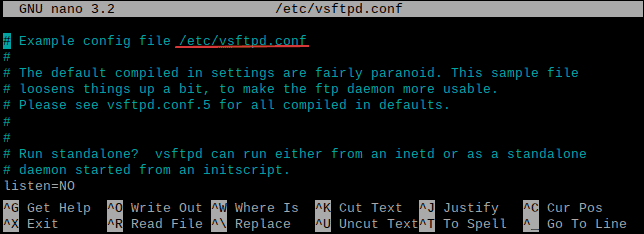
2. Find (CTRL + W) and uncomment the following lines by removing the hash (#) sign:
write_enable=YESlocal_umask=022chroot_local_user=YES3. Find the following line:
anonymous_enable=YESChange it to:
anonymous_enable=NO4. Add the following lines at the end of the config file:
user_sub_token=$USERlocal_root=/home/$USER/FTPThese settings lock server users to the FTP folder in their home directory.
5. Press CTRL + X and confirm with Y to save the settings and exit.
Step 4: Create FTP Directory
Create an FTP directory to use for transferring files. A subdirectory is needed since the root directory cannot have write permissions.
Use the following syntax:
mkdir -p /home/[user]/FTP/[subdirectory_name]Replace [user] with the relevant user. Replace [subdirectory_name] with a name of your choice. The default user on Raspberry Pi OS is ‘pi.’
For example:

The -p argument instructs mkdir to create the entire path tree, both FTP and files directories.
Step 5: Modify Permissions
After adding the directory, revoke write permissions on the FTP directory to prevent other users from adding files to it.
Use the following syntax:
chmod a-w /home/[user]/FTPReplace the [user] syntax with the appropriate username.
For example:

Step 6: Restart Vsftpd Daemon
To apply the changes, restart the vsftpd daemon by running:
sudo service vsftpd restartThe FTP server is now set up and running on the Raspberry Pi.
Note: Check out our guide on how to monitor network traffic on Raspberry Pi.
FTP Server Test
Test the server using a remote machine and FileZilla, a popular FTP client that supports all platforms.
Follow these steps:
1. Install FileZilla on a remote machine.
For example, on Ubuntu, run the command:
sudo apt install filezillaConfirm with Y and wait for the installation to complete.
2. Obtain the Pi’s IP address by running the following command in the Raspberry Pi terminal:
ifconfig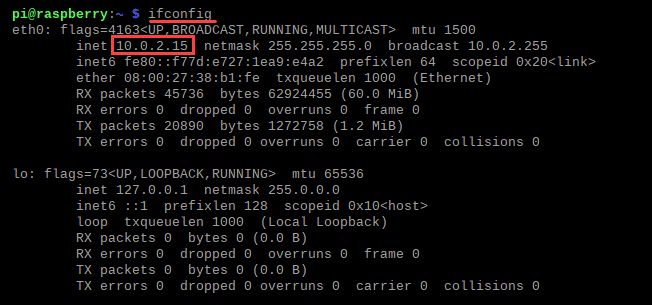
In this case, we used the private IP address to connect locally.
Note: Refer to to our guide on setting up static IP address for Raspberry Pi to facilitate access and management.
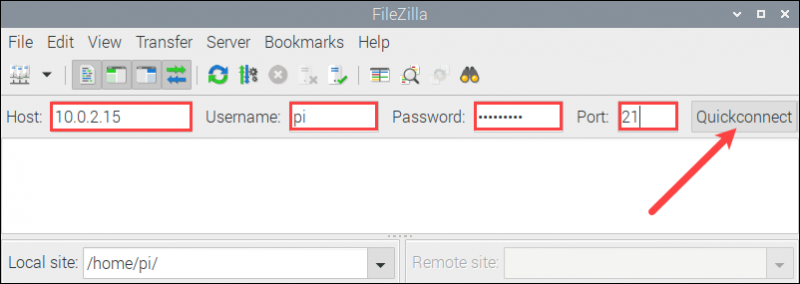
3. Open FileZilla on another machine and enter the Pi’s IP address, username, and password for the user you want to connect to. The default username is ‘pi,’ and the default password is ‘raspberry.’ Port number is 21.
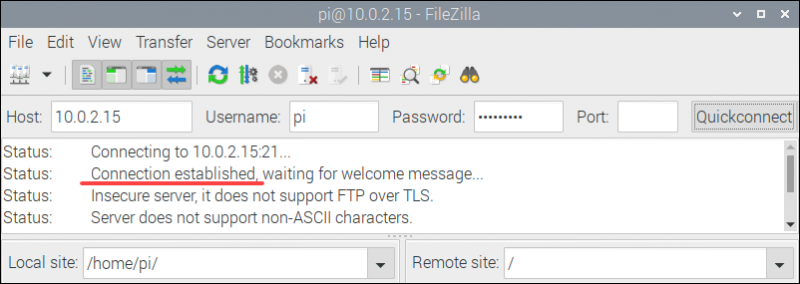
Click Quickconnect to establish a connection.
If the connection is successful, a message stating Connection established appears in the log.
4. On the remote machine, drag and drop some files from a source to the destination directory in FileZilla to make sure the connection is working.
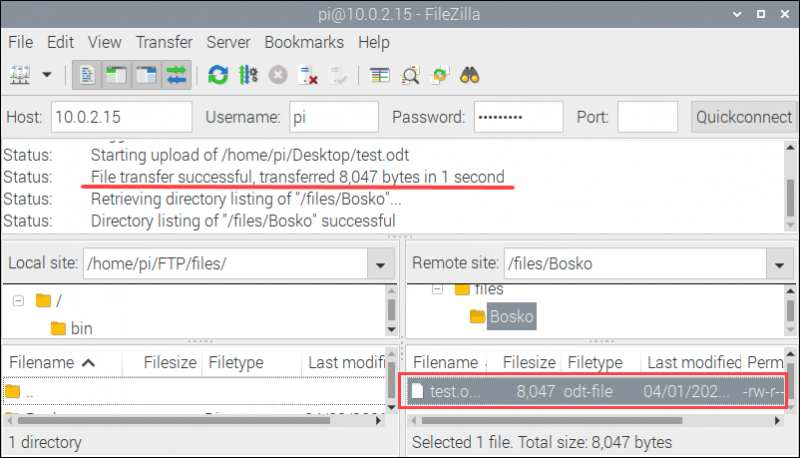
If everything works, FileZilla states that the file transfer was successful. Our example is for a local transfer, but the procedure is the same in other cases.
Conclusion
This article explained how to set up an FTP server on your Raspberry Pi. The solution is simple and works well when transferring files between two computers.
You can use this setup as private cloud storage and keep the costs low.