A Kubernetes namespace is a logical separator of cluster resources. Namespaces allow administrators to organize, group, structure and allocate resources and Kubernetes objects to ensure smooth cluster operation. One Kubernetes cluster can hold multiple namespaces, all logically isolated from each other.
Use namespaces to define resource policies for different users, teams, or customers or set up role-based access control.
In this tutorial, you will learn to create a Kubernetes namespace.
Prerequisites
- Kubernetes installed and configured
- Cluster administrator account
Create Kubernetes Namespace Using kubectl
The easiest way to create a Kubernetes namespace is via the kubectl CLI tool. To create a new Kubernetes namespace, use the following syntax:
kubectl create namespace [namespace-name]For [namespace-name], specify the namespace name. The rules for namespace names are:
- It must be a unique name in the cluster.
- Up to 63 characters.
- It can contain only lowercase letters, numbers, and the dash symbol (-).
Note: Namespaces starting with kube- are reserved for Kubernetes system namespaces.
For example, create a development namespace by running:
kubectl create namespace development
A message confirms that the namespace has been created.
Create Kubernetes Namespace Using YAML
Another way to create a Kubernetes namespace is by using a YAML file. Kubernetes resources, such as pods, services, and deployments can be created declaratively with YAML files.
Follow the steps below to create a Kubernetes namespace using a YAML file:
1. Using a text editor, create a YAML file.
On Linux, run:
vim dev-space.yamlOn Windows, open Notepad++ and follow the steps below.
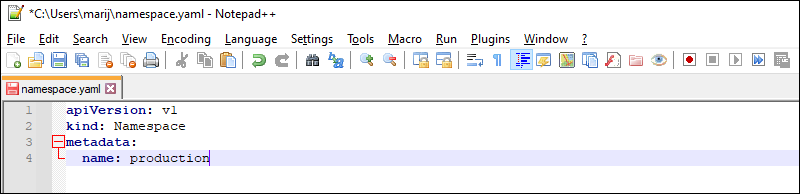
2. Paste the following configuration into the YAML file and save it:
apiVersion: v1
kind: Namespace
metadata:
  name: [namespace-name]
For [namespace-name], specify the name of the namespace.
Note: See how to save a file in vi/vim.
For example:
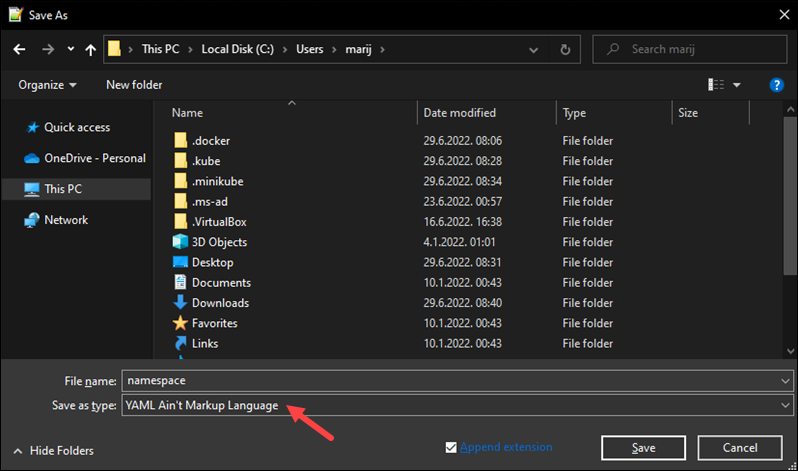
On Windows, click Save and choose the YAML file type.
3. Use the kubectl create command followed by the YAML file path:
kubectl create -f [file-name]For example:
kubectl create -f namespace.yaml
The output states that the namespace was created.
Managing Active Namespaces
This section explains how to manage namespaces and perform basic namespace operations after creating a namespace.
View Namespaces
To list the current namespaces in a cluster, run the following command:
kubectl get namespaces
The command returns a list of namespaces in the cluster, showing their running status and age.
Kubernetes comes with some initial namespaces out of the box:
default. The default namespace for Kubernetes objects that don't belong to other namespaces.kube-system. A namespace for objects created by the Kubernetes system.kube-public. A namespace readable by all users and mostly reserved for cases when some resources need to be visible and readable publicly throughout the cluster.
To view the summary of a specific namespace, use the following syntax:
kubectl get namespaces [namespace-name]To get in-depth information about a namespace, use the following syntax:
kubectl describe namespaces [namespace-name]For example:

The detailed description shows the namespace name, labels, annotations, running status, and resource quota.
Change the Active Namespace
By default, the active namespace is the default Kubernetes namespace. All Kubernetes commands use the default namespace, unless specified differently in the YAML file or in the command.
While the kubectl CLI tool is excellent for basic namespace operations, switching the active namespace with kubectl isn't that easy. A simpler and faster tool for switching the active namespace is kubens. Follow the official installation instructions to install kubens on your machine and then follow the steps below to see and change the active namespace.
To see which namespace is currently active, run:
kubens
The command outputs all the namespaces and highlights the active one.
Switch the active namespace by specifying the kubens command followed by the namespace name you want to change to. For example, to switch the active namespace to development, run:
kubens development
Rerun kubens and check if the active namespace has been changed:

Create Resources in a Namespace
Creating a resource without specifying a namespace automatically creates it in the currently running or default namespace if no other namespaces were created.
Use the syntax below to create a pod in a specific namespace using the nginx image:
kubectl run nginx --image=nginx --namespace=[namespace-name] --restart=NeverFor [namespace-name], specify the namespace in which you want to create the pod. The --restart=Never flag instructs Kubernetes to create a single pod rather than a deployment.
For example:

The output states that the pod was created.
Note: See how to deploy NGINX reverse proxy on Docker.
View Namespace Resources
To see which resources are available under a certain namespace, use the following syntax:
kubectl get pods --namespace=[namespace-name]For example:

The output shows the previously created pod in the given namespace.
Deleting a Namespace
Delete a Kubernetes namespace with the following syntax:
kubectl delete namespaces [namespace-name]Warning: The delete namespaces command deletes all the objects and resources under the namespace.
For example:
kubectl delete namespaces dev
Since namespace deletion is asynchronous, its state shows as Terminating until it is completely removed.
Note: For a detailed tutorial with additional namespace delete options, refer to our tutorial for deleting a Kubernetes namespace.
Conclusion
This tutorial showed how to create Kubernetes namespaces and perform basic namespace operations. Namespaces help organize Kubernetes resources and increase cluster performance by properly allocating resources.
Next, get started with Kubernetes networking, or see the best Kubernetes practices for building efficient clusters.