The Apache HTTP server is an open-source web server and a main component of the LAMP stack. This software package is reliable and versatile when serving web content.
This guide will help you install the Apache web server on Ubuntu Linux.

Prerequisites
- A system running Ubuntu.
- Internet connection.
- Access to a user account with sudo privileges.
Apache Installation on Ubuntu
In this tutorial, we will install Apache using apt, the default package manager for Ubuntu. Follow the steps in the sections below to install and set up your Apache web server.
Step 1: Update Package Repository
Update the local software package repository to ensure you install the latest version of the program. This helps reduce the time it takes to update after installation and prevents zero-day exploits against outdated software.
Open a terminal window and run the following command:
sudo apt updateWait for the package manager to finish updating.
Step 2: Install Apache
To install the Apache package on Ubuntu, use this command:
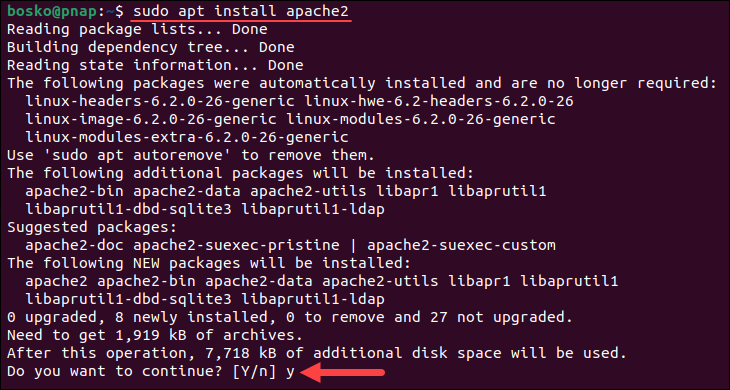
sudo apt install apache2When prompted to confirm the installation, type y and press Enter. Wait until the installation completes.

Verify that the Apache service is running:
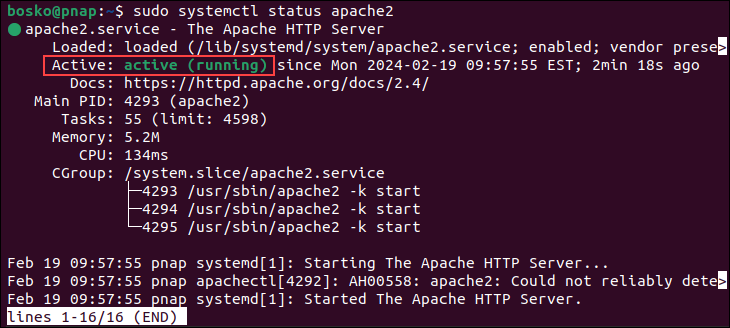
sudo systemctl status apache2
The output shows that the service has started successfully. Refer to the commands below to learn some important Apache service controls, such as how to stop (and start) the Apache service.
Stop Apache:
sudo systemctl stop apache2.serviceStart Apache:
sudo systemctl start apache2.serviceRestart Apache:
sudo systemctl restart apache2.serviceReload Apache:
sudo systemctl reload apache2.serviceStep 3: Configure Your Firewall
After completing the Apache installation, configure the firewall to allow traffic on port 80:
1. Start by displaying available app profiles on UFW:
sudo ufw app listThe terminal outputs all the available application profiles:

There are three Apache profiles available:
- Apache. Opens only port 80 (regular, unencrypted web traffic).
- Apache Full. Opens port 80 and port 443 (TLS/SSL encrypted traffic).
- Apache Secure. Opens only port 443 (TLS/SSL encrypted traffic).
2. Run the following command to allow web traffic on port 80:
sudo ufw allow 'Apache'
3. Verify the changes by checking UFW status:
sudo ufw status
Note: At this point, your Apache service on Ubuntu is up and running. If you are familiar with Apache, you may want to set up Apache virtual hosts.
Step 4: Verify Apache Installation
To verify Apache was installed correctly, open a web browser and type in the address bar:
http://[local_server_ip]Replace [local_server_ip] with the IP address of your server. If you are unsure what the IP address is, run the following command:
hostname -I | awk '{print $1}'The output returns your server's IP address.
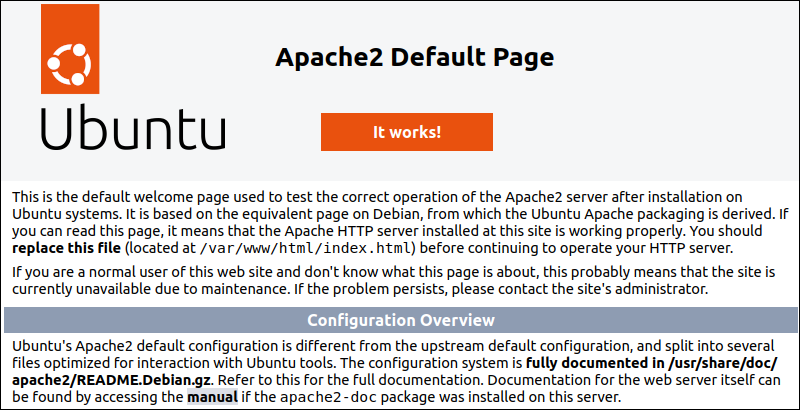
The browser should open a page labeled "Apache2 Default Page", as in the image below:

Apache Files and Directories
After installing the Apache web server, it is important to become familiar with the key files and directories that Apache relies on. The log files help troubleshoot server issues, while the configuration files allow you to customize the server.
Following is a breakdown of the key Apache directories and files:
Web Content
- /var/www/html. This directory stores the web content served by Apache. This is also where you install content management systems, such as WordPress. If necessary, you can modify this path in the main configuration file. You can also create subdirectories within this location for each different website hosted on your server.
Server Configuration
- /etc/apache2. This directory stores all Apache configuration files.
- /etc/apache2/apache2.conf. The main configuration file for global server settings. It controls how other configuration files are loaded.
- /etc/apache2/ports.conf. A configuration file that specifies listening ports. By default, Apache listens on ports 80 (HTTP) and 443 (HTTPS) if SSL is enabled.
Virtual Hosts
- /etc/apache2/sites-available. This directory stores per-site virtual host configuration files.
- /etc/apache2/sites-enabled. A directory for symbolic links to virtual host configuration files.
Configuration Fragments
- /etc/apache2/conf-available and /etc/apache2/conf-enabled. Similar to sites-* directories, but for general configuration snippets.
Modules
- /etc/apache2/mods-available and /etc/apache2/mods-enabled. These directories hold available and enabled modules. .load files activate modules, while .conf files configure them.
If you intend to work with software modules, you can enable them using the following syntax:
sudo a2enmod module_nameTo disable a module, use:
sudo a2dismod module_nameServer Logs
- /var/log/apache2/access.log. Log file that records all web server requests.
- /var/log/apache2/error.log. Log file that records all server errors.
There are many other directories and configuration files, which are detailed in the Apache Ubuntu documentation. These can be used to add modules to enhance Apache's functionality or to store additional configuration information.
Conclusion
This tutorial showed how to install Apache on Ubuntu using a set of simple commands and configure the basic settings for your installation.
Next, read our detailed comparison of Apache and Nginx, or learn to deploy Apache on Docker.


