After installing MySQL, the root user has full access to the entire database installation. For security reasons, allowing non-root users to manage particular data sets requires creating specific, privileged user accounts.
Learn how to create MySQL user accounts and manage their permissions and privileges.
Prerequisites
- A Linux server with MySQL installed and running.
- Command-line access.
- A user account with sudo privileges.
- A MySQL root user account.
How to Create New MySQL User
To create a new MySQL user:
1. Open a terminal window and enter the following command to launch the MySQL shell as the root user:
sudo mysql -u root -p2. Type the root password and press Enter to access the mysql> shell.
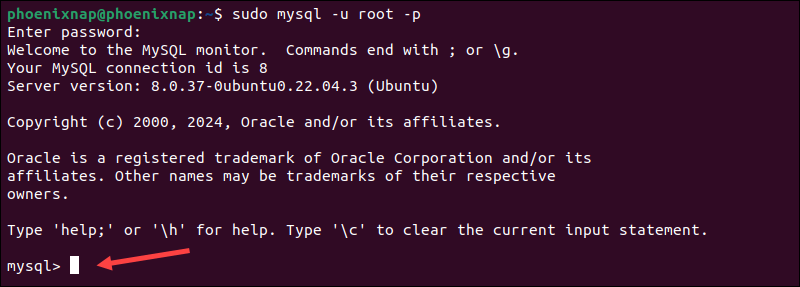
3. When creating new users, specify the host to ensure only authorized machines can connect to the MySQL server. For users working on the same machine as the MySQL server, use 'localhost' to streamline access:
CREATE USER 'username'@'localhost' IDENTIFIED BY 'password';Replace username and password with a username and password of your choice.
4. For users who need to connect remotely, specify their IP addresses (or hostname) to enable secure remote access:
CREATE USER 'username'@'ip_address' IDENTIFIED BY 'password';Replace username, ip_address, and password with your desired values.
Note: Before users can log in from a remote machine, the MySQL server must be configured to allow remote connections.
5. More lenient access controls are common in development environments. Enter the following command to create a MySQL user that can connect from any machine:
CREATE USER 'username'@'%' IDENTIFIED BY 'password';Use a strong and complex password and avoid using this option in a production environment due to security concerns.
Note: Learn how to list MySQL database users to monitor active user accounts and manage database security effectively.
How to Grant Permissions in MySQL
Permissions are actions the user is allowed to perform in a database. Depending on how much authority you want users to have, grant them one, several, or all the following privileges:
| Privilege | Actions |
|---|---|
ALL PRIVILEGES | Full access to the database. |
INSERT | Insert rows into tables. |
DELETE | Remove rows from tables. |
CREATE | Create entirely new tables and databases. |
DROP | Drop (remove) entire tables and databases. |
SELECT | Read the information in the databases. |
UPDATE | Update table rows. |
GRANT OPTION | The user can modify other user account privileges. This option is usually reserved for the MySQL root user. |
The syntax for granting privileges to a user account on a local machine is:
GRANT permission_type ON database_name.table_name TO 'username'@'localhost';The database_name.table_name parameter is mandatory, but you can use wildcard characters to broaden the scope of the privileges:
*.* | Grant access to all databases and tables. |
database_name.* | Grant access to all tables within a specific database. |
database_name.table_name | Grant access to a specific table within a specific database. |
Note: If you need to find a specific database, learn how to list and filter databases in MySQL.
Grant All Privileges
The ALL PRIVILEGES permission gives the user complete control over the specified databases and tables and allows them to perform any operation.
Follow these steps:
1. Use one of the following commands to grant ALL PRIVILEGES to a MySQL user:
All databases
GRANT ALL PRIVILEGES ON *.* TO 'username'@'localhost';All tables in a specific database
GRANT ALL PRIVILEGES ON database_name.* TO 'username''@'localhost';Specific table
GRANT ALL PRIVILEGES ON database_name.table_name TO 'username'@'localhost';Replace username with the actual username and hostname with the hostname or IP address of the user's machine.
2. Flush the MySQL privilege tables to apply the changes:
FLUSH PRIVILEGES;3. Enter the following command to check if the privileges have been awarded:
SHOW GRANTS FOR 'username'@'localhost';Note: For more information on how to check existing user privileges on a MySQL server, read our article MySQL show user privileges.
Grant Insert Privileges
The INSERT privilege allows MySQL users to add new table rows and input data into the database.
1. Enter one of the following statements to grant INSERT privileges:
All databases
GRANT INSERT ON *.* TO 'username'@'localhost';All tables in a specific database
GRANT INSERT ON database_name.* TO 'username''@'localhost';Specific table
GRANT INSERT ON database_name.table_name TO 'username'@'localhost';Replace the placeholder parameters with the actual MySQL user credentials.
2. To apply the changes, flush the privileges:
FLUSH PRIVILEGES;3. Verify that the user has been granted the new privileges:
SHOW GRANTS FOR 'username'@'localhost';
Grant Delete Privileges
The DELETE privilege lets users remove incorrect or outdated database entries by deleting table rows.
Follow these steps:
1. Use one of the following commands to grant DELETE privileges to a MySQL user:
All databases
GRANT DELETE ON *.* TO 'username'@'localhost';All tables in a specific database
GRANT DELETE ON database_name.* TO 'username''@'localhost';Specific table
GRANT DELETE ON database_name.table_name TO 'username'@'localhost';Replace username, database_name, and table_name with the names you are using in your MySQL setup.
2. Apply the changes by flushing MySQL privileges:
FLUSH PRIVILEGES;3. Confirm the new privileges have been awarded:
SHOW GRANTS FOR 'username'@'localhost';
Grant Create Privileges
The CREATE privilege allows a MySQL user to create new tables and databases.
Follow these steps:
1. Use one of the following commands to grant CREATE privileges:
- All databases:
GRANT CREATE ON *.* TO 'username'@'localhost';- All tables in a specific database:
GRANT CREATE ON database_name.* TO 'username''@'localhost';- A specific table:
GRANT CREATE ON database_name.table_name TO 'username'@'localhost';The database_name, table_name, username, and localhost are example values. Replace them with the actual database name, table name, username, and hostname or IP address.
2. To ensure the changes take effect immediately, refresh the privilege tables:
FLUSH PRIVILEGES;3. Check if the new privileges have been applied:
SHOW GRANTS FOR 'username'@'localhost';
Grant Drop Privileges
A user with DROP privileges can delete entire tables and databases. To do so:
1. Enter one of the following commands to grant DROP privileges to a MySQL user:
- All databases:
GRANT DROP ON *.* TO 'username'@'localhost';- All tables in a specific database:
GRANT DROP ON database_name.* TO 'username''@'localhost';- A specific table:
GRANT DROP ON database_name.table_name TO 'username'@'localhost';Substitute the values in the example command with the actual parameters in your MySQL setup.
2. Refresh the MySQL privilege tables:
FLUSH PRIVILEGES;3. Confirm that the user has DROP privileges:
SHOW GRANTS FOR 'username'@'localhost';
Grant Select Privileges
The SELECT privilege allows MySQL user accounts to read data from tables, which is ideal for users who need to view or query the database without making any changes.
To configure this privilege:
1. Use one of the following commands to grant SELECT privileges:
All databases
GRANT SELECT ON *.* TO 'username'@'localhost';All tables in a specific database
GRANT SELECT ON database_name.* TO 'username''@'localhost';Specific table
GRANT SELECT ON database_name.table_name TO 'username'@'localhost';Replace the values in the command with the actual parameters for your MySQL user and database.
2. Reload the MySQL privilege tables:
FLUSH PRIVILEGES;3. Confirm that the user has been granted SELECT privileges:
SHOW GRANTS FOR 'username'@'localhost';
Grant Update Privileges
The UPDATE privilege enables users to alter or correct data records in MySQL databases.
Follow these steps:
1. Enter one of the following commands to grant UPDATE privileges:
All databases
GRANT UPDATE ON *.* TO 'username'@'localhost';All tables in a specific database
GRANT UPDATE ON database_name.* TO 'username''@'localhost';Specific table
GRANT UPDATE ON database_name.table_name TO 'username'@'localhost';Substitute the database_name, table_name, username, and localhost example values with the actual parameters on your system.
2. To ensure the privileges are updated, run:
FLUSH PRIVILEGES;3. Use the following command to verify if the user has UPDATE privileges:
SHOW GRANTS FOR 'username'@'localhost';
How to Revoke Privileges in MySQL
You can use the REVOKE command to remove specific privileges from existing users without deleting their accounts.
The basic syntax for the REVOKE statement is:
REVOKE permission_type ON database.table FROM 'username'@'localhost';To delete a MySQL user account completely, which removes all their privileges and database access, use the DROP command:
DROP USER 'username'@'localhost';After revoking user privileges or deleting an account, it is essential to flush the privileges in MySQL:
FLUSH PRIVILEGES;This ensures that changes take effect immediately and prevents unauthorized access caused by outdated privilege settings.
Conclusion
The steps in this guide showed you how to create users and grant different types of permissions in a MySQL database.
Download this comprehensive MySQL Commands Cheat Sheet to manage MySQL databases and users even more efficiently.
