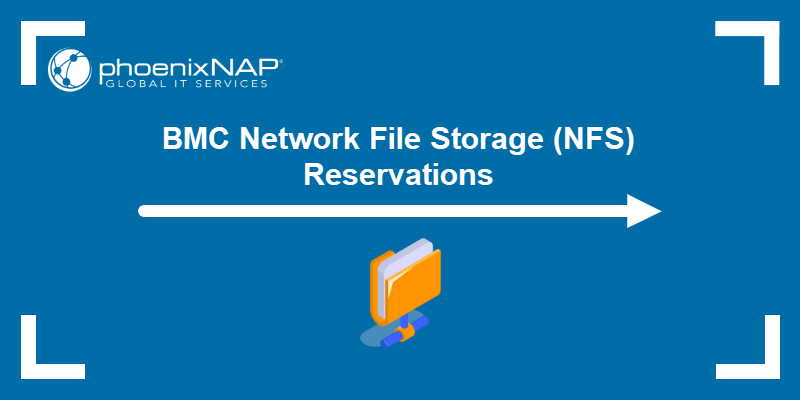
Bare Metal Cloud offers NFS reservations as part of its BMC Network File Storage feature. By reserving a fixed NFS storage capacity, you make your storage expenditure more predictable and easier to budget for the long term.
This guide shows how to create and manage NFS reservations in BMC.
Prerequisites
- Bare Metal Cloud portal credentials. Create an account for BMC to deploy a server.
Create NFS Reservation
Note: Storage creation is independent of reservation creation. Reserving storage capacity will not create the necessary storage/volumes. Learn more about storage management by reading our guide to Bare Metal Cloud Storage Management via Portal and API.
Creating a new NFS reservation involves specifying the location, size, and billing model for the reserved NFS storage. Follow the steps below:
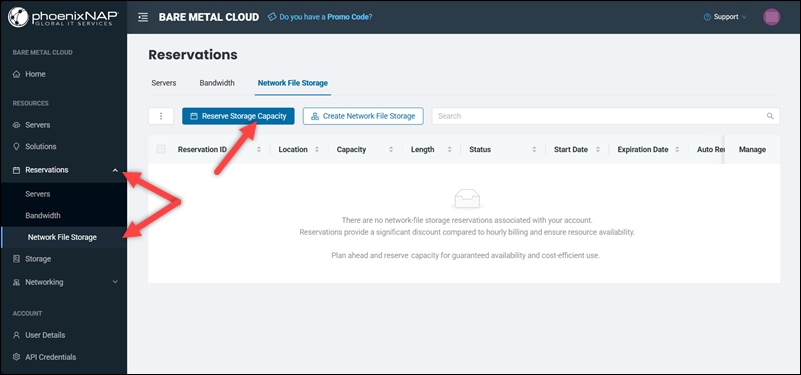
2. Select Network File Storage under the Reservations item in the menu on the left side of the screen.
3. Click the Reserve Storage Capacity button.
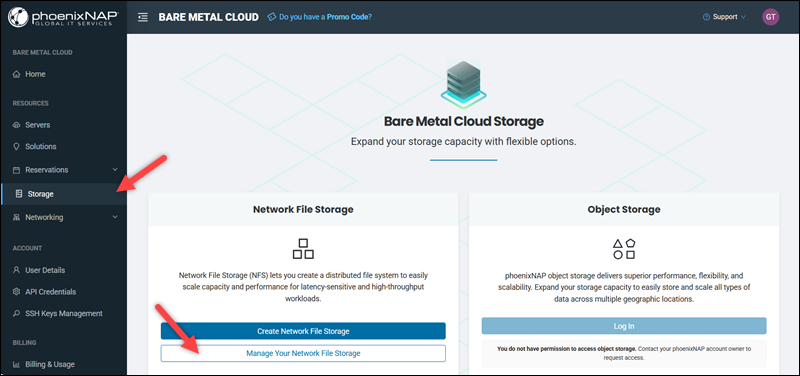
Alternatively, select Storage in the menu on the left side of the screen, then click the Manage Your Network File Storage button.
Select the Reserve Storage Capacity button on the Network File Storage page.
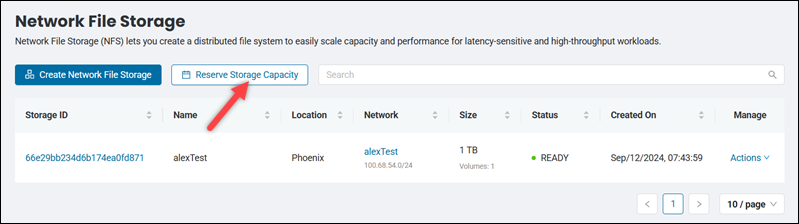
The Reserve Network File Storage Capacity page opens.
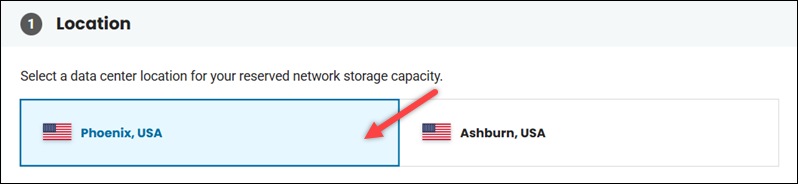
4. Select a data center location.
5. Choose the reservation length. The available reservation lengths are 1 month, 12 months, 24 months, and 36 months.
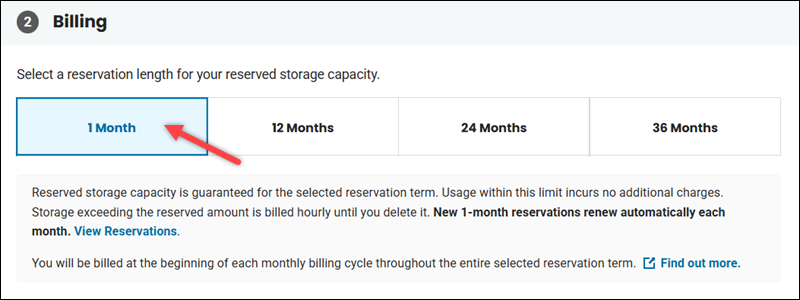
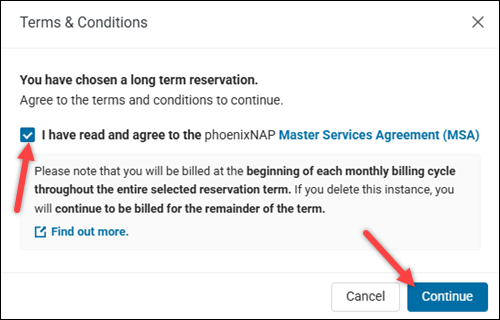
If you choose a long-term reservation (12, 24, or 36 months), the Terms & Conditions dialog appears. Select I have read and agree to the phoenixNAP Master Services Agreement (MSA) and click Continue to proceed.
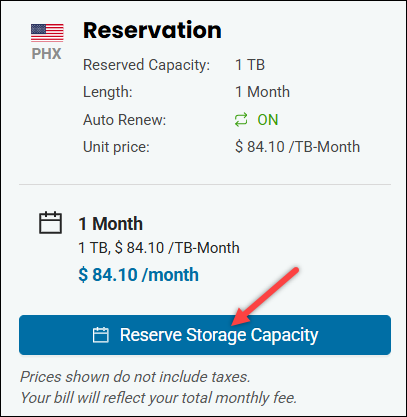
6. Specify the reserved capacity in the text box in the Storage section.
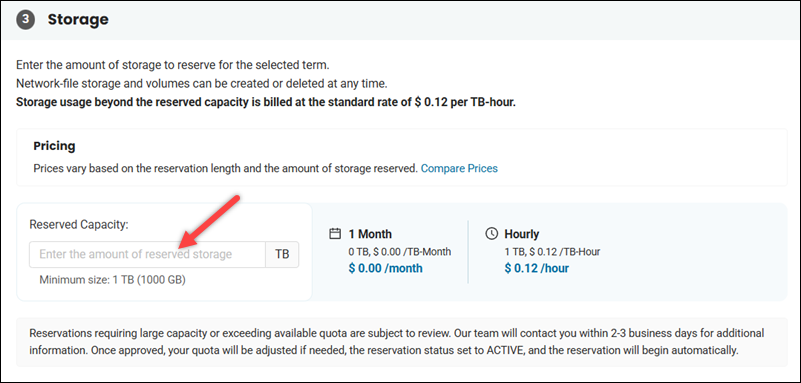
View the total monthly price in the field on the right side when you enter the amount of the reserved storage.
Note: Large or over-quota reservations are subject to review. We will contact you within 2-3 business days to confirm the details. Once approved, we will adjust the quota (if necessary), set the reservation status to ACTIVE, and automatically start your reservation.
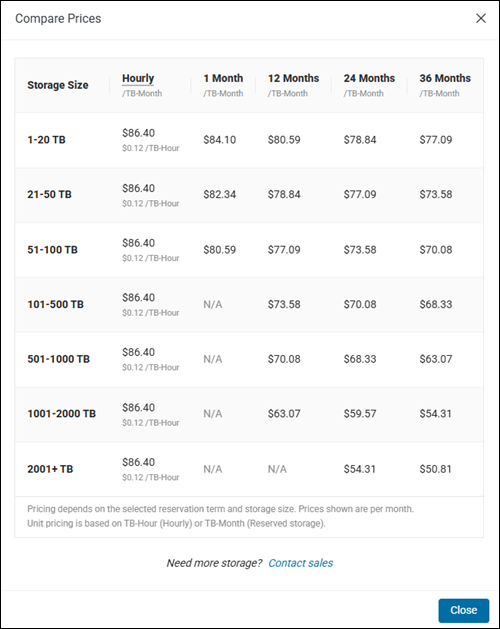
Compare the prices by clicking the Compare Prices link in the Pricing subsection. A pop-up window shows an overview of prices across different storage sizes and reservation lengths.
7. Review your selection in the reservation summary on the right side of the screen, then press the Reserve Storage Capacity button to complete the procedure.
Note: The reserved capacity is consumed when storage is created in Bare Metal Cloud. If the storage created exceeds the reserved capacity, the excess will be billed at the hourly rate.
Manage NFS Reservations
Your NFS reservations appear in the Network File Storage section of the Reservations screen. The list of reservations includes columns for reservation length, capacity, and unit price.
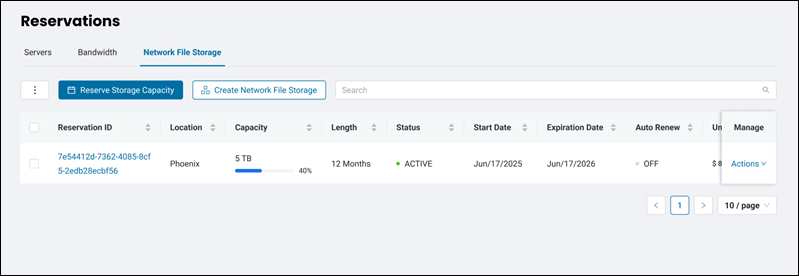
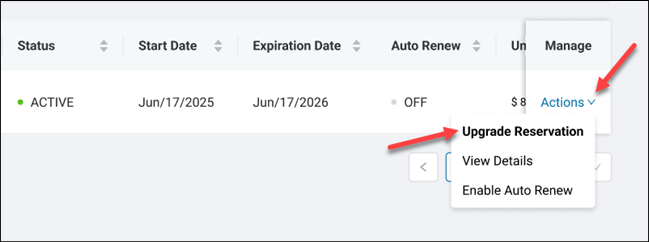
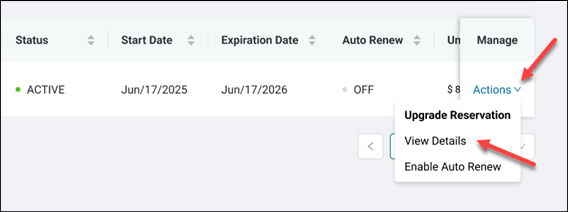
The Manage column features the Actions item. Selecting Actions opens a menu with the following management options:
- Upgrade reservation. Enables the user to change parameters of the NFS reservation.
- View Details. Provides additional details about the NFS reservation.
- Enable/Disable Auto Renew. Allows the user to turn the Auto Renew feature on or off.
Upgrade Reservation
To change the parameters of an existing reservation, follow the steps below:
Note: You can only upgrade a reservation with the ACTIVE status.
1. Navigate to Reservations -> Network File Storage.
2. Locate the reservation you want to change.
3. Select Actions -> Upgrade Reservation.
The Upgrade Reservation screen opens.
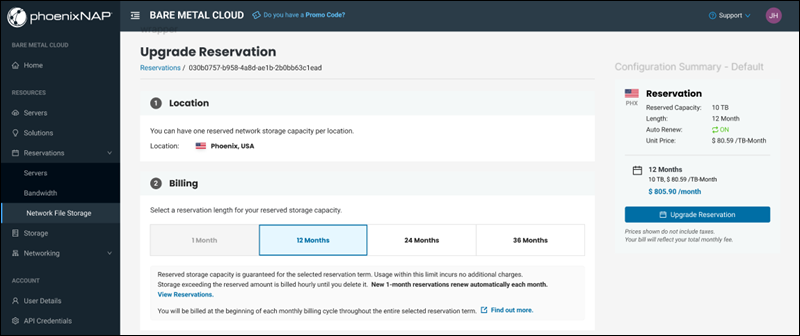
4. Change the parameters you want, such as reservation length and reserved capacity.
Note: You can only increase the reserved capacity when upgrading a reservation.
5. Select the box to confirm you agree to the phoenixNAP Master Services Agreement (MSA).
6. Click the Upgrade Reservation button to finish upgrading.
View Reservation Details
To see the details of a reservation:
1. Navigate to Reservations -> Network File Storage.
2. Locate the reservation you want to change.
3. Select Actions -> View Details.
The Reservation Details screen opens.
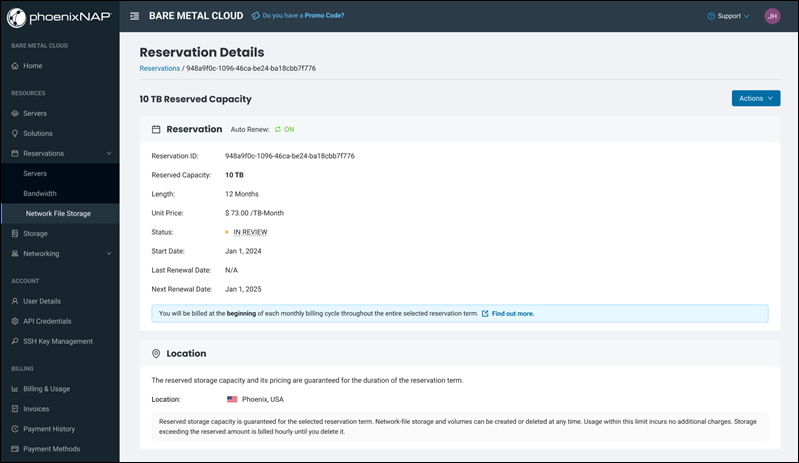
The screen contains more information about the reservation you selected, including the last and next renewal dates.
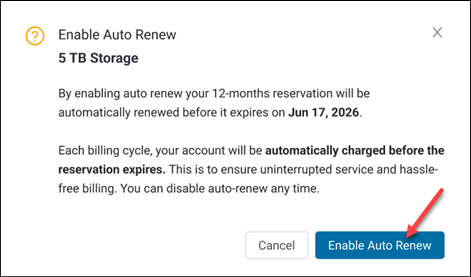
Enable/Disable Auto Renew
The Auto Renew feature automatically extends the term of a reservation for the pre-specified reservation length. Reservations with the 1-month reservation length renew automatically each month. For longer reservation lengths, the Auto Renew feature is off by default.
Note: If the storage reservation expires, the storage will be automatically billed at the per-GB, per-hour rate.
To enable the Auto Renew feature:
1. Navigate to Reservations -> Network File Storage.
2. Locate the reservation you want to change.
3. Select Actions -> Enable Auto Renew.
4. Click the Enable Auto Renew button.
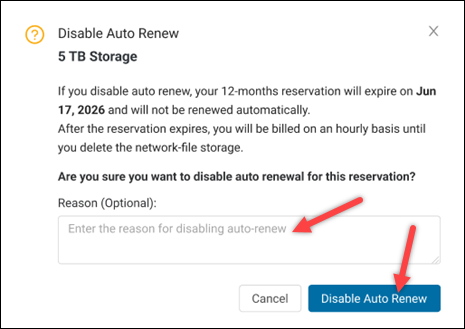
To disable Auto Renew:
1. Select Disable Auto Renew in the Actions menu of the relevant reservation.
2. Optionally, write the reason for disabling auto-renew.
3. Click the Disable Auto Renew button.
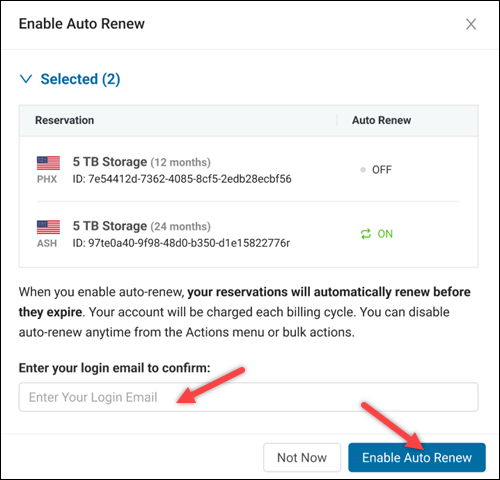
To enable/disable Auto Renew for more than one reservation at the same time, use the bulk action:
1. Select reservations you want to auto-renew.
2. Select the bulk action button (three dots) and choose Enable/Disable Auto Renew on Selected.
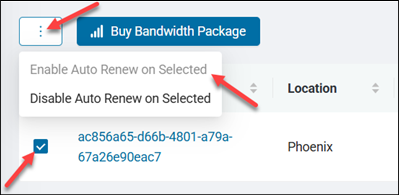
3. Enter your login email address to confirm the action and press Enable/Disable Auto Renew.
Conclusion
After reading this article, you should be able to create and manage NFS reservations within Bare Metal Cloud (BMC). The guide explained how to set up a new reservation, upgrade an existing one to meet growing needs, view reservation details, and control the Auto Renew status.
Next, learn how to scale and improve database performance using BMC Pliops.