Most organizations do not build every part of their infrastructure from scratch. Servers, databases, DNS, and other components usually come from different vendors and platforms.
To connect to and manage those external platforms and services with Terraform, you need to use plugins called providers.
Find out how providers work and how to use them in your Terraform workflows.
What Is a Terraform Provider?
A Terraform provider is a plugin that enables Terraform to interact with a specific platform or service. Software companies, cloud vendors, and individual contributors publish providers so that users can manage their tools and platforms through Terraform code.
To use a provider, you need to add a provider block to your Terraform configuration. This is an example of a provider block for phoenixANP's pnap provider:
terraform {
  required_providers {
    pnap = {
      source  = "phoenixnap/pnap"
      version = "0.33.0"
    }
  }
}

provider "pnap" {
  # Configuration options
}
The parameters in the required_providers block tell Terraform which provider plugin to download and install, and where to find it.
The provider block declares that the configuration will use pnap to manage phoenixNAP resources. You can add provider-specific configuration options inside this block.
Translation Layer Architecture
After you declare the provider in your configuration, Terraform can pass the relevant configuration data to it. The provider then needs to translate that data into API requests that the target platform can understand.
The process follows these steps:
1. You declare the provider in your configuration to let Terraform know which platform or service to connect to.
2. Terraform reads your configuration and sends the relevant data to the provider plugin.
3. The provider plugin translates the information into API requests that the external platform can understand.
4. The provider sends these requests to the target service.
5. The target service processes the request and sends back a response.
6. The provider translates the response back into structured data that Terraform can understand.
7. Terraform uses this data to update the state file.
This process runs every time you use commands such as terraform plan or terraform apply, so that Terraform can keep track of your infrastructure and compare it with any future changes.
Note: Terraform comes with a lot of commands, so having a quick reference can really help. Keep this Terraform Commands Cheat Sheet handy while you work on your projects.
Types of Terraform Providers by Source
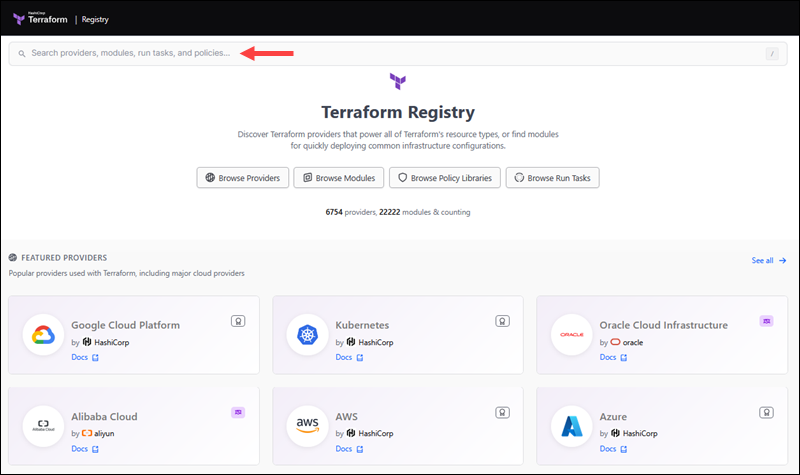
The Terraform Registry is the main source for publicly available Terraform providers. It covers most major infrastructure platforms and includes many of the providers and modules a beginner needs to manage resources with Terraform.
Some providers are maintained directly by HashiCorp, while others are created by software vendors or members of the Terraform community. You can browse and search for all of them in the Registry.
The Registry uses tiers, badges, and namespaces to show who publishes and maintains each provider. This makes it easy to see where a provider comes from and what kind of support you can expect.
Official Providers
Official providers are owned and maintained by HashiCorp. Here you'll find providers for many of the largest cloud platforms and infrastructure companies that support Terraform.
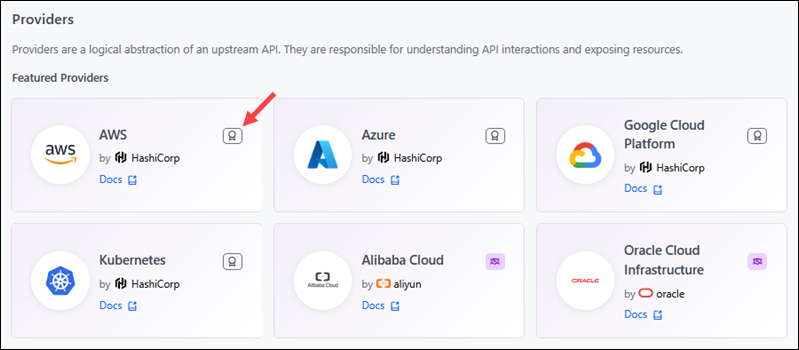
Official providers are a good starting point for beginners because their documentation closely matches the rest of the Terraform ecosystem. These providers are marked with an Official badge.
Partner Providers
Partner providers are written and published by third-party companies for their own platforms, APIs, or services. You will recognize them by the Partner badge.
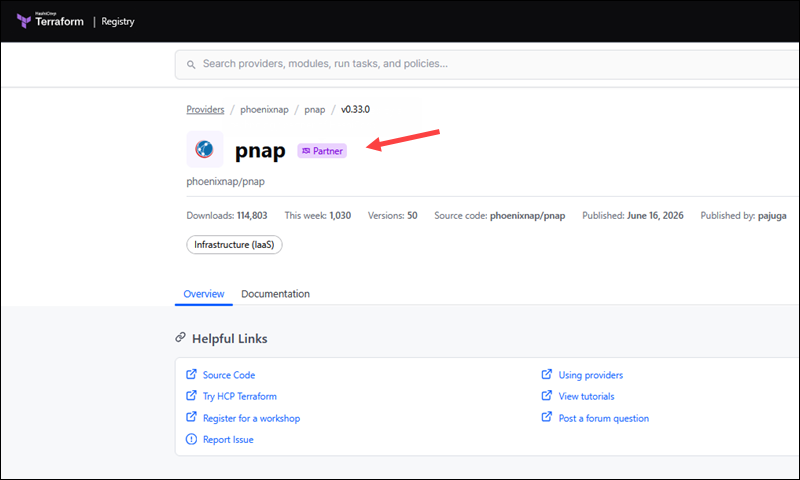
These providers are validated and published through HashiCorp's partner program. If you use a commercial platform that supports a Terraform provider, for example, phoenixNAP's Bare Metal Cloud platform, it will be in this category.
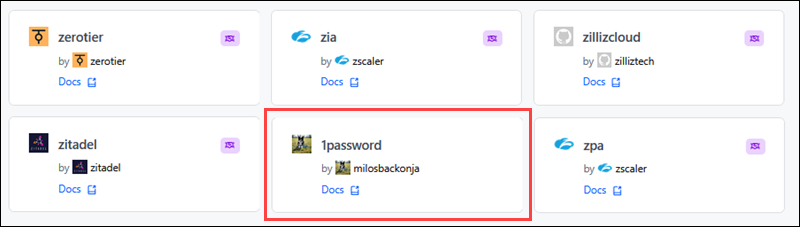
Community Providers
Individual members of the Terraform community can also publish providers. Community providers can be very useful, especially for smaller tools, niche platforms, or services without an official Terraform integration. They usually do not have a badge. The Registry shows the publisher's name and links to the provider documentation.
Support and updates vary a lot from one community provider to another. Before choosing a community provider for a long-term project, you need to check their documentation, how often they release updates, and how well they maintain their projects.
Configuring Providers in HCL
A Terraform provider configuration written in HashiCorp Configuration Language (HCL) is organized into blocks. Some of the main blocks include:
required_providers. Instructs Terraform which provider to download and install, and where to find it. The structure of this block is defined by Terraform itself.provider. Contains settings specific to the provider that define how the provider connects to its external platform.resource. Describes the resources that Terraform needs to create and manage.
The arguments inside the provider and resource blocks are defined in the provider's schema. Each provider can have its own set of arguments, so you need to check its documentation when writing your configuration files.
This is an example configuration that uses the phoenixNAP Bare Metal Cloud provider:
terraform {
  required_providers {
    pnap = {
      source  = "phoenixnap/pnap"
      version = "0.33.0"
    }
  }
}

provider "pnap" {
    endpoint = "https://api.example.com"
    region = "us-east-2"
}

# Create a server
resource "pnap_server" "test_server_1" {
    hostname = "test-server-1"
    os = "ubuntu/bionic"
    type = "s1.c1.medium"
    location = "PHX"
    ssh_keys = [
        "ssh-rsa AAAA..."

    ]
    #allowed actions are: reboot, reset, powered-on, powered-off, shutdown
    #action = "powered-on"
}Note: The endpoint and region settings in this example are just for illustration. If you want to use phoenixNAP Bare Metal Cloud with Terraform, read our How to Provision Infrastructure with Terraform article for a complete integration guide.
Required Providers Block
The required_providers block tells Terraform which provider to install and assigns it a local name inside your configuration. In this example, required_providers sets the provider's local name, source address, and version constraint:
terraform {
  required_providers {
    pnap = {
      source  = "phoenixnap/pnap"
      version = "0.33.0"
    }
  }
}
Terraform uses this information when you run terraform init to install the provider.
Local Name
When you add a provider to the Terraform configuration, you give it a local name. The name can then be used in the same module anytime the configuration needs to refer to the provider.
In the required_providers block example, the local name is pnap:
pnap = {}You can also choose a custom local name, since it is used only within the current module. However, it is usually best to keep the provider's preferred local name when you can. This makes the configuration easier to read and maintain.
Source Address
Each provider has a source address that informs Terraform where it can download and install the provider from. The address follows this format:
[hostname/]namespace/typeIf the provider is in the public Registry, you usually leave out the hostname. For example, instead of writing:
registry.terraform.io/phoenixnap/pnapYou can write:
phoenixnap/pnapIn this address:
phoenixnapis the namespace, which shows who published the provider.pnapis the type, which identifies the provider itself.
Terraform still uses the full address even if you leave out the hostname. It treats the address as registry.terrraform.io/phoenixnap/pnap.
Version Constraints
The version argument defines which provider versions the module is compatible with. In this example, Terraform will only use version 0.33.0:
version = "0.33.0"Terraform also supports operators that let you define a range of acceptable versions. For example:
| Example | Description |
|---|---|
0.33.0 | Use only version 0.33.0. |
>= 0.33.0 | Use version 0.33.0 or any newer version. |
~> 0.33.0 | Use version 0.33.0 and compatible patch updates, but not 0.34.0 or newer. |
>= 0.33.0, < 1.0.0 | Use any version from 0.33.0 up to, but not including, 1.0.0. |
Flexible version constraints are very common in production environments because they allow Terraform to update versions automatically and also reduce the risk of breaking changes.
Provider Configuration Block
Arguments in the provider block are defined by the provider's developer and are usually listed in their documentation. This means the arguments you can pass in this block will be different for each provider.
In most cases, the provider block contains values that help the provider connect to its external platform, like an API endpoint or authentication settings. In this example, Terraform is instructed to provide the endpoint and region arguments to the pnap provider:
provider "pnap" {
  endpoint = "https://api.example.com"
  region = "us-east-2"
}
A common approach is to add the provider block but leave it empty:
provider "pnap" { }This allows you to pass values separately from the configuration, for example, through environment variables. This is often the safer approach because you do not need to hardcode sensitive information, such as credentials and endpoints, in the configuration.
Resource Block
This resource block is where you describe the infrastructure Terraform should create and manage through a specific provider. In this example, the block defines a pnap_server resource for the pnap provider:
resource "pnap_server" "test_server_1" {
    hostname = "test-server-1"
    os = "ubuntu/bionic"
    type = "s1.c1.medium"
    location = "PHX"
    ssh_keys = [
        "ssh-rsa AAAA..."

    ]
}
The supported arguments in the example include:
hostname. Sets the server hostname.os. Specifies which operating system Terraform should install on the server.type. Defines the server type ID.location. Defines the location where the server will be deployed.ssh_keys. A list of SSH keys that will be installed on the server.
Managing Multiple Provider Instances
You can use the alias argument in the provider block to configure the same provider more than once. This is useful when you need different configurations for the same provider, for example, separate Bare Metal Cloud accounts, environments, or sets of credentials.
In this example, the first provider block is the default configuration. The second block is an aliased configuration named pnap.dev:
provider "pnap" {
    endpoint = "https://api.example.com"
    region = "us-east-2"
}

provider "pnap" {
    alias = "dev"
    endpoint = "https://api-dev.example.com"
    region = "us-west-1"
}

resource "pnap_server" "test_server_1" {
    hostname = "test-server-1"
    os = "ubuntu/bionic"
    type = "s1.c1.medium"
    location = "PHX"
    ssh_keys = [
        "ssh-rsa AAAA..."

    ]
}

resource "pnap_server" "dev_server_1" {
    provider = pnap.dev
    hostname = "dev-1"
    os = "ubuntu/bionic"
    type = "s1.c1.medium"
    location = "PHX"
   ssh_keys = [
        "ssh-rsa AAAA..."

    ]
}
Since the first resource block does not specify a provider, Terraform uses the default provider configuration. The second resource block contains the provider = pnap.dev argument. This instructs Terraform to use the aliased pnap.dev configuration for this resource.
Practical Implementation for Server Management
Terraform providers help you manage infrastructure across different environments, including public and private clouds, on-premises setups, and hypervisor platforms.
Setting Up Cloud Compute Instance Providers
A cloud compute provider allows Terraform to connect to a platform that creates and manages servers for you. This platform can be a public cloud, an IaaS provider, or a bare metal platform with an API.
For example, Terraform can provision and manage phoenixNAP Bare Metal Cloud servers, so you do not have to do everything manually in the web portal. The phoenixnap/pnap provider connects Terraform to phoenixNAP Bare Metal Cloud, and the pnap_server resource defines the server Terraform should create and manage:
terraform {
  required_providers {
    pnap = {
      # Local provider name
      source = "phoenixnap/pnap"

      # Version Terraform should install
      version = "0.33.0"
    }
  }
}

provider "pnap" {
  # This block tells Terraform that this configuration uses the pnap provider.
  # In a real setup, credentials can be supplied here or through
  # environment variables such as PNAP_CLIENT_ID and PNAP_CLIENT_SECRET.
}

resource "pnap_ssh_key" "admin" {
  # Name of the SSH key resource in phoenixNAP
  name = "admin-key"

  # If true, phoenixNAP treats this as a default SSH key
  default = false

  # Reads the public SSH key from a local file
  key = file("${path.module}/admin.pub")
}

resource "pnap_server" "test_server_1" {
  # Hostname assigned to the server
  hostname = "test-server-1"

  # Operating system to install
  os = "ubuntu/jammy"

  # Server instance type
  type = "s1.c1.medium"

  # Data center location code
  location = "PHX"

  # Attach the SSH key created above to this server
  ssh_key_ids = [
    pnap_ssh_key.admin.id
  ]

  cloud_init {
    # Reads a cloud-init file, encodes it in Base64,
    # and sends it to the server for first-boot setup
    user_data = filebase64("${path.module}/cloud-init.yaml")
  }
}
After you enter terraform init in the terminal:
1. Terraform downloads the phoenixnap/pnap provider plugin.
2. The provider "pnap" block tells Terraform that this configuration uses the pnap provider.
When you run the terraform apply command:
3. The pnap_ssh_key block reads the public key from a local file and sends it to phoenixNAP.
4. The pnap_server block sets the server hostname, operating system, type, location, and SSH key association.
5. Terraform calls the provider, and the provider calls the phoenixNAP API to create the SSH key and server.
6. The API returns details about the newly created pnap_server, such as its ID, IP address, CPU count, and other attributes.
Terraform stores these values in the state file so it can track and manage the server in future runs.
Working with On-Premises and Hypervisor Providers
You can also use Terraform to manage infrastructure in your own data center or lab, as long as the platform has an API.
For example, if you already use Proxmox or vSphere to manage virtual machines and some workloads run in the cloud while others stay on local infrastructure, you can connect Terraform to the virtualization platform instead of each VM host individually.
This example uses the vSphere provider:
terraform {
  required_providers {
    vsphere = {
      source = "hashicorp/vsphere"
    }
  }
}

provider "vsphere" {
  user                 = var.vsphere_user
  password             = var.vsphere_password
  vsphere_server       = var.vsphere_server
  allow_unverified_ssl = true
}

data "vsphere_datacenter" "dc" {
  name = var.datacenter
}

data "vsphere_virtual_machine" "template" {
  name          = "/${var.datacenter}/vm/${var.template_name}"
  datacenter_id = data.vsphere_datacenter.dc.id
}

resource "vsphere_virtual_machine" "test_server_1" {
  name     = "test-server-1"
  num_cpus = 4
  memory   = 2048
}
When you enter the terraform init command:
1. Terraform downloads the vSphere provider from the Terraform Registry.
During terraform apply:
2. Terraform uses the settings in the provider "vsphere" block to connect to the vSphere API.
3. The data blocks read information about existing objects, such as the datacenter and the VM template.
4. The vsphere_virtual_machine resource describes the VM that Terraform should create and track.
5. Terraform calls the provider, and the provider sends API requests to vSphere.
6. After the VM is created, Terraform stores the attributes in the state file so it can track the infrastructure.
Even though the underlying infrastructure is completely different from that of, for example, a hosted cloud, the process remains the same. You still declare a provider, set up access, define resources, and use the same Terraform commands to manage your infrastructure.
Utilizing Utility Providers to Bootstrap Servers
A utility provider generates values or sets up configurations that other providers or resources need. The random and cloudinit providers are prime examples and are commonly used alongside infrastructure providers in Terraform projects.
In the following example, the pnap provider provisions a Bare Metal Cloud server, random generates a reusable hostname value, and cloudinit renders the startup configuration the server uses when it first boots:
terraform {
  required_providers {
    pnap = {
      source  = "phoenixnap/pnap"
      version = "0.33.0"
    }

    random = {
      source = "hashicorp/random"
    }

    cloudinit = {
      source = "hashicorp/cloudinit"
    }
  }
}

provider "pnap" {}

resource "random_pet" "hostname" {
  prefix = "test-server"
}

data "cloudinit_config" "web" {
  gzip          = false
  base64_encode = true

  part {
    content_type = "text/cloud-config"
    content = <<-EOT
      #cloud-config
      package_update: true
      packages:
        - nginx
      write_files:
        - path: /var/www/html/index.html
          content: |
            <h1>Server bootstrapped with Terraform and cloud-init</h1>
      runcmd:
        - systemctl enable nginx
        - systemctl start nginx
    EOT
  }
}

resource "pnap_ssh_key" "admin" {
  name    = "admin-key"
  default = false
  key     = file("${path.module}/admin.pub")
}

resource "pnap_server" "web" {
  hostname = random_pet.hostname.id
  os       = "ubuntu/jammy"
  type     = "s1.c1.medium"
  location = "PHX"

  ssh_key_ids = [
    pnap_ssh_key.admin.id
  ]

  cloud_init {
    user_data = data.cloudinit_config.web.rendered
  }
}
After you enter terraform init:
1. Terraform downloads the pnap, random, and cloudinit providers.
Next, when you run terraform apply:
2. random_pet creates a hostname value that Terraform can reuse in the server configuration.
3. cloudinit_config prepares the startup instructions for the server.
4. Terraform calls the pnap provider to create the SSH key and provision the Bare Metal Cloud server.
5. When the server boots for the first time, it uses the cloud-init configuration to install packages, write files, and run setup commands.
6. Terraform records the created resources and their returned values so it can track the infrastructure in future runs.
In this workflow, the random and cloudinit providers prepared what the server needed during provisioning, while the pnap provider created the actual server resources.
Advanced Provider Configuration
Declaring a provider is only the first step. Terraform also has to choose the correct provider packages, decide when to update them, and reuse them in future runs. Most of this happens during terraform init, but you can adjust the settings to make this process more efficient and secure.
Caching Provider Plugins
The terraform init command sets up the working directory and downloads and installs the required providers. You can configure Terraform to reuse provider packages it has already downloaded from a shared plugin cache. A plugin cache saves time and bandwidth because Terraform does not have to download the same provider for every working directory.
To turn on plugin caching, add the plugin_cache_dir setting to your Terraform CLI configuration file:
1. To create a cache on Linux or macOS, open a terminal and enter the following command:
mkdir -p "$HOME/.terraform.d/plugin-cache"On Windows PowerShell, use:
New-Item -ItemType Directory -Force "$env:APPDATA\terraform.d\plugin-cache"2. Use a text editor to open the Terraform CLI configuration file:
nano "$HOME/.terraformrc"To open the Terraform CLI configuration on Windows, enter:
notepad "$env:APPDATA\terraform.rc"3. Add the plugin_cache_dir setting in the file to tell Terraform where it should store and reuse downloaded provider packages:
plugin_cache_dir = "$HOME/.terraform.d/plugin-cache"4. Reinitialize the project directory:
terraform initTerraform will reuse provider packages from the local cache when possible. You'll notice that terraform init runs faster on this machine. A new machine will still need to download the provider packages for the first time.
Configuring FileSystem Mirrors
If you work in a restricted or offline environment, you can use a local filesystem mirror to control where Terraform installs provider packages from.
To set up a filesystem mirror:
1. Use the mkdir command to create a local mirror directory on Linux or macOS:
mkdir -p ./terraform-providersIf you are using Windows PowerShell, type:
New-Item -ItemType Directory -Force .\terraform-providers2. Download the required providers into the terraform-providers directory:
terraform providers mirror ./terraform-providers3. Open the Terraform CLI configuration file in a text editor:
nano "$HOME/.terraformrc"On Windows, open the file with:
notepad "$env:APPDATA\terraform.rc"4. Add a provider_installation block to the CLI configuration file:
provider_installation {
  filesystem_mirror {
    path = "./terraform-providers"
  }

  direct {
    exclude = ["*/*/*"]
  }
}
This block tells Terraform to install providers from the local filesystem mirror rather than download them from a registry.
5. Reinitialize the configuration:
terraform initFrom now on, Terraform will use the local mirror directory as the source for provider installations.
Environment Variables Mapping
As a security precaution, avoid putting API keys, client secrets, or passwords directly in your Terraform files. Many providers let you use shell environment variables to pass sensitive information to their APIs.
Terraform does not use the same naming rule for every provider. Each provider defines its own set of supported environment variables, and its documentation usually lists the exact variable names and explains how they map to settings you would otherwise set in the provider block.
For example, the phoenixNAP pnap provider supports PNAP_CLIENT_ID and PNAP_CLIENT_SECRET. To use environment variables with the pnap provider:
1. Open the terminal.
2. Export the provider credentials as environment variables:
Linux/macOS
export PNAP_CLIENT_ID="your-client-id"
export PNAP_CLIENT_SECRET="your-client-secret"
Windows PowerShell
$env:PNAP_CLIENT_ID="your-client-id"
$env:PNAP_CLIENT_SECRET="your-client-secret"
3. Apply the configuration:
terraform applyYou do not need to modify your configuration. If the provider plugin supports environment variables, it will read the values from your shell environment when Terraform runs.
Integrating Shared Credential Files
Most major cloud providers support shared credential files in addition to environment variables. If you already use the provider's CLI tools on your local machine, this approach can be convenient. Instead of creating a new set of credentials just for Terraform, you can let Terraform use the credentials you already have.

If the provider supports shared credential files, this is how you usually set them up:
1. Check the provider documentation for details about the file format, location, and supported profiles.
2. Store your credentials in the format and location the provider expects.
3. When you run terraform plan or terraform apply, the provider reads your credentials from the shared file and uses them to authenticate to the API.
Not all providers handle shared credential files in the same way. Always check the provider documentation to see which authentication options are available and how to set them up.
Authenticating via OpenID Connect
OpenID Connect (OIDC) is a secure protocol for authenticating with providers in automated Terraform workflows. It is especially useful in CI/CD pipelines. Once you set up a trust relationship between the CI/CD platform and the cloud provider, the pipeline can request temporary access credentials during each run.
This is how the process works:
1. The CI/CD platform creates an OIDC identity token for the pipeline run.
2. The platform sends the OIDC token to the cloud provider as part of the authentication request.

3. The cloud provider confirms the token comes from a trusted pipeline and provides temporary access credentials.
4. Terraform uses these temporary credentials to initialize the backend, read state, acquire a lock, and write the updated state after the run.
Because access is temporary, you do not need to store permanent cloud credentials in the pipeline configuration, making your CI/CD pipelines more secure.
Troubleshooting and Best Practices
Users usually run into provider issues during one of the following commands:
terraform init. You see a message that Terraform cannot download or select a provider version.terraform plan. Terraform reads the configuration, but the provider schemas or versions do not match what the code expects.terraform apply. Terraform connects to the provider API, but the API calls fail due to incorrect user credentials, bad permissions, API rate limits, or invalid arguments.
Depending on the issue, there are several actions you can take to attempt to resolve it.
Resolving Dependency and Version Conflicts
Provider version conflicts often happen when different parts of a configuration require incompatible versions of the same provider. For example, the root module might declare the pnap provider with the version constraint ~>0.31.0:
terraform {
  required_providers {
    pnap = {
      source  = "phoenixnap/pnap"
      version = "~> 0.31.0"
    }
  }
}
However, a child module might use a different version:
terraform {
  required_providers {
    pnap = {
      source  = "phoenixnap/pnap"
      version = "0.33.0"
    }
  }
}
Terraform cannot install both versions for the same provider address in the same root configuration, which triggers an error. To check provider requirements across the current configuration, run:
terraform providersThis command shows which providers are required by the root module and child modules. Once you identify the conflict, fix it by aligning version constraints so that at least one provider version meets all requirements:
terraform {
  required_providers {
    pnap = {
      source  = "phoenixnap/pnap"
      version = ">= 0.31.0, < 0.34.0"
    }
  }
}
It is usually better to use a version range. This allows your configuration to get compatible updates while avoiding unexpected breaking changes.
Debugging Provider API Logs
If a provider fails during terraform plan or terraform apply, Terraform displays an error message in the terminal. Some of the most common issues include:
- Invalid or expired API credentials.
- The account does not have the permissions for the specific action.
- Some resources are only available in specific regions or locations.
- The account may have reached an API request limit.
- The provider version needs to be updated.
- The external platform may be temporarily unavailable.
If the error message is unclear, you can check the provider's logs. Terraform lets you choose from several log levels: TRACE, DEBUG, INFO, WARN, and ERROR. TRACE generally provides the most details about an event.
To view provider logs in the terminal:
1. Enter the following command to set the provider log level to TRACE:
export TF_LOG_PROVIDER=TRACE2. Apply the configuration:
terraform apply3. If the output is too large for the terminal, you can write logs to a file with TF_LOG_PATH:
export TF_LOG=TRACE
export TF_LOG_PATH=terraform-provider.log
terraform apply
4. After you finish troubleshooting, use the following commands to turn logging off:
unset TF_LOG
unset TF_LOG_PROVIDER
unset TF_LOG_PATH
Leaving trace logging on can make future runs harder to read.
Upgrading Providers and Handling Breaking Changes
Treat provider upgrades as code changes, especially if you are working in a production environment. A standard workflow for updating providers includes the following steps:
1. Check the current provider requirements:
terraform providers2. Review the new release notes, and then update the version constraint in the required_providers block:
terraform {
  required_providers {
    pnap = {
      source  = "phoenixnap/pnap"
      version = "~> 0.33.0"
    }
  }
}
3. Tell Terraform to ignore the currently locked selection and install the newest version allowed by the updated version constraints:
terraform init -upgrade4. Terraform records the selected provider version in the .terraform.lock.hcl file. Use the following command to check what changed before you commit:
git diff .terraform.lock.hcl5. Use the following command to check how Terraform plans to update your infrastructure and to make sure the upgraded provider works:
terraform plan6. If both the lock file and the plan look good, go ahead and complete the upgrade in your normal workflow.
If you are moving to a major version, review the provider's changelog or update guide first. Breaking changes can include renamed arguments, removed resources, new authentication requirements, or changes to values stored in state.
Conclusion
This article explained how providers work, how to configure and use them, and how to troubleshoot common errors.
If you recently changed a provider, you may also need to update your Terraform backend configuration.