As a full-featured open-source VPN solution, OpenVPN is a popular choice for privacy-conscious individuals and organizations who need to secure their company networks. Running OpenVPN on Docker simplifies the setup and management of TLS-encrypted virtual private networks.
This step-by-step article will show you how to install OpenVPN on Docker and connect a client to the server.

Prerequisites
- Docker installed.
- Administrative access to the system.
Set Up OpenVPN on Docker Manually
OpenVPN installation in Docker involves creating a data volume, an image-based container, and a client configuration file. The configuration file requires a valid SSL certificate, which is also generated during installation.
Follow the steps below to manually install OpenVPN on Docker using a premade OpenVPN Docker image.
Step 1: Create Data Volume
Creating a Docker volume will allow the future OpenVPN container to store relevant information. Follow the procedure below to create a volume on your system:
1. Create an environment variable that stores the volume name:
OVPN_DATA="ovpn-test"2. Run the following docker volume command:
docker volume create --name $OVPN_DATA
The output shows the name of the created volume.
Step 2: Create OpenVPN Container
After creating the data volume, execute the following command to run the OpenVPN container based on the kylemanna/openvpn Docker image:
docker run -v $OVPN_DATA:/etc/openvpn --log-driver=none --rm kylemanna/openvpn ovpn_genconfig -u udp://[server-domain-or-ip-address]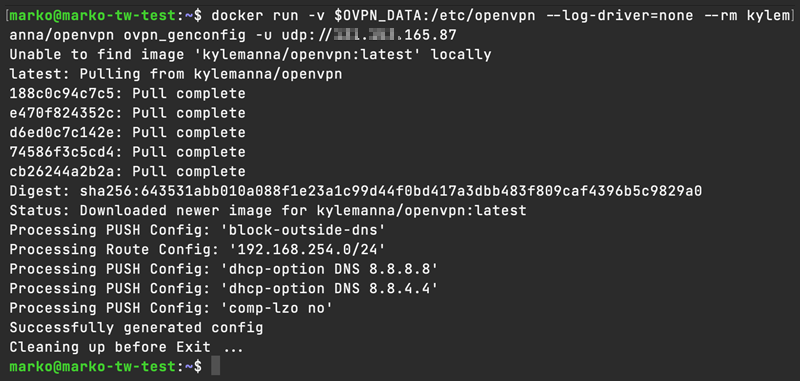
Docker pulls the necessary data and configuration from the registry and generates the config file.
Note: This tutorial assumes you have a domain name and a static IP address to create an OpenVPN server. If you do not have a static IP address, you must use a Dynamic DNS service.
Step 3: Set up Certificates
Next, generate a client certificate to connect to the VPN network. Follow the steps below to create the certificate.
1. Execute the following command to begin the certificate setup process:
docker run -v $OVPN_DATA:/etc/openvpn --log-driver=none --rm -it kylemanna/openvpn ovpn_initpki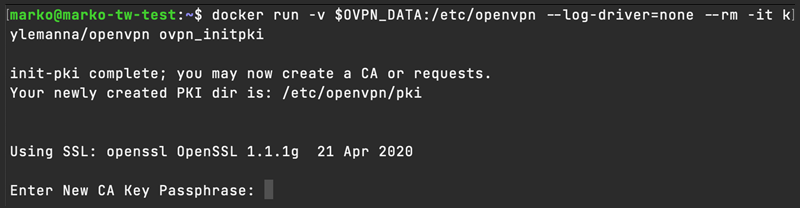
The command starts the certificate generation process.
2. Type a secure passphrase and press Enter.
Note: Save the CA passphrase for future use because you will need it each time you generate a client certificate.
The output shows the progress of creating an RSA private key.
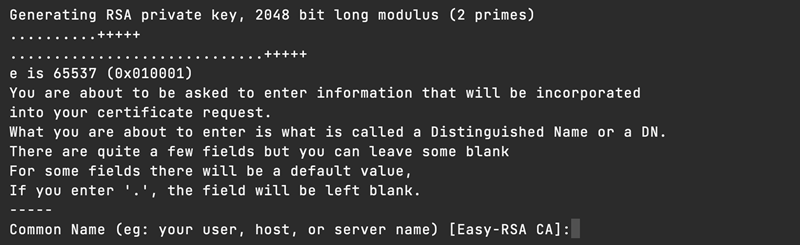
3. Enter the name of your user, host, or server to continue the process. The system uses the name to generate a certificate. Depending on your system's speed, this process may take some time to complete.
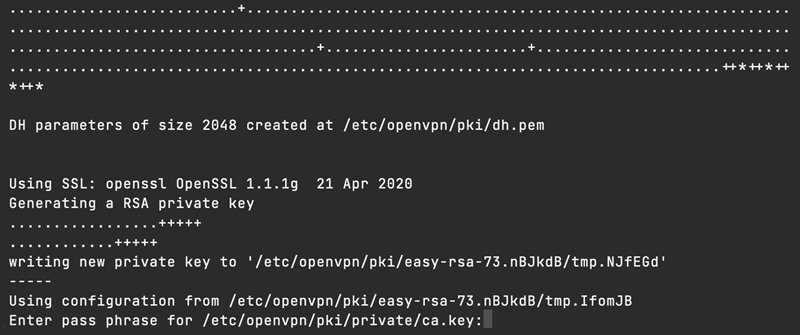
4. Enter the passphrase and press Enter.
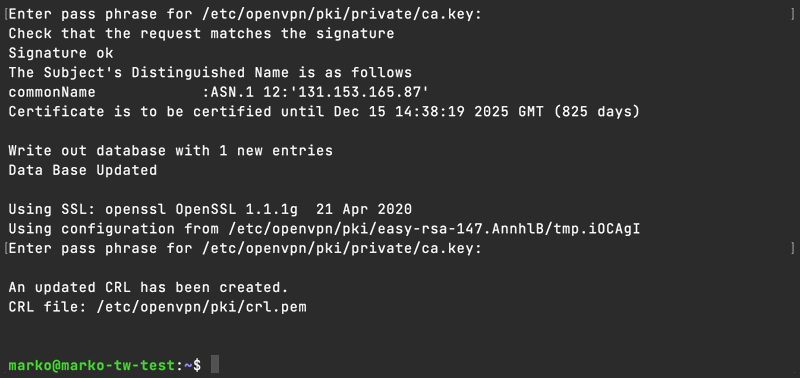
The output confirms that the certificate has been created.
Step 4: Start OpenVPN Container
Start the container using port 1194, which is the default UDP port for OpenVPN:
docker run -v $OVPN_DATA:/etc/openvpn -d -p 1194:1194/udp --cap-add=NET_ADMIN kylemanna/openvpn
The output shows the container ID.
Step 5: Generate Client Certificate
A client certificate allows a client machine to connect to the OpenVPN server. Generate the certificate with the command below, replacing [client-name] with the name of the client that connects to the server:
docker run -v $OVPN_DATA:/etc/openvpn --log-driver=none --rm -it kylemanna/openvpn easyrsa build-client-full [client-name] nopass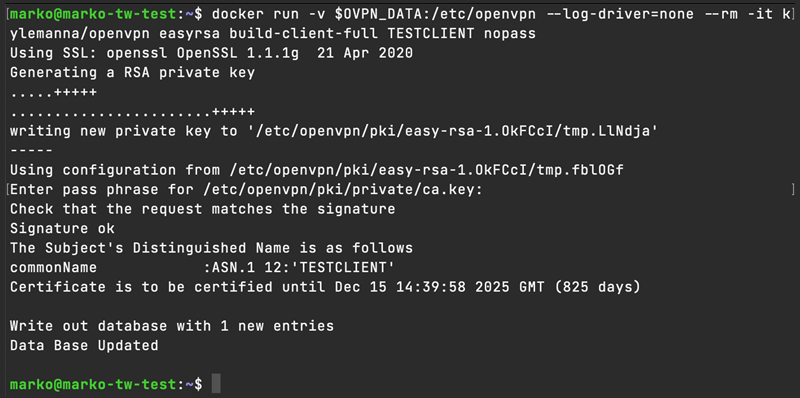
Type the CA passphrase when prompted and wait for the certificate generation to complete.
Step 6: Compile OpenVPN Configuration File
Use the generated client certificate to compile a client configuration file. The following is the syntax for the file generation:
docker run -v $OVPN_DATA:/etc/openvpn --log-driver=none --rm kylemanna/openvpn ovpn_getclient [client-name]> [file-name].ovpnReplace [client-name] with the name you used for the client certificate generation. Replace [file-name] with your chosen name (best practice is to use the client name).
Step 7: Connect to Server
With the server running and the client configuration file available, connect to the OpenVPN instance you created.
Follow the procedure described below:
1. Install the OpenVPN client:
sudo apt install openvpn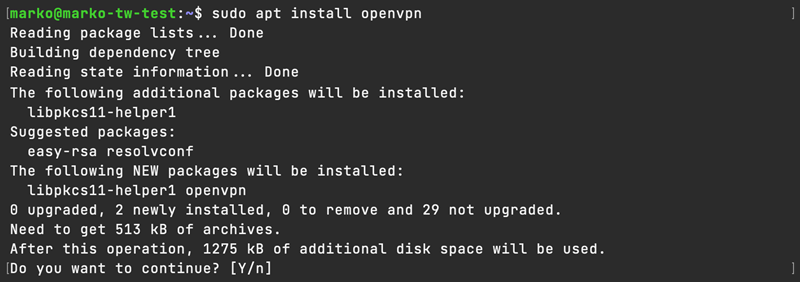
When prompted, type Y and press Enter. Wait for the installation to finish.
2. Start the connection by using the openvpn command with the configuration file as an argument:
sudo openvpn [client-name].ovpn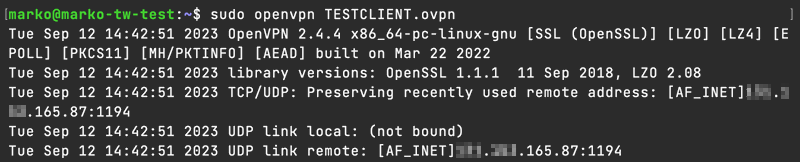
The output shows the client communicating with the server:
Note: You can use the generated configuration file to connect to the VPN using any major VPN client, such as OpenVPN Connect or Pritunl.
Set Up OpenVPN on Docker with DockOvpn
DockOvpn is an OpenVPN Docker image that further simplifies the VPN server creation. The image automates the CA certificate and client configuration file creation.
To set up a VPN server using DockOvpn, follow the steps below:
1. Run the container based on the DockOvpn image with this command:
docker run -it --rm --cap-add=NET_ADMIN -p 1194:1194/udp -p 80:8080/tcp -e HOST_ADDR=$(curl -s https://api.ipify.org) --name dockovpn alekslitvinenk/openvpn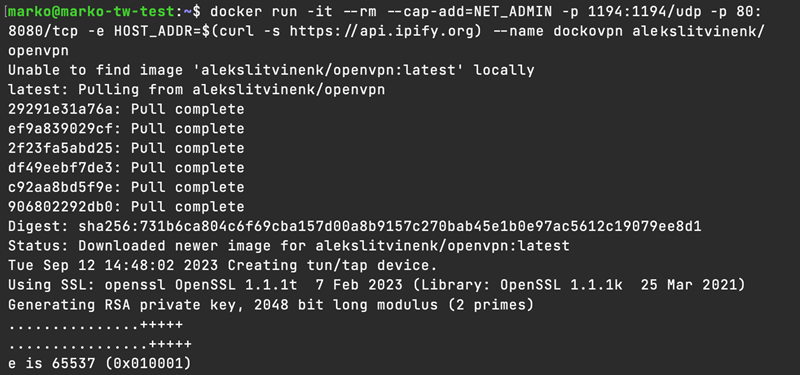
Wait for the process to complete. When DockOvpn generates the client configuration file, a message instructs the user to download the file.
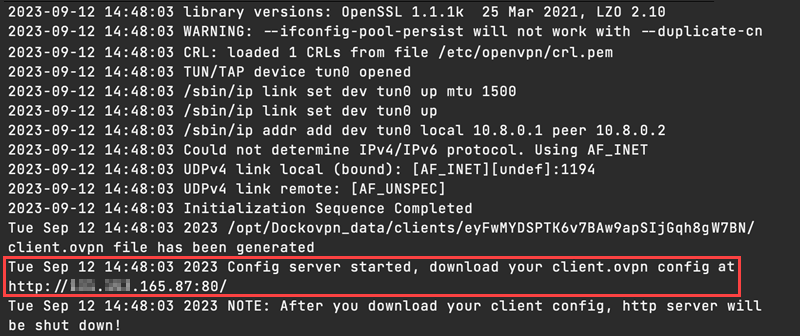
2. Go to the address printed in the output on your internet browser. The download will start automatically. Alternatively, use the following curl command:
curl http://[ip-address]:80 --output client.ovpn3. Use the configuration file in a VPN client to connect to your installed OpenVPN server.
Conclusion
After reading this article, you should know how to set up an OpenVPN Docker container and use it to connect your client machines to an encrypted network. Aside from the manual steps, the article also described the automatic DockOvpn procedure.
Next, learn the difference between VPN and VDI (Virtual Desktop Infrastructure).