Rust is a general-purpose programming language for system-level development projects. It is fast, memory efficient, and seamlessly integrates with other languages.
This guide will show you how to install Rust on Ubuntu using an installer script or the APT package manager.
Prerequisites
- Ubuntu installed.
- Command-line access.
- User with sudo privileges.
- curl installed.
Option 1: Install Rust on Ubuntu Using rustup
Use the rustup shell script to install the latest version of Rust. The script allows users to customize their Rust installation by specifying the default host triple, toolchain, and profile.
Follow the steps below to install Rust with rustup.
Step 1: Start rustup
Use the following procedure to download and initiate the rustup script:
1. Enter the curl command below:
curl https://sh.rustup.rs -sSf | shThe Rust installer starts.

2. Press Enter to proceed with the default installation.
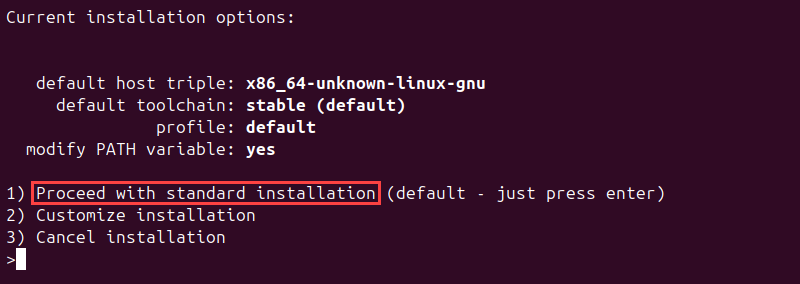
Note: To customize the default installation parameters, type 2 and press Enter.
Wait for the installation to finish. Once Rust is installed, the output confirms the success of the operation.
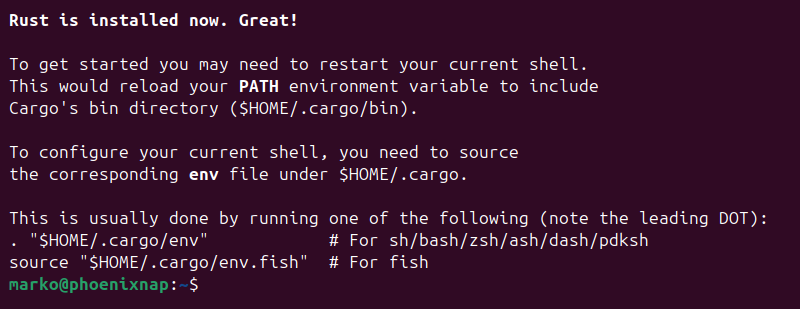
Note: The system might not recognize the /.cargo/bin directory. To resolve the issue, exit the current Terminal instance and start a new one.
Step 2: Add Rust to PATH
Run the following source command to add Rust to the system PATH:
source "$HOME/.cargo/env"The command does not produce an output.
Step 3: Verify Installation
Execute rustc with the -V option to verify the installation:
rustc -VThe output shows the installed Rust version.

Option 2: Install Rust on Ubuntu Using APT
The official Ubuntu repository contains the Rust package, which means Rust can be installed with the APT package manager. Even though it does not offer the latest version, using APT to install Rust is a simple and fast option.
Use the steps below to install Rust via APT.
Step 1: Update Package Registry
Refresh the list of package sources by entering the following:
sudo apt updateThis action ensures that APT installs the latest Rust version available in the repositories.
Step 2: Install Rust
After updating the package registry, install Rust by running the following command:
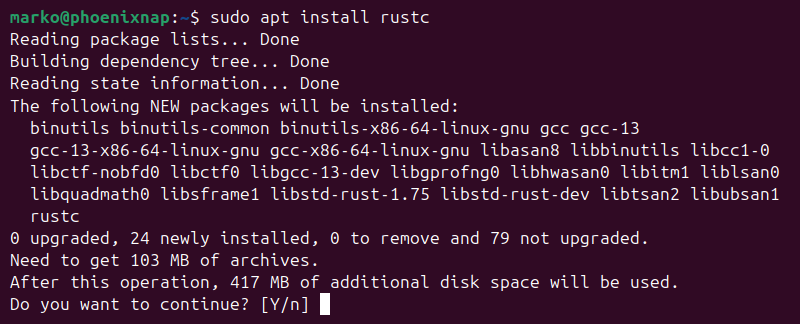
sudo apt install rustcEnter Y when prompted and wait for the installation to complete.
Step 3: Verify Installation
Confirm the installation using the rustc command:
rustc -VThe output shows the version of Rust installed on the system.

How to Uninstall Rust on Ubuntu
Depending on which method you used to install Rust, use either the rustup or apt command to uninstall it.
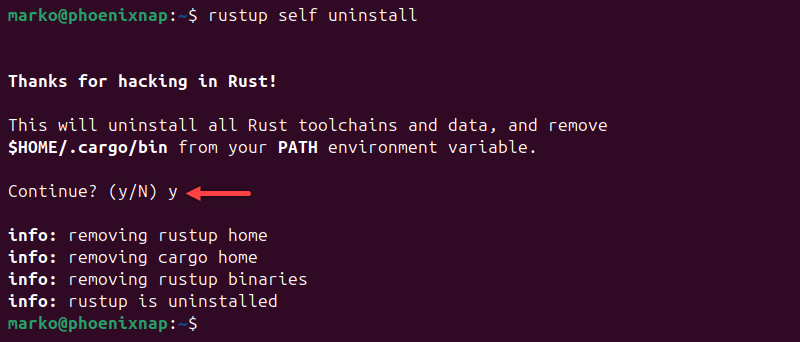
To remove a rustup version from the system, run:
rustup self uninstallEnter Y to confirm the action and wait for the removal to finish.
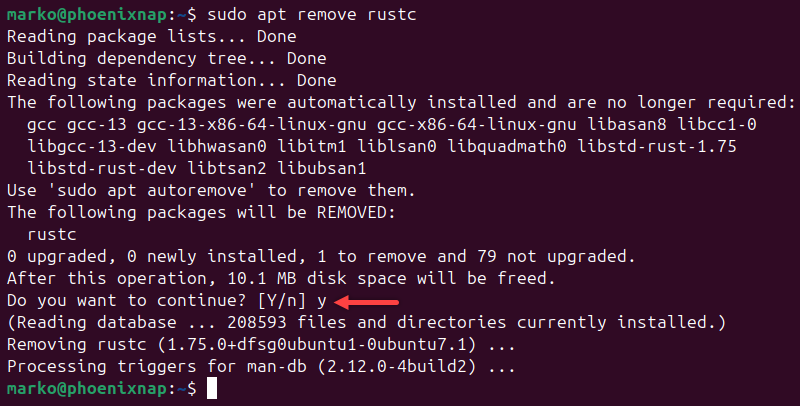
To uninstall an APT version of Rust, run:
sudo apt remove rustcEnter Y to confirm. APT removes Rust from the system.
Conclusion
After reading this tutorial, you know how to install Rust on Ubuntu. The article covered the installation methods that involved the APT package manager and the rustup script installer.
Next, check out this list of the best Linux text editors for coding to find a suitable tool for writing Rust code.


