Jenkins is an open-source automation server that helps developers automate building, testing, and deploying software through continuous integration and continuous delivery (CI/CD) pipelines. It is a crucial tool for facilitating the software development process.
This guide will help you install Jenkins on Debian.
Prerequisites
- A system running a Debian operating system.
- A user account with root privileges.
- Access to the terminal.
Installing Jenkins on Debian
Jenkins requires Java to run. The latest Jenkins versions support Java 11, 17, or 21 runtime environments. This tutorial uses Debian 12 with Java 17, which is available in the official Debian repository.
Follow the steps below to install Jenkins on Debian.
Note: Upgrading your Java to version 17 may create conflicts in Jenkins. You should either install Java before installing Jenkins or review the official installation notes before the upgrade.
Step 1: Install Java
Start by installing the Java developer's kit (JDK). The JDK includes the Java Runtime Environment (JRE) and its required files.
1. Open a terminal window and update the package repository index:
sudo apt update2. Install Java by running the command below:
sudo apt install default-jdk -y
The system installs the latest Java version available in the Debian repository. Wait for the installation to complete.
3. Verify the installation by checking the Java version. Run:
java -version
Step 2: Download the GPG Security Key
Jenkins packages are signed to ensure integrity. You need to download and save the updated signing key. Depending on which Debian build you are using (LTS or weekly), run one of the commands below to add the GPG key:
For LTS releases:
curl -fsSL https://pkg.jenkins.io/debian-stable/jenkins.io-2023.key | sudo tee \
  /usr/share/keyrings/jenkins-keyring.asc > /dev/null
For weekly releases:
curl -fsSL https://pkg.jenkins.io/debian/jenkins.io-2023.key | sudo tee \
  /usr/share/keyrings/jenkins-keyring.asc > /dev/null
Step 3: Add the Jenkins Repository
By default, Debian does not include access to the Jenkins software repository. Add the appropriate Jenkins repository to your system:
For LTS releases:
echo deb [signed-by=/usr/share/keyrings/jenkins-keyring.asc] \
  https://pkg.jenkins.io/debian-stable binary/ | sudo tee \
  /etc/apt/sources.list.d/jenkins.list > /dev/null
For weekly releases:
echo deb [signed-by=/usr/share/keyrings/jenkins-keyring.asc] \
  https://pkg.jenkins.io/debian binary/ | sudo tee \
  /etc/apt/sources.list.d/jenkins.list > /dev/null
This command adds the Jenkins repository to your system.
Step 4: Install Jenkins
Before you install Jenkins, refresh the package index to include the newly added Jenkins repository:
sudo apt updateThen, install Jenkins with:
sudo apt install jenkins -y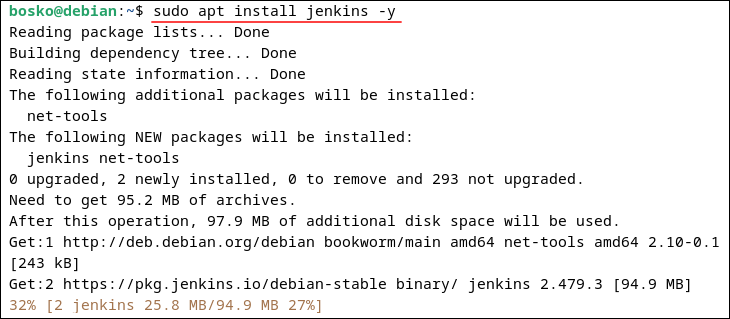
Wait for the installation process to complete.
Note: If you have servers running other operating systems, you can install Jenkins on Ubuntu or install Jenkins CentOS and Rocky Linux.
Step 5: Start and Enable the Jenkins Service
Once the installation completes, start the Jenkins service with:
sudo systemctl start jenkinsThen, configure Jenkins to start when the system boots:
sudo systemctl enable jenkinsHow to Configure Jenkins on Debian
After installation, access the Jenkins configuration utility by opening a web browser to the following address:
http://localhost:8080If your server has a domain name or hostname, use that instead of localhost.
Note: The 7 DevOps principles behind Jenkins relate to the concepts behind Kubernetes. You may also be interested in deploying Jenkins on Kubernetes.
Unlock Jenkins
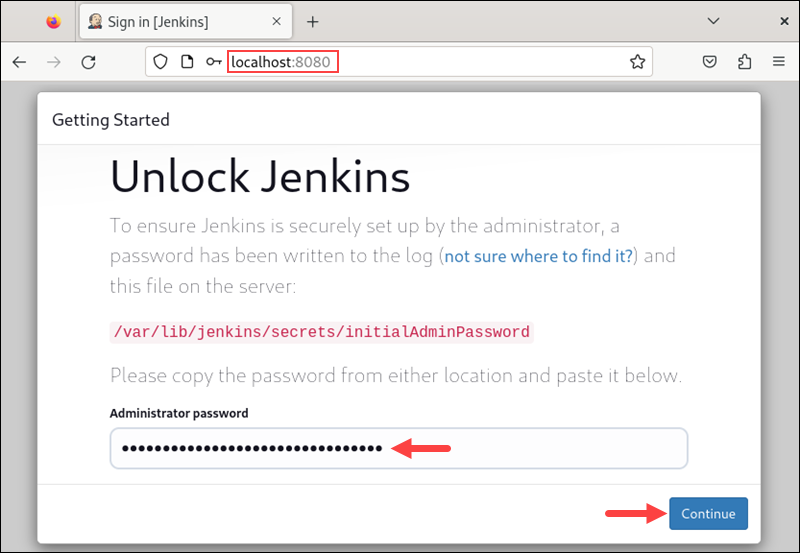
The Jenkins configuration webpage states that a password was created during installation. Follow the steps below to find the password and unlock Jenkins:
1. Switch to a terminal window and run the following command to show the password:
sudo cat /var/lib/jenkins/secrets/initialAdminPasswordThe system displays a long alphanumeric code. Copy the code.
2. Switch to the Jenkins Getting Started page in your browser and paste the code into the Administrator Password field. Then, click Continue to unlock Jenkins.
Install Plugins
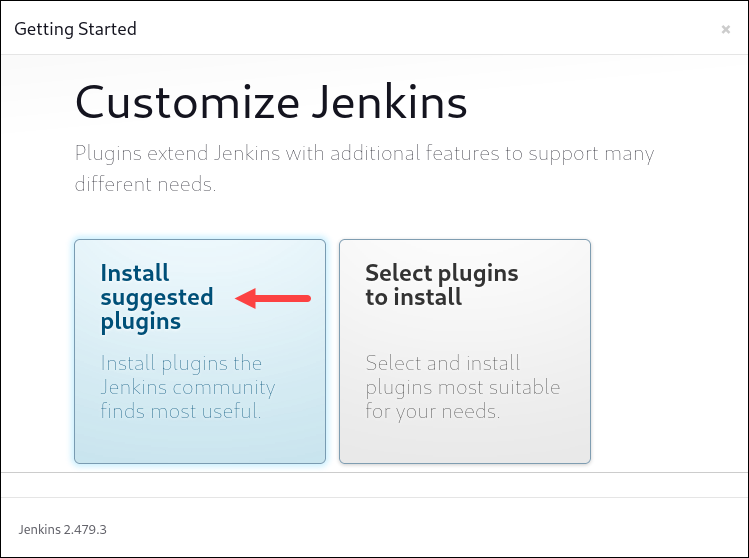
On the next screen, Jenkins prompts you to install plugins. Unless you know which plugins you specifically want, the recommended option is to Install suggested plugins.
Create First Admin User
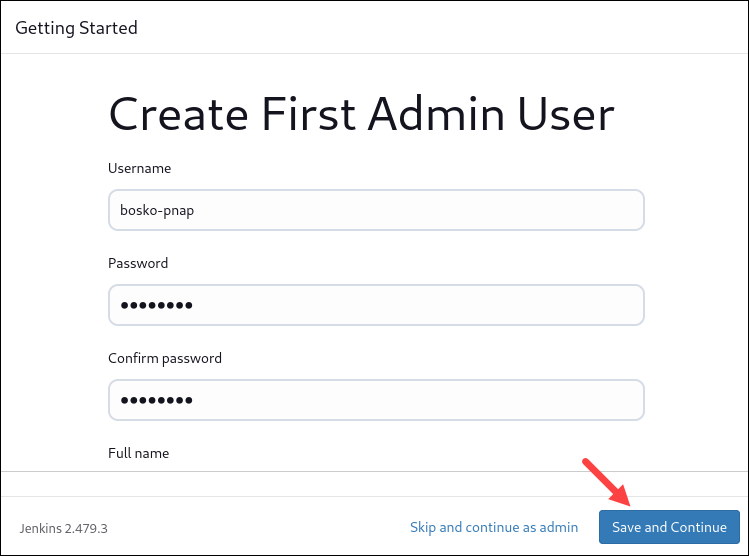
Once plugins finish installing, the wizard prompts you to Create First Admin User. Fill in the fields with the required information and click Save and Continue.
Instance Configuration
The last screen displays the Jenkins URL. This should be the URL you initially used to access the configuration tool.
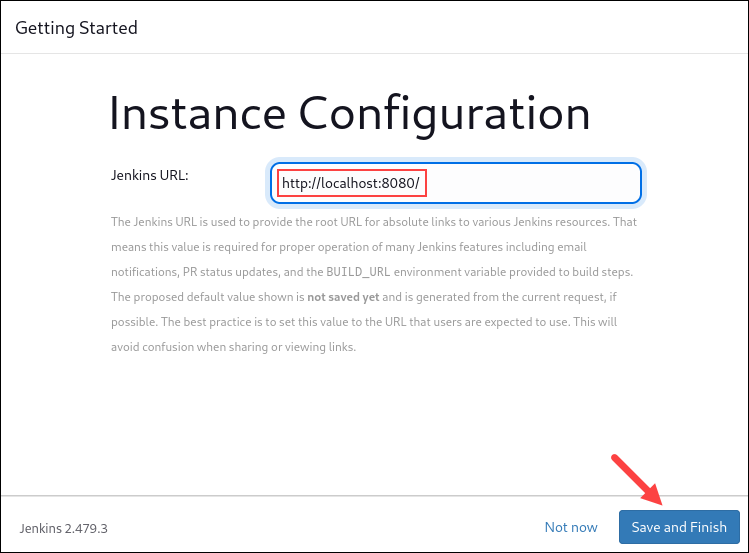
You can use this URL anytime to set up Jenkins. When you are ready, click Save and Finish.
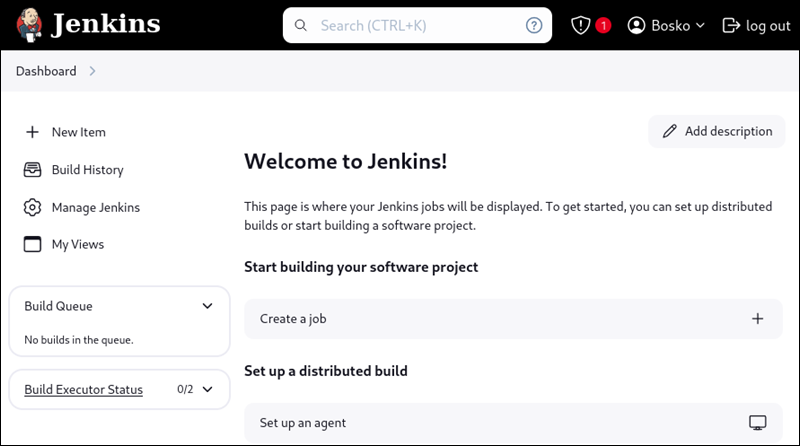
The system lets you know that Jenkins is ready. Click Start using Jenkins to load the Jenkins software. This takes you to the main Jenkins dashboard with a Welcome to Jenkins! message:
Note: Visit our Jenkins beginner's tutorial to learn all about Jenkins' features.
Securing Jenkins on Debian
This section outlines the key security best practices to secure your Jenkins instance.
Configure Firewall
A firewall is essential for securing Jenkins by limiting access to specific ports and IP ranges. On Debian, you can use ufw (Uncomplicated Firewall) to configure the firewall. Follow the steps below:
1. Run the command below to allow traffic only on specific ports (e.g., 8443):
ufw allow 8443 sudo ufw enable2. Enable ufw to enforce the rules:
sudo ufw enableActivate Audit Plugins
Audit logs in Jenkins record events like job builds, user logins, and configuration changes. They offer critical insights for troubleshooting, security, and compliance.
1. Log in to your Jenkins instance and select the Manage Jenkins option on the dashboard.
2. On the manage Jenkins page, click System Log.
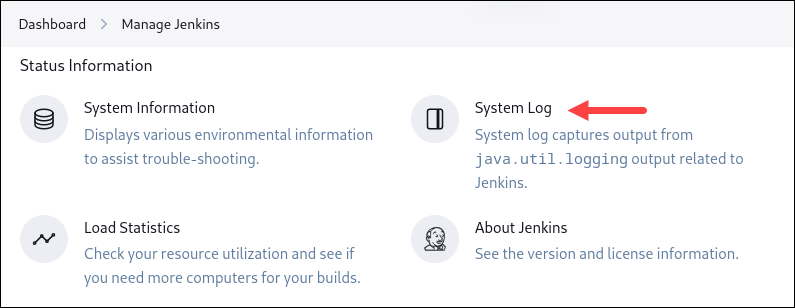
On the Log Recorders page, click the + Add recorder button to add a new log recorder to your instance. Use plugins like Audit Trail to enable detailed monitoring and enhance security.

Turn on TLS Encryption
TLS (Transport Layer Security) encryption ensures secure communication by encrypting data transferred between systems. It is crucial for protecting the data from interception and tampering.
Follow the steps below to turn on TLS Encryption for connections between the controller and the agents:
1. Log in to your Jenkins instance and select Manage Jenkins on the dashboard.
2. Scroll down to the Security section and select Security. The Security section also provides various other settings that you can configure to secure your Jenkins instance.
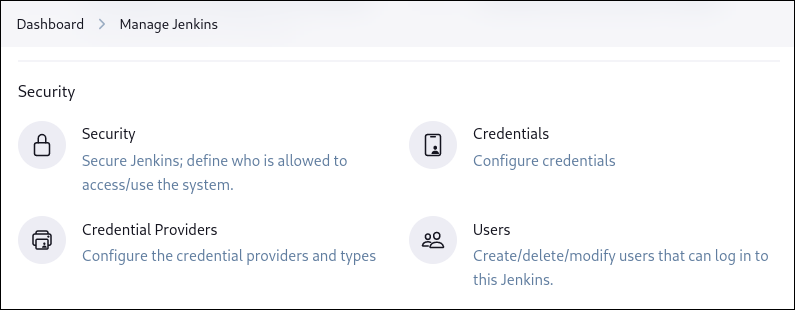
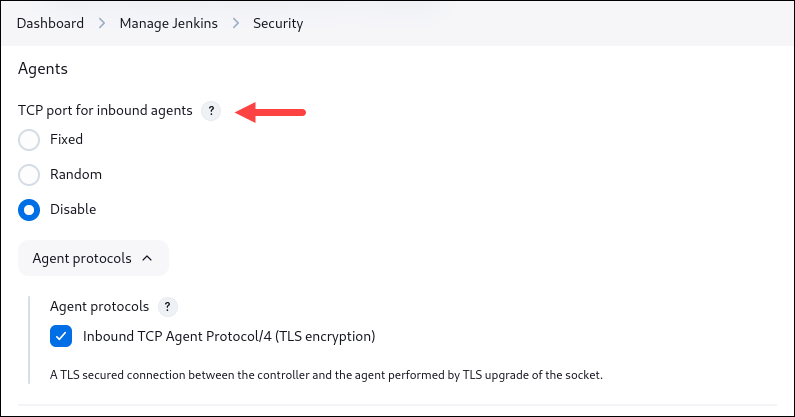
3. In Security, scroll down to the Agents section. By default, agents connect to the controller via TCP using an inbound port. If inbound connections are not required, disable the port. If inbound connections are necessary, enable "Inbound TCP Agent Protocol/4 (TLS encryption)" to secure these connections with TLS. This setting ensures encrypted, secure communication.
Enable CSRF protection
Cross-Site Request Forgery (CSRF) is a web security vulnerability where malicious sites can perform unauthorized actions on behalf of authenticated users. Jenkins provides CSRF protection. This setting generates a unique token (crumb) for each user. Any action that modifies Jenkins requires this crumb and ensures actions are tied to the authenticated user.
Follow the steps below to activate CSRF protection:
1. Select the Manage Jenkins option on the Dashboard.
2. Find the Security section and click Security.
3. Scroll down to the CSRF Protection section and enable the Default Crumb issuer.

Conclusion
You should now have Jenkins installed and ready to use on your Debian system. You can now easily coordinate with multiple teams on a project and deliver software in a CI/CD environment.
If you are using a different distribution of Linux, we also have a guide on how to install Jenkins on CentOS or Rocky Linux, as well as how to install Jenkins on Ubuntu. For Windows users, check out our guide on how to install Jenkins on Windows, and if you are a Mac user, learn how to install Jenkins on Mac.
