The NVIDIA CUDA Toolkit provides the development environment required to build GPU-accelerated applications on Linux systems. It includes the CUDA compiler, runtime libraries, debugging and profiling tools, and supporting utilities that enable software to execute parallel workloads on NVIDIA GPUs.
A correct installation ensures compatibility between the NVIDIA driver and the CUDA Toolkit, which is required for CUDA applications to compile and run properly.
This guide will explain how to install the NVIDIA CUDA Toolkit on Ubuntu, configure the system correctly, and verify the installation works as expected.

Prerequisites
- A system running Ubuntu.
- A user account with sudo or root privileges.
- An NVIDIA GPU supported by CUDA.
What Is NVIDIA CUDA?
Compute Unified Device Architecture (NVIDIA CUDA) is a parallel computing platform and programming model developed by NVIDIA. It enables developers to use NVIDIA GPUs for general-purpose processing, not only graphics rendering.
CUDA allows software to offload compute-intensive tasks from the CPU to the GPU. Because GPUs contain thousands of smaller processing cores optimized for parallel execution, they handle large-scale mathematical operations significantly faster than traditional CPUs in many workloads.
The CUDA Toolkit includes the CUDA compiler (nvcc), runtime libraries, development headers, debugging tools, and performance profiling utilities. Developers write CUDA applications with extensions to C, C++, and other supported languages, then compile them into GPU-executable code.
NVIDIA CUDA Use Cases
CUDA accelerates workloads that benefit from massive parallel processing. It is adopted across scientific computing, data processing, and artificial intelligence.
Common CUDA use cases include:
- Data analytics. GPU acceleration improves performance for processing large datasets and executing parallel algorithms.
- Machine learning and deep learning. Frameworks such as TensorFlow and PyTorch use CUDA to accelerate neural network training and inference on GPUs.
- Scientific simulations. Physics modeling, molecular dynamics, and climate simulations use CUDA to efficiently process large numerical datasets.
- Video processing and rendering. CUDA speeds up encoding, decoding, and real-time video effects in professional media workflows.
- High-performance computing (HPC). Research institutions use CUDA-enabled clusters to perform complex computational tasks at scale.
How to Install CUDA?
Ubuntu is widely used in development and production environments, which makes it a common platform for GPU-accelerated workloads. To install the NVIDIA CUDA Toolkit, you need a proper driver setup and a correctly configured repository to avoid version conflicts.
The steps in the sections below outline the required sequence to install and configure CUDA on Ubuntu.
Step 1: Upgrade Ubuntu
Before you install NVIDIA drivers or CUDA, update the system package index and upgrade existing packages. This ensures the kernel, libraries, and package metadata are up to date, which reduces compatibility issues during driver installation.
Run the following commands:
sudo apt update
sudo apt upgrade -y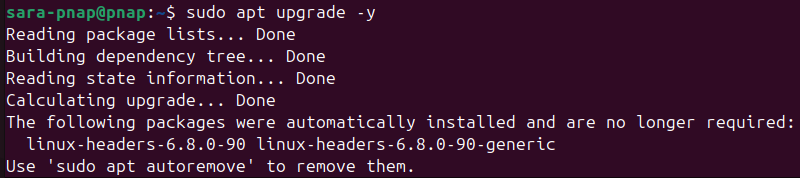
The first command refreshes the package lists from configured repositories. The second installs available updates.
Step 2: Install NVIDIA Drivers
Before you install the CUDA Toolkit, you need a compatible NVIDIA driver. This allows the operating system to communicate with the GPU and ensures CUDA works correctly once installed.
Take the following steps:
1. List all available NVIDIA drivers for detected GPUs and mark the recommended version with :
sudo ubuntu-drivers devices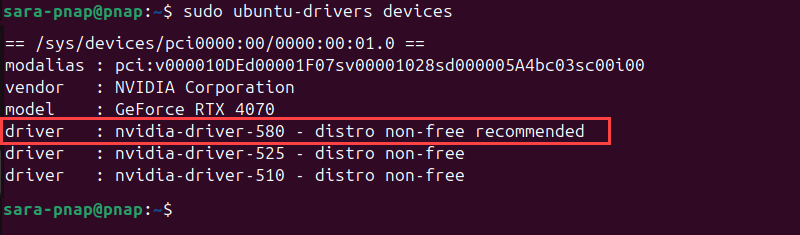
2. Install the recommended driver automatically and configure it for your system:
sudo ubuntu-drivers autoinstall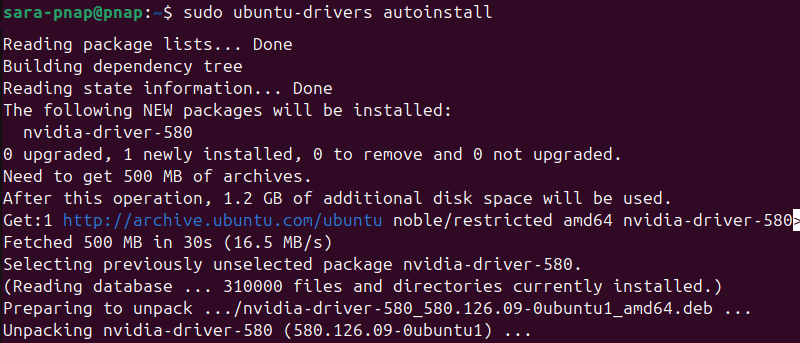
3. Check the installed driver version to verify the installation:
nvidia-smi
Step 3: Add the NVIDIA CUDA Repository
After the NVIDIA driver installation, add the official CUDA repository with the wget command. This allows Ubuntu to download and install the latest CUDA Toolkit packages directly from NVIDIA.
Take the following steps:
1. Download the CUDA repository package for your Ubuntu version:
wget https://developer.download.nvidia.com/compute/cuda/repos/ubuntu2404/x86_64/cuda-keyring_1.1-1_all.deb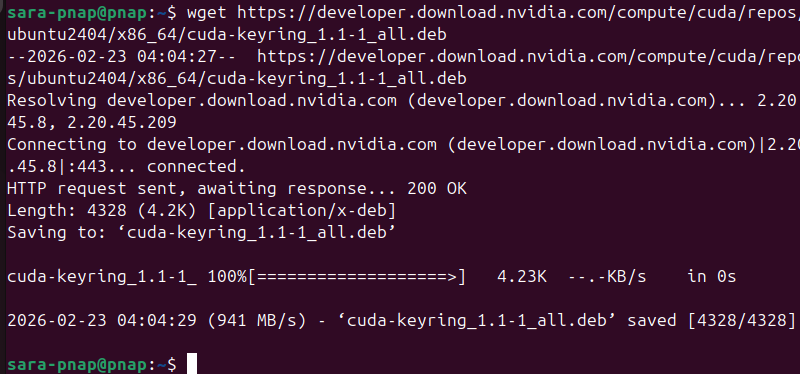
Note: This guide is tested on Ubuntu 24.04. CUDA repository paths are version-specific, and if you use a different version, the repository URL must match it.
2. Install the CUDA keyring package with dpkg:
sudo dpkg -i cuda-keyring_1.1-1_all.deb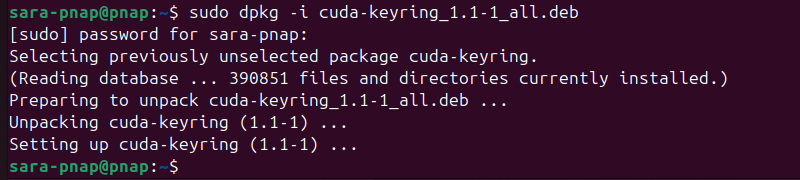
This step adds the official NVIDIA GPG key and repository configuration to your system with the keyring method required by current Ubuntu releases.
3. Refresh the package index:
sudo apt updateStep 4: Install the CUDA Toolkit
After you add the NVIDIA repository and update the package index, install the CUDA meta package for Ubuntu. This package includes the latest CUDA Toolkit, runtime libraries, and development tools.
Use apt to install CUDA:
sudo apt install cuda
Step 5: Configure Environment Variables
After the CUDA Toolkit installation, add CUDA paths to the system environment. This ensures the development tools like nvcc and libraries are accessible from any terminal session.
Do the following:
1. Open your shell configuration file in a text editor of your choice. In this case, Nano:
nano ~/.bashrc2. Add the following lines at the end of the config file:
export PATH=/usr/local/cuda/bin:$PATHexport LD_LIBRARY_PATH=/usr/local/cuda/lib64:$LD_LIBRARY_PATH
3. Save and exit.
4. Apply the changes immediately:
source ~/.bashrcThe command has no output.
Test NVIDIA CUDA Toolkit
After you complete the installation, verify that the CUDA and the NVIDIA driver are correctly installed and integrated. Test the toolkit to ensure the compiler is functional, the driver is recognized by the system, and CUDA programs are able to compile and execute successfully.
The following text provides several ways to test the NVIDIA CUDA toolkit.
Verify CUDA Compiler
Ensure the CUDA Toolkit was installed correctly and the nvcc compiler is accessible from the system PATH to confirm you can compile CUDA programs on the system.
Run the following:
nvcc --version
Verify NVIDIA Driver
Check the NVIDIA driver to ensure the system recognizes it and that it is correctly registered. This is necessary for CUDA programs to interact with the GPU.
Run the following:
nvidia-settings --version
Compile a Test Program
Compile a simple CUDA program to verify that the CUDA Toolkit, headers, and runtime libraries are correctly configured. This confirms nvcc can build CUDA source code into an executable.
Take the following steps:
1. Create a test file in a text editor:
nano hello.cu2. Add the following content:
#include <stdio.h>__global__ void testKernel() {}int main() {<br> testKernel<<<1,1>>>(); printf("CUDA test program executed successfully.\n");<br> return 0;<br>}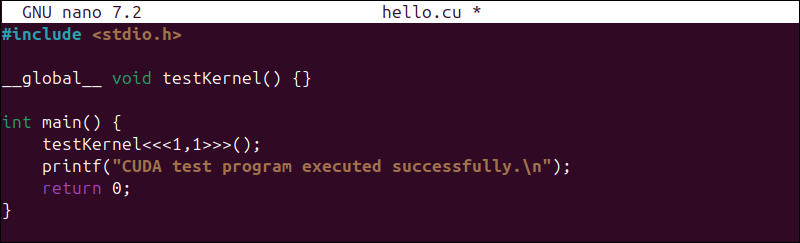
3. Save the file and exit the editor.
4. Compile the program:
nvcc hello.cu -o helloNo output indicates successful compilation. The hello executable file is created in the current directory.
5. Run the program:
./hello
Conclusion
This tutorial explained what NVIDIA CUDA is and its use cases. It also elaborated on how to install and test the toolkit.
Next, learn the difference between CUDA Cores and Tensor Cores.