Vault by HashiCorp is a tool designed to securely store and manage sensitive information, such as passwords, API keys, and certificates. It provides features like data encryption and access control through policies, ensuring secure access to secrets across applications and systems.
In this tutorial, learn how to install Vault on CentOS and Rocky Linux and run it as a service.

Prerequisites
- A CentOS or Rocky Linux system.
- A user account with sudo or root privileges.
- Access to the terminal.
Install Vault from Binary on CentOS and Rocky Linux
Installing Vault from a binary on CentOS or Rocky Linux is straightforward and ensures you get the latest stable version directly from the official source. To accomplish that, take the following steps:
1. Download the binary from Vault's official website. Navigate to the website and click the Download icon.
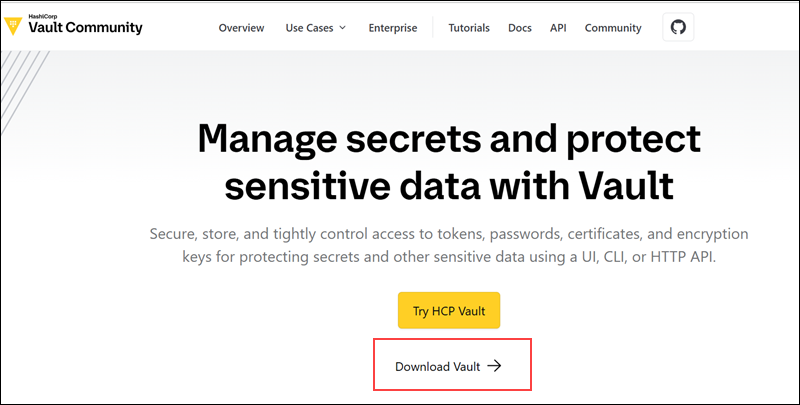
The browser takes you to the Download page with all the available packages.
2. Search for the Linux section and the Binary download subsection.

3. Find the download compatible with the system's architecture. In this example, it's AMD64.
4. Right-click the Download button and select Copy Link Address as it is needed in the next step.
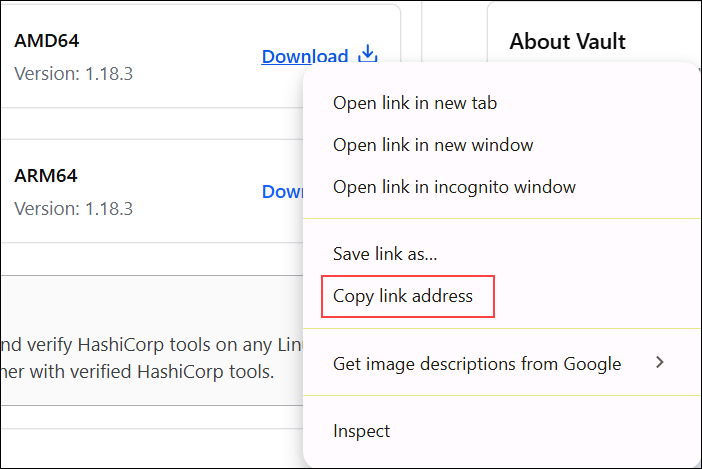
5. Open the terminal and use the wget command and the link location you copied in the previous step to download the binary:
sudo wget https://releases.hashicorp.com/vault/1.18.3/vault_1.18.3_linux_amd64.zip
6. Unzip the package with the command:
unzip vault_1.18.3_linux_amd64.zip
Note: The command varies depending on the version. Make sure to use the correct version in the command.
7. Change the binary ownership to root using the chown command:
sudo chown root:root vaultThe command has no output but ensures only the root user has full control over the binary.
8. Use the mv command to move the vault binary to /usr/local/bin:
sudo mv vault /usr/local/bin/ The command has no output. However, it ensures it can be executed anywhere on the system without specifying the full path.
9. Verify Vault is running with the command:
vault --version
The output displays the version of Vault running on the system.
For additional information, prompt the help page with the command:
vault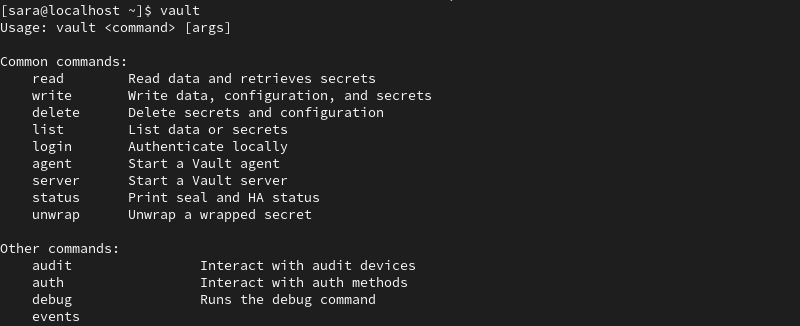
Note: Vault 1.18.3 is currently the newest version. However, newer releases may be available by the time of your installation.
Configuring Vault on CentOS and Rocky Linux
Configuring Vault is critical to ensure secure and efficient operation within your environment. The following steps explain how to configure Vault.
Create Service User for Vault
To enhance security, run the Vault server under a separate non-privileged system user. Create the system user and assign ownership of the Vault installation directory with useradd:
sudo useradd --system --home /etc/vault.d --shell /bin/false vaultThe command has no output. Verify the service user was created successfully by running the grep command:
sudo grep vault /etc/passwd
Run Vault as a Service
To run Vault as a service, take the following steps:
1. Create a new Systemd service file in a text editor of choice, in this case Vim:
sudo vim /etc/systemd/system/vault.service2. Add the following content:
[Unit]
Description=HashiCorp Vault - A tool for managing secrets
Documentation=https://www.vaultproject.io/docs/
Requires=network-online.target
After=network-online.target
ConditionFileNotEmpty=/etc/vault.d/vault.hcl

[Service]
User=vault
Group=vault
ProtectSystem=full
ProtectHome=read-only
PrivateTmp=yes
PrivateDevices=yes
SecureBits=keep-caps
AmbientCapabilities=CAP_IPC_LOCK
CapabilityBoundingSet=CAP_SYSLOG CAP_IPC_LOCK
NoNewPrivileges=yes
ExecStart=/usr/local/bin/vault server -config=/etc/vault.d/vault.hcl
ExecReload=/bin/kill --signal HUP $MAINPID
KillMode=process
KillSignal=SIGINT
Restart=on-failure
RestartSec=5
TimeoutStopSec=30
LimitNOFILE=65536
LimitMEMLOCK=infinity

[Install]
WantedBy=multi-user.target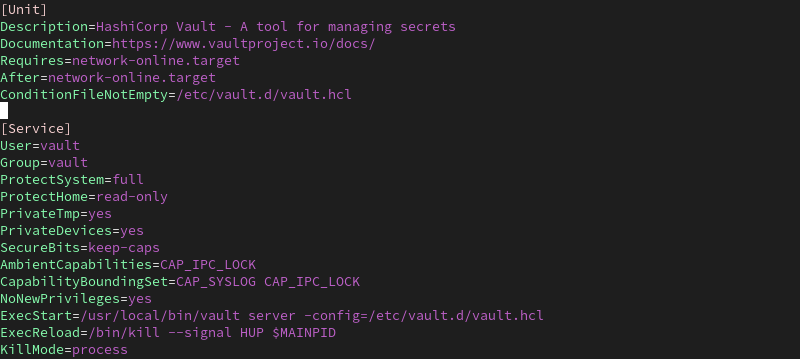
3. Save and exit the file.
4. Reload the Systemd daemon to recognize the new service file:
sudo systemctl daemon-reloadThe command has no output.
5. Enable the Vault service to start at boot:
sudo systemctl enable vault.service
6. Start the Vault service:
sudo systemctl start vault.serviceThe command has no output.
7. Verify the service status to ensure it's running correctly:
sudo systemctl status vault.service
Prepare to Administer Vault
To make the Vault binary accessible from any location, take the following steps:
1. Add Vault's directory to the $PATH environment variable by running the export command:
export PATH=$PATH:/opt/vault/bin2. Make this change persistent across sessions with echo by adding it to your .bashrc file:
echo "export PATH=$PATH:/opt/vault/bin" >> ~/.bashrc3. Set the environment variable for Vault's address with:
export VAULT_ADDR=http://10.128.0.2:82004. Make this change permanent with:
echo "export VAULT_ADDR=http://10.128.0.2:8200" >> ~/.bashrcIf successful, these commands don't produce any output.
Initialize and Unseal your Vault
To initialize and unseal Vault, take the following steps.
1. Run the following command to start the Vault server in dev mode:
vault server -dev
Do not use dev mode in a production environment, as it is insecure.
This command outputs important information, including the unseal key and root token at the bottom. Save these values, as they are needed for the next steps.
Note: Since Vault does not fork, you need to open a new shell or terminal window to run the following commands.
2. In the new terminal, set the VAULT_ADDR environment variable using the address provided in the output from the previous step:
export VAULT_ADDR='http://127.0.0.1:8200'The command has no output.
3. Set the VAULT_DEV_ROOT_TOKEN_ID environment variable with the root token from the output:
export VAULT_DEV_ROOT_TOKEN_ID="hvs.wkgnP7d3n17AkDf3p23ufLPu"The command does not produce any output.
4. To confirm Vault is initialized and unsealed, check its status with the following command:
vault status
The output shows that Vault is initialized and no longer sealed:
Conclusion
This article explained how to install and configure Vault on CentOS and Rocky Linux. It also elaborated on initializing and unsealing your Vault.
Next, learn about different solutions for enterprise password management.
