GPG keys are an implementation of the OpenPGP standard for secure communication and data integrity. Deleting GPG keys is sometimes necessary for security maintenance and key expiration management.
In this article, you will learn how to delete GPG keys using different methods.

Prerequisites
- A Linux system (this tutorial uses Ubuntu 22.04).
- An existing GPG Keys set.
GPG Key Types
There are two types of GPG keys:
- Public keys. This type of key is used to encrypt data and to verify the origin of a message. Public keys are meant to be shared openly, as the message can be decrypted only with the corresponding private key.
- Private keys. This type of key should be kept confidential for security reasons. A single private key is paired with a single public key, and both are required for authentication and decryption.
How to List GPG Keys in Linux
Before deleting GPG keys on Linux, list them with the gpg command to verify the User ID (uid) and KeyID.
To list public keys in Linux, run:
gpg --list-keys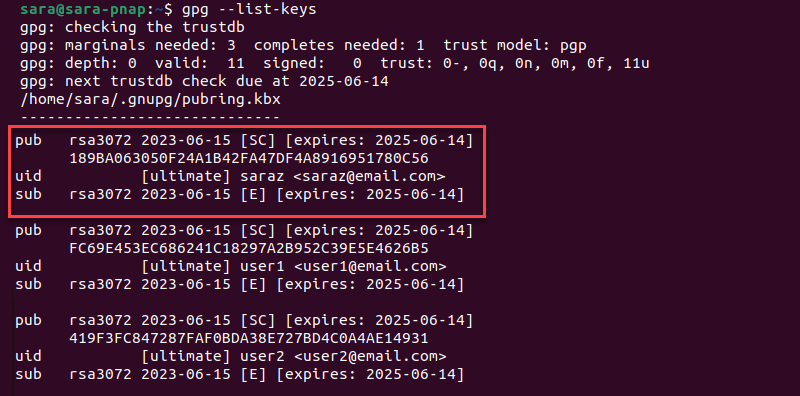
The gpg --list-keys output includes the following information:
pub. Indicates the key type (i.e., algorithm used), creation and expiration date, and capability (SC).- KeyID. A unique identifier displayed as a hexadecimal value.
uid. Indicates the user ID, trust level (ultimate), username, and associated email.sub. Subkey information and relevant details.
To list private keys, use gpg with the --list-secret-keys option:
gpg --list-secret-keys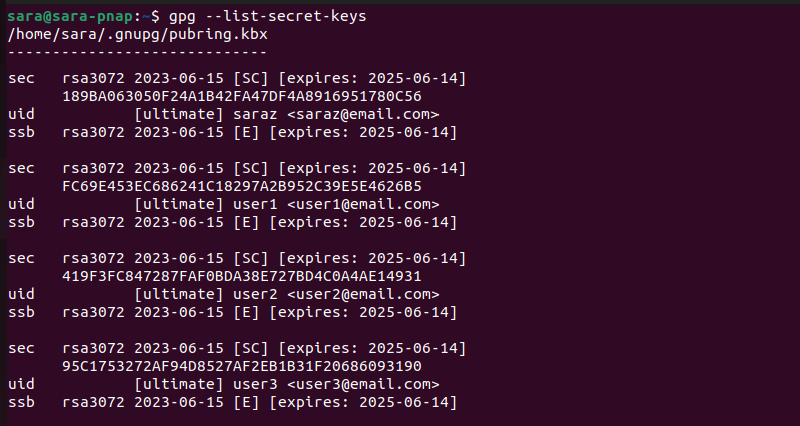
The output is similar to the gpg --list-keys output, but displays the private keys associated with different users. The structure and components in the output remain the same.
Still, different signifiers are used:
sec. Indicates the type of key (private key).ssb. Represents the secret subkey associated with the primary private key.
Note: If the system has no GPG keys, the gpg command has no output.
How to Delete GPG Keys in Linux
There are two approaches to deleting GPG keys: Using the User ID (uid) or the KeyID. Both options enable users to delete GPG keys for single or multiple users.
Warning: To ensure successful key removal, delete the Private key first and then proceed with deleting the Public key.
Delete Keys of a Single User
To remove the GPG keys of a single user, use gpg with appropriate options.
Delete GPG Keys of a Single User Using UserID
The syntax for deleting the Private GPG key for a single user using the uid is:
gpg --delete-secret-key [uid]On the other hand, to delete the public GPG key, the syntax is:
gpg --delete-key [uid]For instance, to delete the GPG keys of user1:
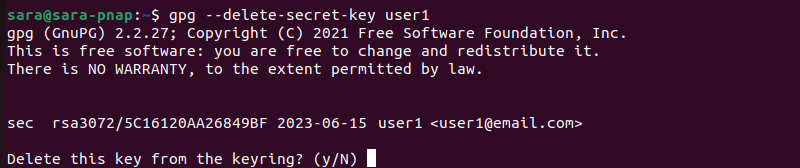
1. Find the user1 uid in the gpg --list-secret-keys output.
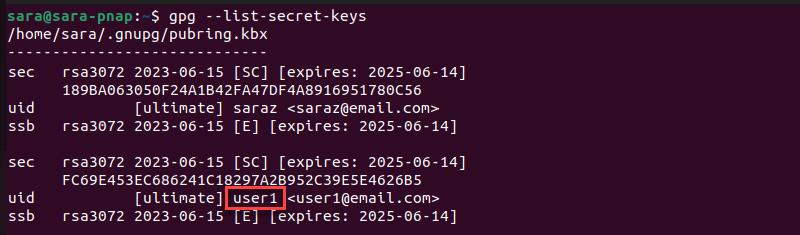
The UID for the chosen key is user1.
2. Run this command:
gpg --delete-secret-key user13. Type y to confirm.
4. Type y again to confirm.

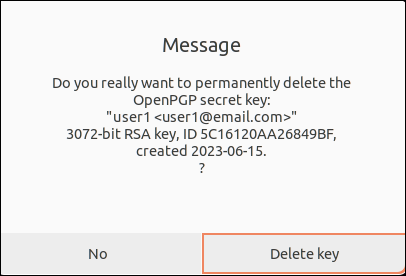
5. Click Delete key on the first pop-up message.
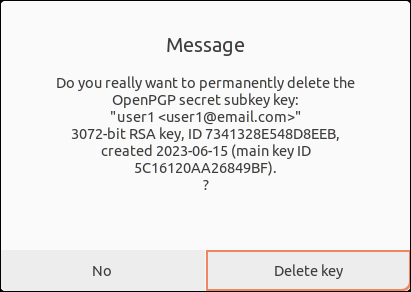
6. Click Delete key on the second pop-up message to delete the subkey.
7. Delete the user1 Public key with:
gpg --delete-key user1Type y to confirm.
8. Verify the keys are deleted:
gpg --list-keys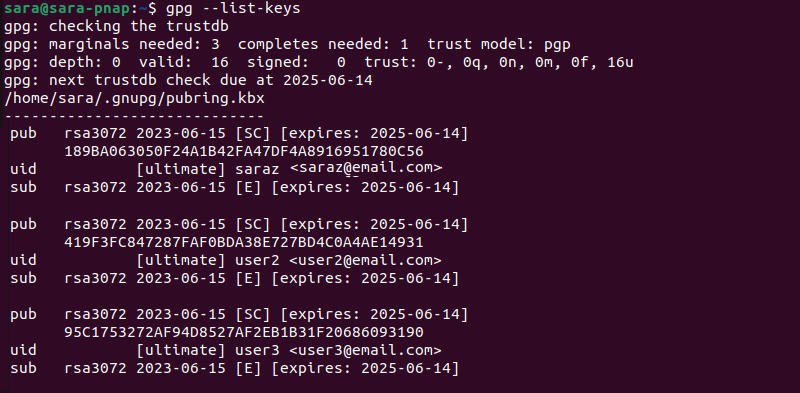
The output shows the user1 Public key is missing. Run gpg with the option to list Private keys to complete the verification:
gpg --list-secret-keys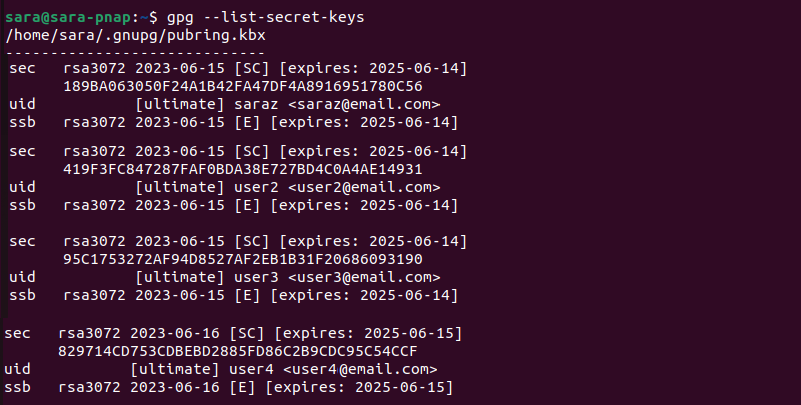
The output does not show the Private key for user1, confirming its removal.
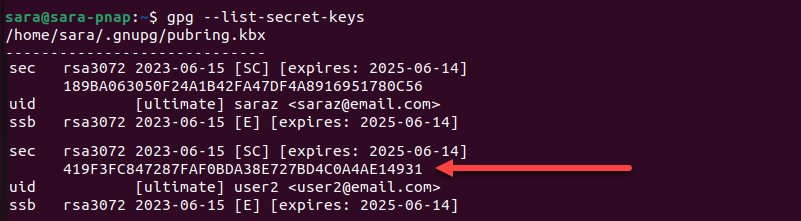
Delete GPG Keys of a Single User Using KeyID
Another way to delete GPG keys is by using the KeyID.
However, the KeyID is the same for the Private and Public keys for the same user. Therefore, to locate the KeyID, check out either the gpg --list-secret-keys or gpg --list-keys output.
The example below shows the KeyID for user2 in the gpg --list-secret-keys output:
The syntax for deleting the Private key with the KeyID is:
gpg --delete-secret-key [Key_ID]The syntax to delete the Public key using KeyID is:
gpg --delete-key [Key_ID]For instance, to delete the user2 Private GPG key:
1. Use the KeyID in the following command:
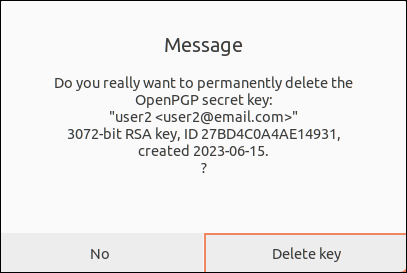
gpg --delete-secret-key 419F3FC847287FAF0BDA38E727BD4C0A4AE149312. Type y on both prompts to confirm the removal.

3. Click the Delete key button.
4. Delete the user2 Public key with:
gpg --delete-key gpg 419F3FC847287FAF0BDA38E727BD4C0A4AE149315. Type y when prompted.

To verify the removal, list all the Private and Public keys.
1. Confirm the Private key is removed with:
gpg --list-secret-keys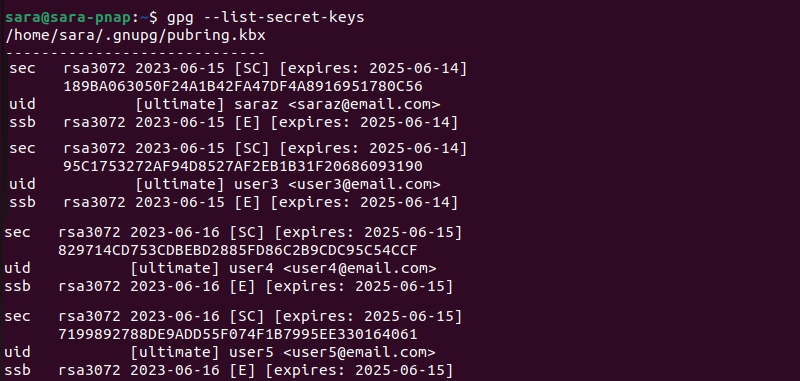
2. Confirm the Public key is removed with:
gpg --list-keys
Delete Keys of Multiple Users
The gpg command also deletes the GPG keys of multiple users at once. Moreover, the removal is possible using uids or KeyIDs.
Delete Keys of Multiple Users Using UserID
To remove the GPG keys for multiple users using the uids, delete the secret keys first with:
gpg --delete-secret-key [uid1] [uid2]Next, delete the Public keys. The syntax is:
gpg --delete-key [uid1] [uid2]For instance, to delete the user3 and user4 Private keys using the uids:
1. Enter this command:
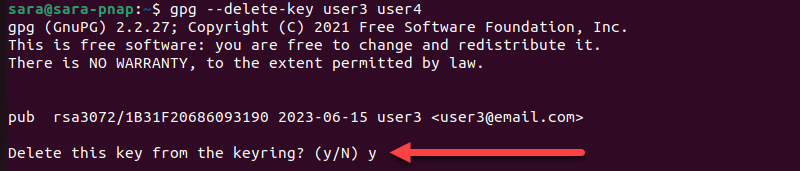
gpg --delete-secret-key user3 user4
The gpg command deletes the keys in the order stated in the command, starting with the user3 first.
2. Type y both times to confirm.

3. Click the Delete key button.
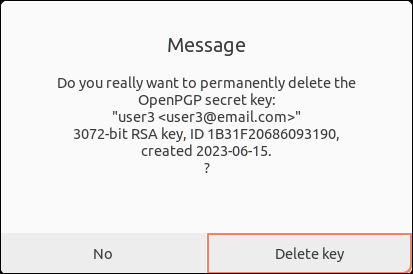
4. Choose the Delete key button to remove the subkey.

Once the first Private key is deleted, the terminal displays the prompt to delete the second one.

5. Type y to initiate the removal process and once again to confirm.

6. Click Delete key on both pop-up messages
7. To finalize the process and delete the Public key, run:
gpg --delete-key user3 user48. Type y to delete the Public key for user 3.
9. Type y to delete the Public key for user4.

To confirm all the changes, list all the Public and Private keys again.
Delete Keys of Multiple Users Using KeyID
Deleting multiple GPG keys is also possible via KeyIDs. To delete multiple Private GPG keys using the KeyIDs, run the following:
gpg --delete-secret-key [Key_ID1] [Key_ID2]Next, delete the Public keys with:
gpg --delete-key [Key_ID1] [Key_ID2]For instance, to delete the Private GPG keys for user5 and user6:
1. Enter this command:
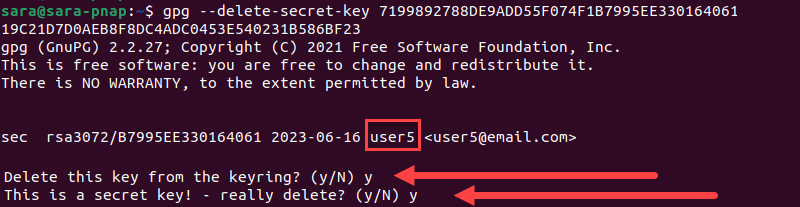
gpg --delete-secret-key 7199892788DE9ADD55F074F1B7995EE330164061 19C21D7D0AEB8F8DC4ADC0453E540231B586BF232. Type y both times to delete the Private key and confirm the removal for the user5.
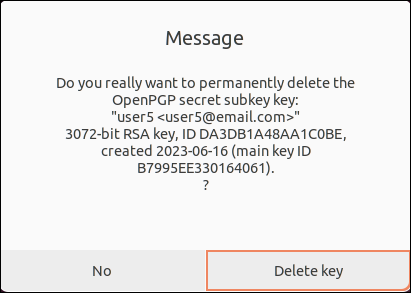
3. Click Delete key.

4. Click Delete key to remove the subkey.
5, Type y both times to delete user6 Private key and confirm the removal.

6. Click the Delete key button on both pop-up messages.
7. Delete the Public keys with:
gpg --delete-key 7199892788DE9ADD55F074F1B7995EE330164061 19C21D7D0AEB8F8DC4ADC0453E540231B586BF238. Type y to delete the Public key for user5.
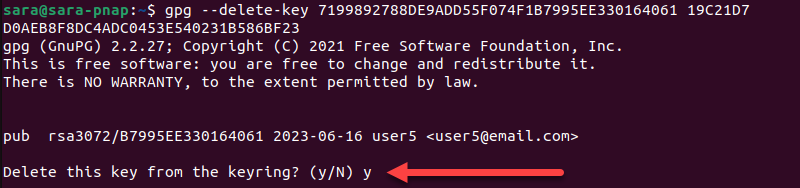
9. Type y to delete the Public key for the user6.

Run gpg --list-keys and gpg --list-secret-keys to confirm the removal.
Conclusion
In this article, you have learned how to delete gpg keys using different methods.
Next, learn about SSH keys, another Linux component with a crucial role in enhancing security and encryption.