When deploying dual-drive Bare Metal Cloud (BMC) servers, the automated process mounts and defines only the drive where the OS is installed. The second drive is not visible before you configure it. The process is necessary for all operating systems and disk types, SSD and NVMe.
Follow the steps in this guide to learn how to configure a second drive on Ubuntu, CentOS, and Windows BMC servers.
Prerequisites
- BMC portal credentials. If you are a new client, create an account for Bare Metal Cloud.
- A deployed BMC server with two drives and a working SSH/RDP connection.
- Root or sudo permissions.
How to Add Second Drive on BMC Server
Every operating system requires a different procedure to mount/initialize a drive. There are many procedures to achieve the same result, but this guide shows the simplest and quickest.
Add Second Drive on Ubuntu or CentOS Server
To utilize the space of your second drive on an Ubuntu BMC server, use the SSH connection or Remote Console feature in the BMC portal to complete the steps.
First, determine the name of the drive. For SSDs, it is usually sdb, and for NVMe drives, it is nvme1n1.
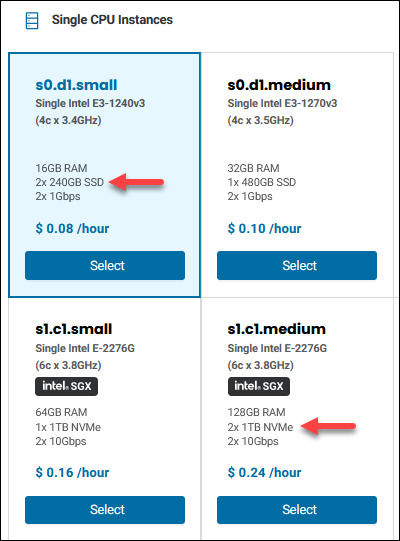
This example uses a server with 2x240GB SSDs, and a server with 2xTB NVMe drives. When you check the available disk space:
df -h
The output shows the size of 220GB for the SSD server and less than 1TB for the NVMe server:

To check the name of the drive and which one is empty, enter:
lsblk
For the NVMe server, the output is:

For example, you can also use this command to view the disks and the drives’ paths:
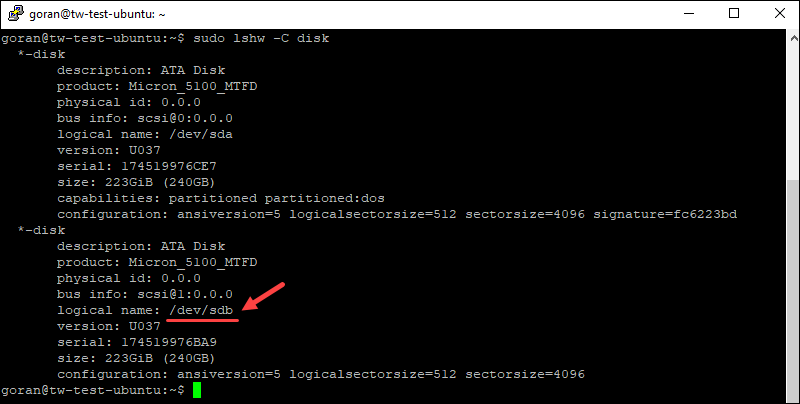
sudo lshw -C diskThe empty SSD does not have the line that says "capabilities: partitioned."
For NVMe drive:
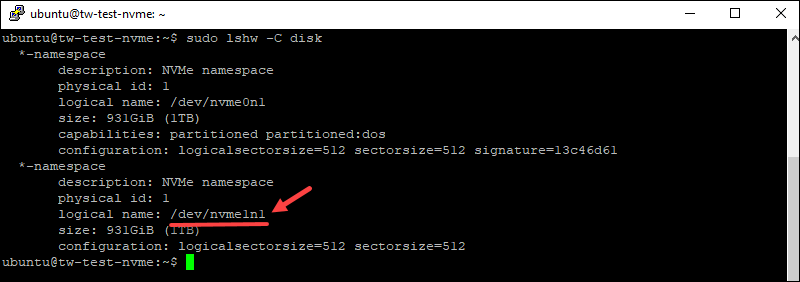
Hence, the name of the drive to use is /dev/sdbfor the SSD server and /dev/nvme1n1 for the NVMe servers.
To utilize the available drive’s space on your BMC server:
1. Run the vgextend command to create the volume and extend the vgroot size.
For SSD:
sudo vgextend vgroot /dev/sdb
For NVMe:
sudo vgextend vgroot /dev/nvme1n1The output is the same as with the SSD server.
2. Use the lvresize command to resize the volume in both cases:
sudo lvresize -l +100%FREE -r -v /dev/vgroot/lvroot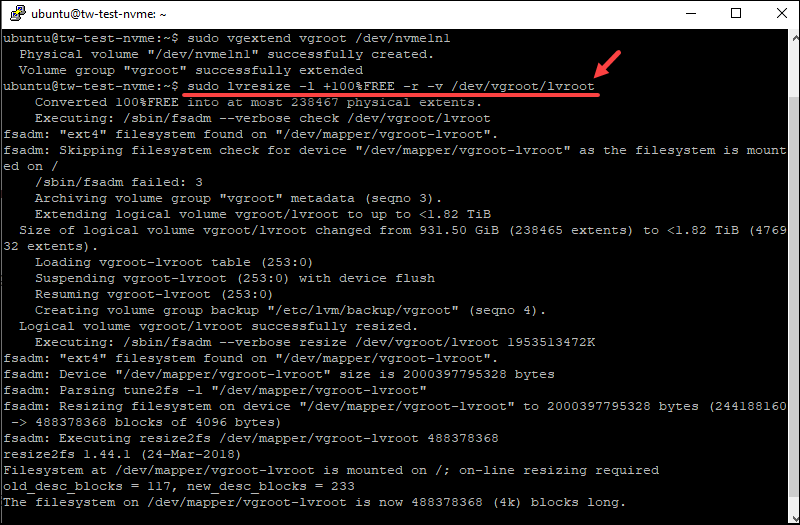
When the process completes, recheck the available space. The server now shows the available space from both drives and that both drives are in use.
You can use the three commands to check the drives.
df -hlsblksudo pvscanThe example below shows the output for the commands on the NVMe server.
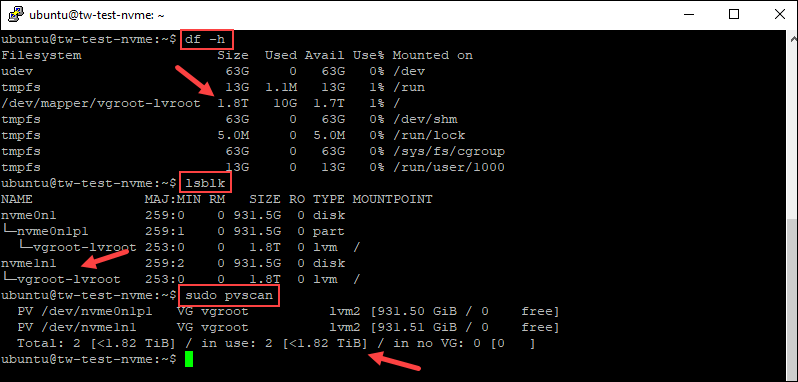
Use the same commands on a server with SSDs to check the drives. You can further configure and partition your drive now that it is ready for use.
Add Second Drive on Windows Server
To initialize and use the second drive on a Windows server via the GUI, log in using the RDP or the Remote Console feature in the BMC portal to complete the steps.
Once you log in:
1. Open the Disk Management utility. Start typing “Create and Format” in the Start menu and open the tool.

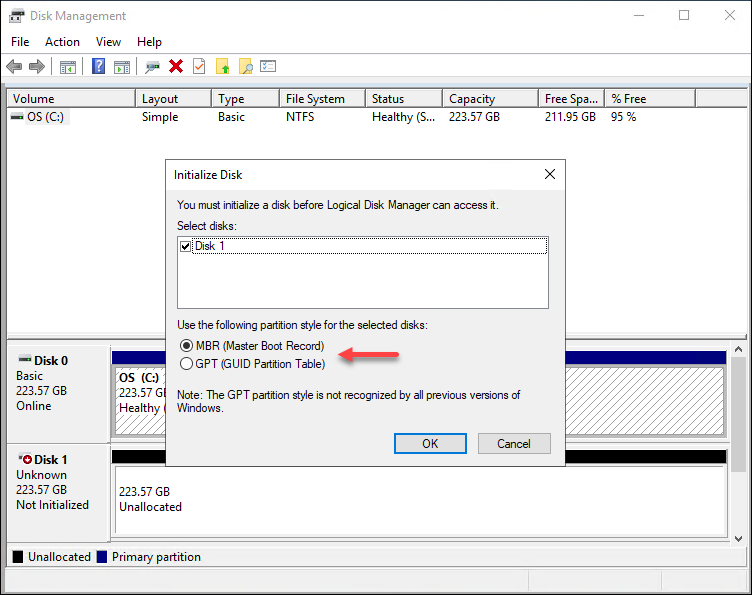
2. Initialize the disk when the program loads. Select the partition style and click OK.
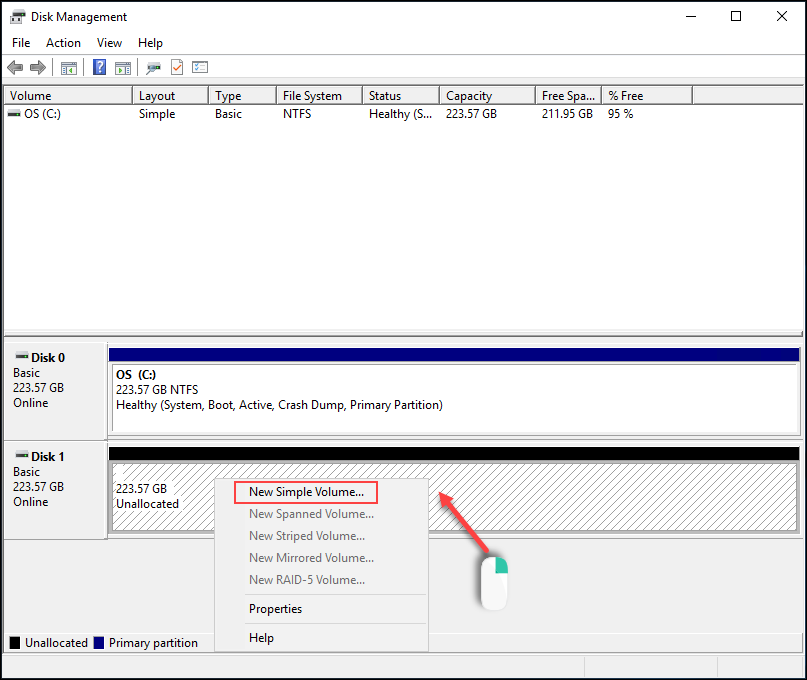
3. Right-click the Unallocated space for Disk 1 and select New Simple Volume.
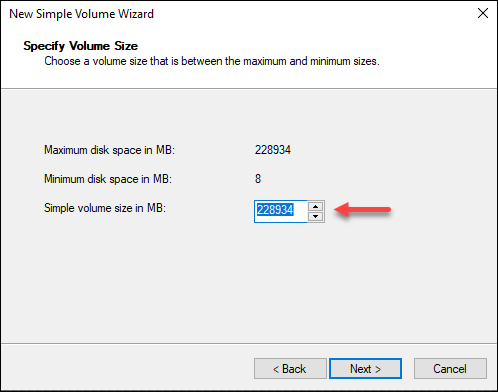
4. Specify the size in MB. Leave the predefined value if you want to use all available space. Click Next.
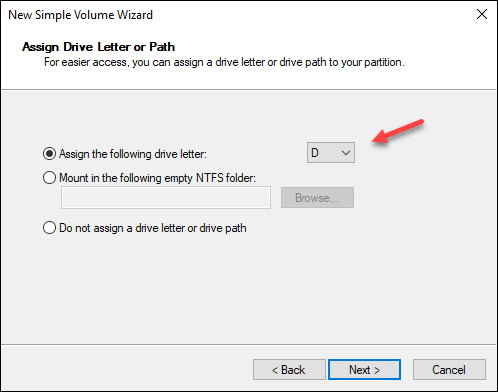
5. Select the drive letter or path and click Next.
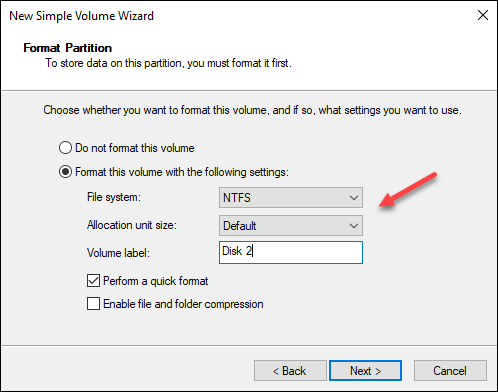
6. Format the volume and choose the settings, and label. You can leave the default values and click Next.
7. Review the settings and click Finish.
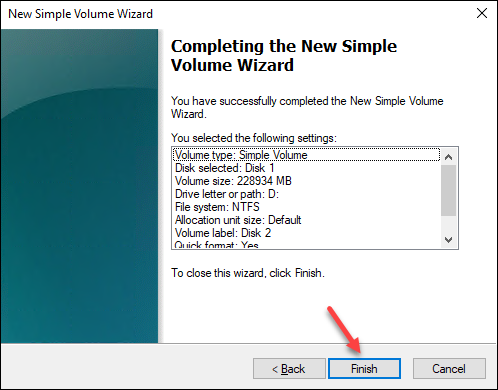
The formatting should take a few moments, and the unallocated space turns blue.
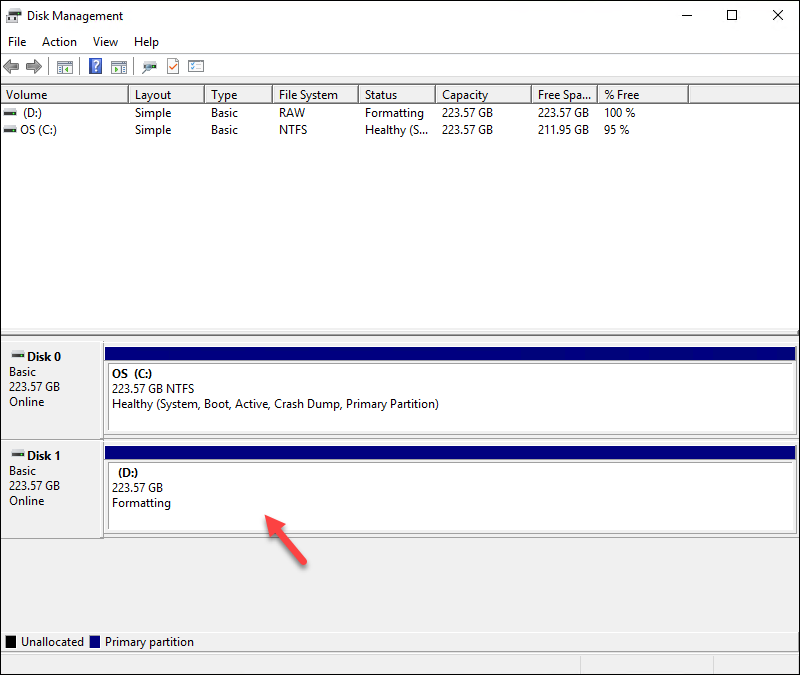
When the formatting completes, you can use start using the second drive on your Windows BMC server.
Conclusion
This guide showed you how to add a second drive to your BMC server if you purchased a setup with two SSD or NVMe drives. The article lists one of the possible methods to configure your drive on an Ubuntu/CentOS or Windows server.
Next, learn more about Bare Metal Cloud Storage Management via Portal and API.
