Nginx is a powerful tool for redirecting and managing web traffic. By configuring Nginx to redirect unencrypted HTTP web traffic to an encrypted HTTPS server, you can enhance security, protect user privacy, and ensure the authenticity of your website.
This guide shows you how to redirect HTTP traffic to HTTPS using Nginx.
Prerequisites
- A Linux server running Nginx.
- Command-line access.
- A user account with sudo privileges.
HTTP to HTTPS Redirect
Note: If you are connecting remotely, ensure your connection is encrypted with SSL.
To enforce an HTTP to HTTPS redirect, change the configuration of your Nginx web server by editing the nginx.conf configuration file. Follow the steps below to locate and modify nginx.conf:
1. Open the file in a text editor, such as Nano:
sudo nano /etc/nginx/nginx.confNote: The file is usually in the /etc/nginx directory. If there is no such directory on the system, find the file in /usr/local/nginx, /usr/local/etc/nginx, or a custom location set by the system administrator.
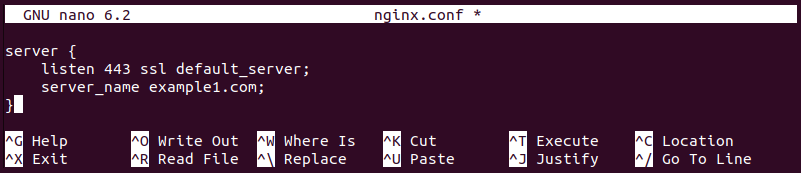
2. Add the following server block to the file to ensure the server only accepts SSL connections on port 443:
server {
    listen 443 ssl default_server;
    server_name [domain];
}
Replace [domain] with the website you want to configure.
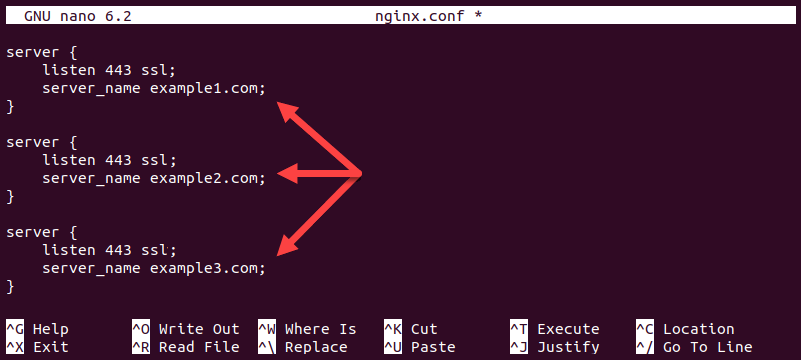
To configure more than one site, provide additional server blocks and remove the default_server parameter:
3. Proceed to one of the two sections below, depending on whether you want to redirect all websites on your server or only specific ones.
Note: Let's Encrypt is a free certificate authority that allows you to set up SSL/TLS encryption on an Nginx server. Check out our article on how to set up Let's Encrypt to secure your Nginx server.
Redirect All Sites to HTTPS
To redirect all websites from HTTP to HTTPS, create a single server block that listens on port 80 and uses either the return directive or the rewrite directive to force a redirection.
Follow the steps below to perform the necessary configuration on an Nginx server:
1. Insert the following code into the nginx.conf file:
server {
    listen 80 default_server;
    server_name _;
    return 301 https://$host$request_uri;
}
The following is a breakdown of the instructions:
listen 80tells the system to catch all HTTP traffic on Port 80.server_name _;matches any hostname.return 301informs the browser and search engines that the redirect is permanent.https://$host$request_urispecifies the HTTPS version of whatever the user has typed.
The return directive is commonly used for simple responses, such as HTTPS redirection and showing error pages. When Nginx encounters the return directive, it stops processing the request and sends the response to the client.
To perform a more complex URL manipulation, use the rewrite directive:
server {
listen 80 default_server;
server_name _;
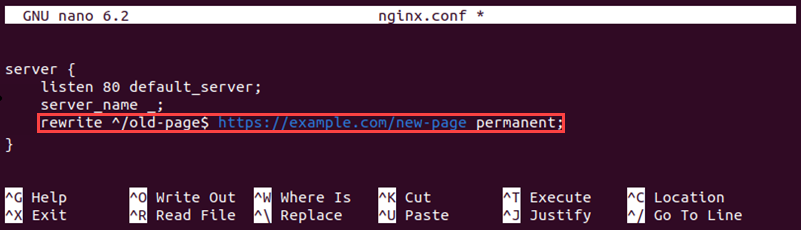
rewrite ^/[old-page]$ https://[domain]/[new-page] permanent;
}The example below uses the rewrite directive to replace any HTTP request for the page named old-page with an HTTPS request for new-page on example.com:
Note: The redirection instruction should be the only server block listening on port 80. Other blocks should listen on port 443.
Nginx does not stop processing the request after reading the rewrite directive. Instead, it modifies the request URL according to the directive and continues processing.
When you finish editing the file, save it and exit.
2. Restart the Nginx service with the following command:
sudo service nginx restartAll traffic directed to the HTTP default server is now redirected to HTTPS.
Redirect Specific Site
If only some of your servers require HTTPS redirection, create custom redirection instructions by following the procedure below:
1. Insert the server block below into the nginx.conf file. Type the server name in the server_name line to redirect the server's HTTP traffic:
server {
    listen 80 default_server;
    server_name [domain];
    return 301 https://[domain]$request_uri;
}
Alternatively, use the rewrite directive:
server {
    listen 80 default_server;
    server_name [domain];
    rewrite ^/[old-page]$ https://[domain]/[new-page] permanent;
}
Replace [domain] with the server name to redirect to.
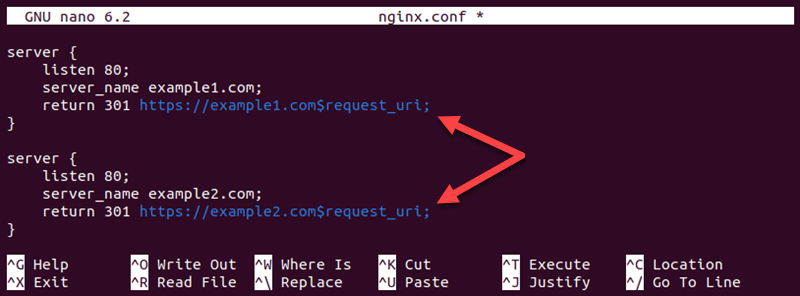
Redirect multiple servers by adding additional server blocks with different server names. For example, to redirect example1.com and example2.com using the return directive, type the following:
server {
    listen 80;
    server_name [domain1];
    return 301 https://[domain1]$request_uri;
}

server {
    listen 80;
    server_name [domain2];
    return 301 https://[domain2]$request_uri;
}
The following example redirects the domains example1.com and example2.com:
2. Save the file and exit.
3. Restart the Nginx service with the following command:
sudo service nginx restartNginx now redirects all HTTP traffic to HTTPS on the selected servers.
Why Redirect HTTP to HTTPS?
There are several reasons to redirect HTTP traffic to HTTPS, including:
- Establishing a more secure, encrypted connection.
- Ensuring user data privacy by protecting login credentials, personal details, and financial information.
- Increasing the website's trustworthiness from users' and search engines' perspectives.
- Achieving compliance with regulations and standards, such as GDPR and PCI DSS.
Note: If you see the ERR_TOO_MANY_REDIRECTS error in your browser, it means the browser is stuck in a redirection loop. Read our guide How to Troubleshoot ERR_TOO_MANY_REDIRECTS to learn more.
Conclusion
After reading this article, you should know how to redirect HTTP to HTTPS in Nginx. The tutorial explained how to edit the Nginx configuration file to perform redirections and introduced the relevant directives.
If you want to secure your website further, learn more about using Nginx SSL certificates.