VMware Workstation Pro is a virtualization application that works as a hosted hypervisor. Hosted hypervisors run on the host operating system and enable users to add multiple guest operating systems using the same physical resources.
When coupled with Ubuntu, VMware enables users to efficiently virtualize diverse operating systems. This streamlines software development, testing, and deployment processes while maximizing resource utilization and flexibility.
This guide will show you how to install VMware Workstation Pro on Ubuntu.
Prerequisites
- A machine running Ubuntu.
- A user with sudo privileges.
- Access to a terminal.
Installing VMware Workstation on Ubuntu
Installing VMware Workstation on Ubuntu lets you run additional operating systems alongside your Linux environment, simplifying software testing, development, and cross-platform administration without requiring separate hardware.
Follow the steps below to install VMware Workstation on your Ubuntu system and ensure seamless virtualization.
Note: Learn the difference between a virtual machine and a container, or see how a virtual desktop interface compares to a virtual machine.
Step 1: Download VMware Workstation Pro
To install VMware, first download the binary package on your system. The best practice is to find the latest stable version on the official VMware website.
1. Open a web browser and navigate to the Try VMware Workstation Pro page.
2. Scroll down and click the DOWNLOAD NOW link in the Workstation Pro for Linux section:
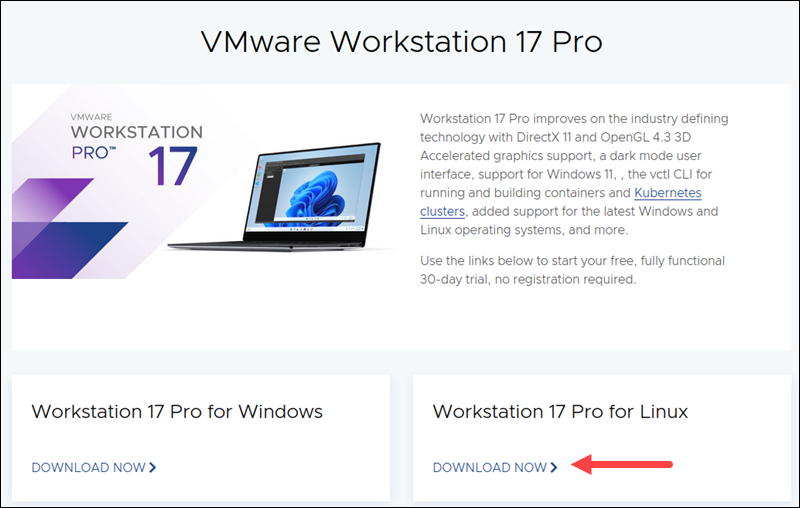
3. Select Save File and wait until the download is complete.
Step 2: Make Installer Executable
Before you install VMware Workstation Pro, you need to make the installer executable. Follow the steps below:
1. Open the terminal and change the directory to Downloads.
2. Using chmod, change the downloaded file's permissions to make it executable. Use the following syntax:
sudo chmod +x [file_name]Replace [file_name] with the full name of the downloaded file. You can list the directory contents by running ls and then copy the full file name for the command above. For example:

Step 3: Install Prerequisites
GNU Compiler Collection and Build Essential are software prerequisites for installing VMware Workstation. Install the packages by following the steps below:
1. Before installing any software, update the package repository information by running:
sudo apt updateUpdating ensures you download the latest software version available in the repository.
2. Install the prerequisites, GNU Compiler Collection and Build Essential, which will be used during installation. Run the command below:
sudo apt install gcc build-essential -yWait for the process to complete.
Step 4: Install VMware Installer
The next step is to extract and install the downloaded VMware file.
1. List the files in the Downloads directory using the ls command:
lsCopy the full file name, as you will need it for the next step.
2. Extract and install the file by typing the command sudo ./ followed by the full file name. The syntax is:
sudo ./[file_name]For example:

Wait for the process to complete.
Step 5: Configure VMware Workstation
The final step is to run the configuration wizard and compile the modules required for VMware to function. Follow the steps below:
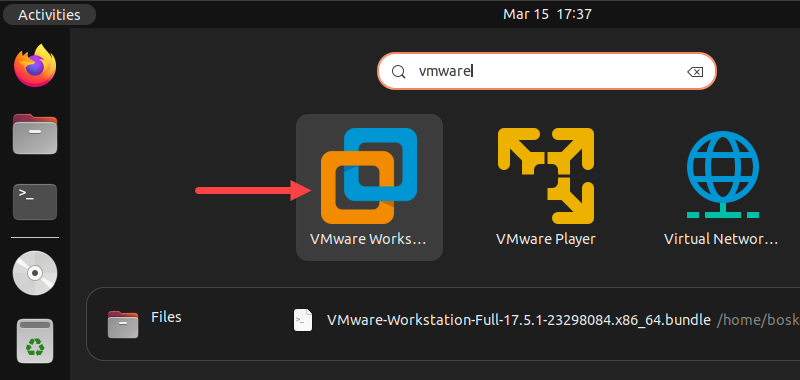
1. Search for VMware Workstation in the Ubuntu search bar. From the results, select the VMware Workstation icon to open the virtualization software.
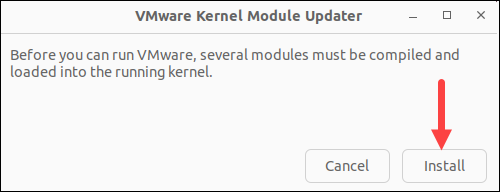
2. Click the Install button at the prompt and wait for the process to finish.
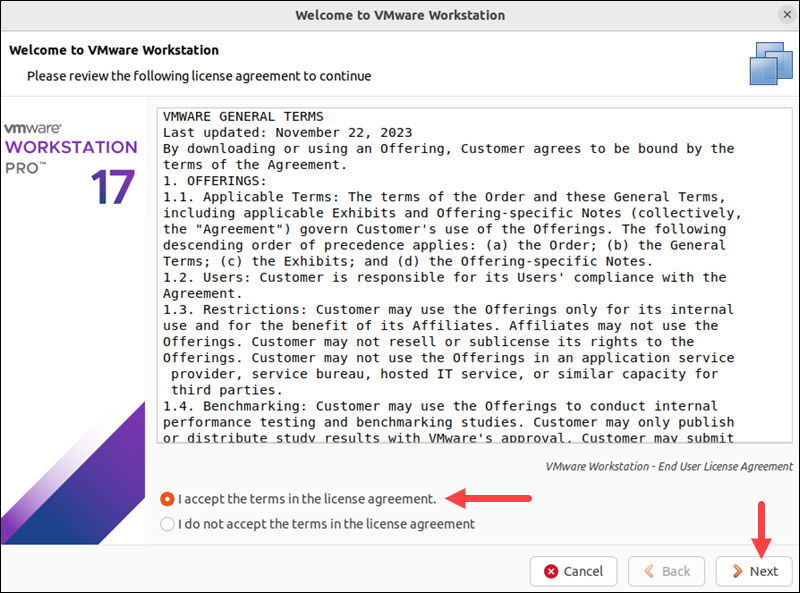
3. A configuration wizard appears, asking you to review the general terms of using VMware Workstation Pro. Review the license agreement, select the option I accept the terms in the license agreement, and click Next to continue.
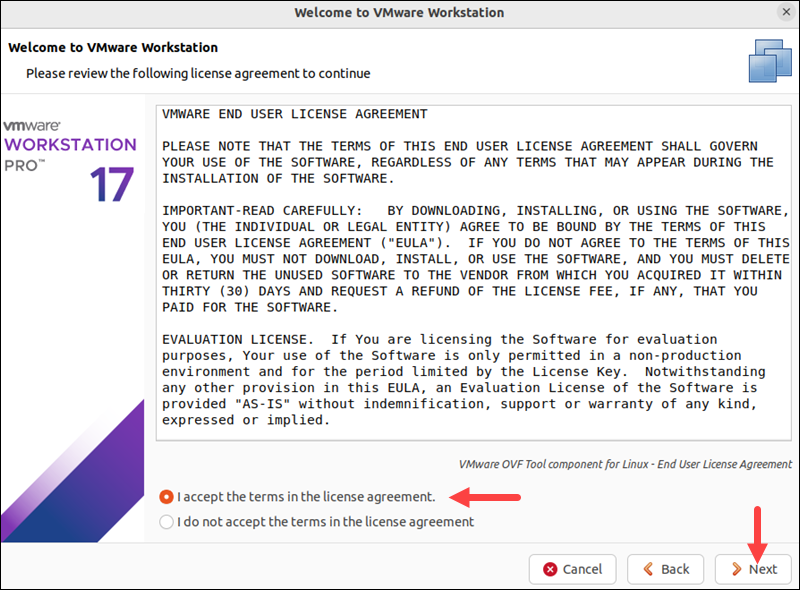
4. Next, review the end-user license agreement. If you agree to the terms, select the "I accept the terms in the license agreement" option and click Next.
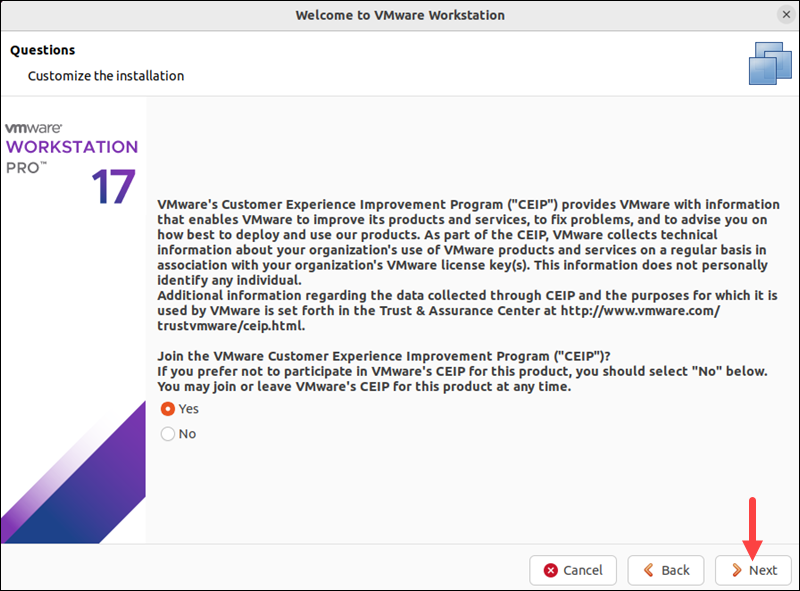
5. The wizard then allows you to choose whether you want to join the Customer Experience Improvement Program. Select Yes to send usage information to VMware, or No if you don't, and click Next.
6. Select whether you want the program to check for updates on startup, and click Next.

7. The installer asks whether you want to:
- Enter a commercial license key.
- Use the software with a personal-use license.
VMware Workstation Pro requires a paid license for commercial use. However, VMware provides free personal-use licensing for users who register for a Broadcom support account and download the latest VMware Workstation Pro release.
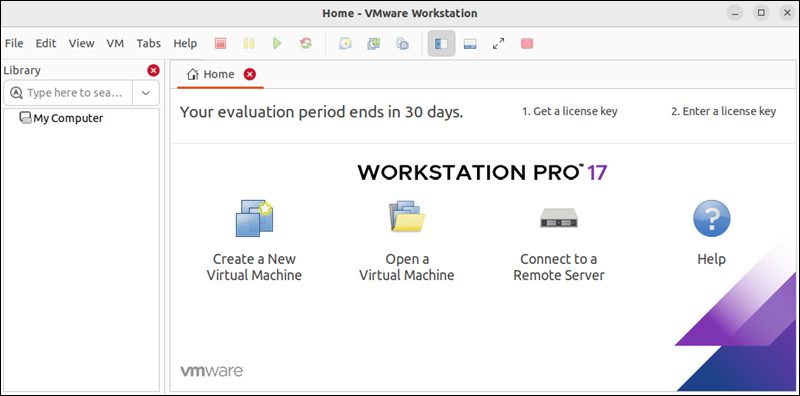
After that, VMware Workstation opens, and you can start creating and managing VMs.
Note: Each VM needs sufficient resources to function properly. See how to calculate vCPU requirements for a VM.
How to Uninstall VMware Workstation from Ubuntu
If you no longer want to use VMware Workstation on your Ubuntu system, uninstall it with the command below:
sudo vmware-installer -u vmware-workstation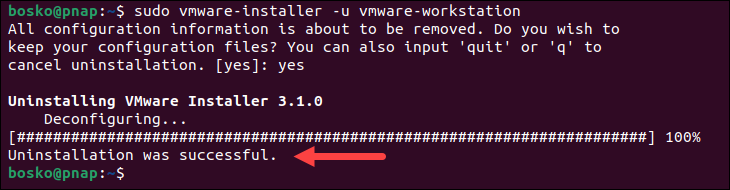
Wait for the process to finish, and VMware will be removed from your system.
Conclusion
This tutorial showed you how to install and uninstall VMware Workstation Player in Ubuntu. Next, see how to install VMware Tools on Ubuntu to improve window scaling and mouse movement and enable the bidirectional clipboard feature.
After installation, you can create new virtual machines, open existing ones, or connect to a remote server.