The GNU Compiler Collection (GCC) is a versatile set of compilers developed by the GNU Project. It supports a wide range of programming languages like C, C++, Fortran, and Go. Originally built for the GNU operating system, GCC has become an essential tool across multiple platforms, including Windows.
While GCC typically comes preinstalled on many Linux distributions, this is not the case with Windows. Additionally, due to differences in system architecture, installing GCC on Windows can be a bit more involved.
In this tutorial, you will learn to install GCC on Windows.
Prerequisites
- A machine running Windows.
- A user account with admin privileges.
- Access to the command line.
Install GCC on Windows via MinGW-w64
The minGW-w64 tool collection provides a straightforward way to install the GCC compiler and related Windows tools, supporting 32-bit and 64-bit architectures. This section outlines the steps for installing GCC using minGW-w64.
Step 1: Download MinGW-w64
Navigate to the GitHub minGW-w64 page and scroll down to the Assets section. From the list of files, select the one you want to use on your system:
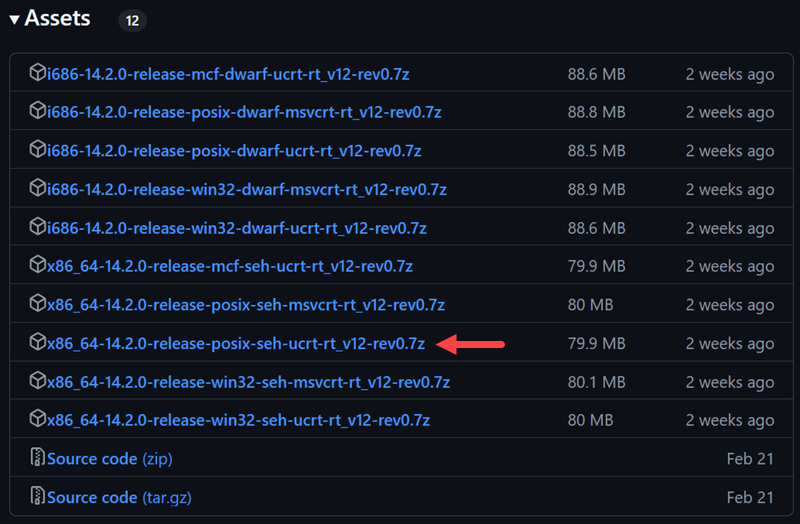
We use Windows 11 64-bit and will download the x86_64-14.2.0-release-posix-seh-ucrt-rt_v12-rev0.7z release. This version uses modern Windows runtime (ucrt), POSIX threading for cross-platform compatibility, and SEH for 64-bit Windows exception handling.
Step 2: Unpack Archive
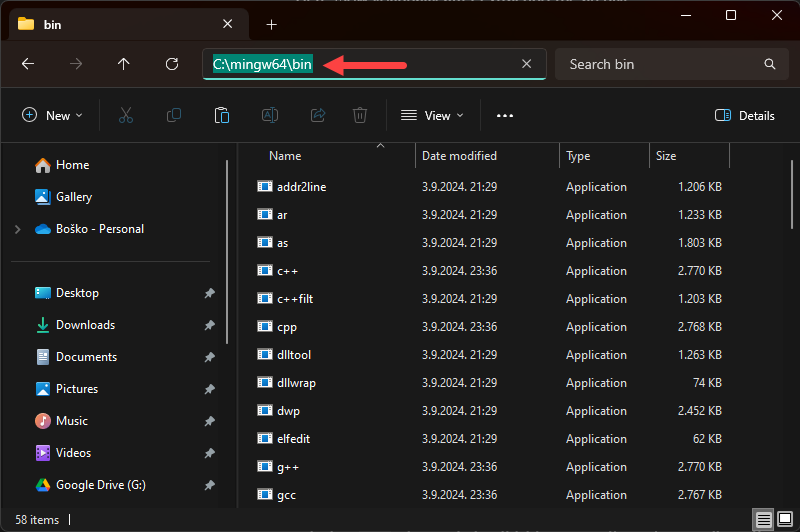
Extract the downloaded archive to a folder that is easy to access. For example, we will place it at the root of the C drive:
C:\mingw64After extracting the archive, navigate to the bin folder and copy the folder path. Add the path to the system's PATH environment variable for it to function.
Step 3: Set Path Environment Variable
This section shows how to set the PATH environment variable on Windows to instruct the system where the executable files are.
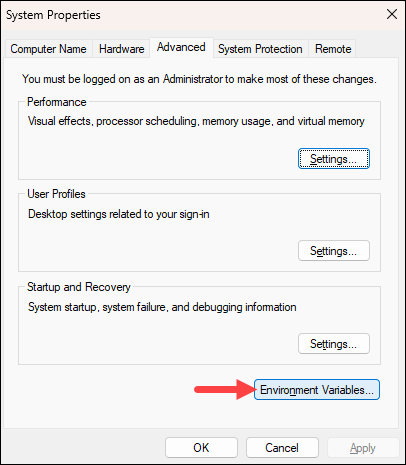
1. Press the Windows key and search for Environment variables. Press Enter to open the System Properties window and click the Environment Variables button.
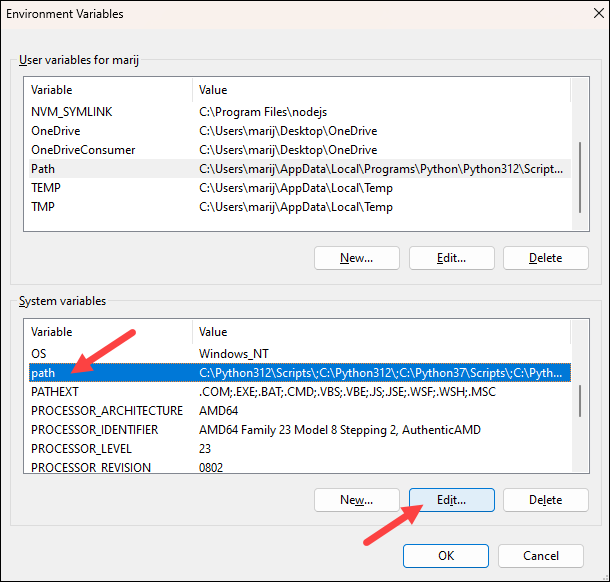
2. Under the System variables section, find Path, select it, and click Edit...
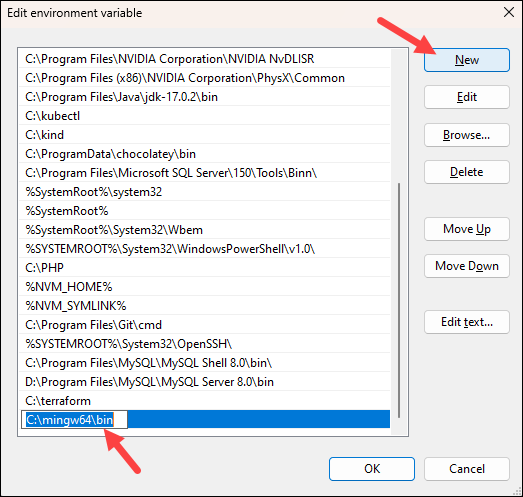
3. Click New and paste the path to the bin folder from the previous step.
4. Click OK in each window to apply the changes.
5. Check if GCC was properly installed by opening the Command Prompt and running the following command:
gcc --version
The system should output the program version, which means that it has been properly installed.
Install GCC on Windows via Chocolatey
Another way to install GCC on Windows is to use Chocolatey, a package manager designed for the Windows OS. It simplifies the process of installing, updating, and managing software through the command line. It is especially useful for developers and system administrators because it reduces the time and effort required to download and configure tools like GCC manually.
The upside is that Chocolatey completely automates the installation, while the downside is that you will probably not get the bleeding edge version you would get from installing manually.
Follow the steps below to install GCC via Chocolatey:
Note: If you don't have Chocolatey installed, check out our guide on how to install Chocolatey on Windows. The guide explains the process step-by-step and offers tips on getting started with the package manager.
Step 1: Install mingw
Open the Command Prompt as an administrator and run the following command to install the mingw installer:
choco install mingw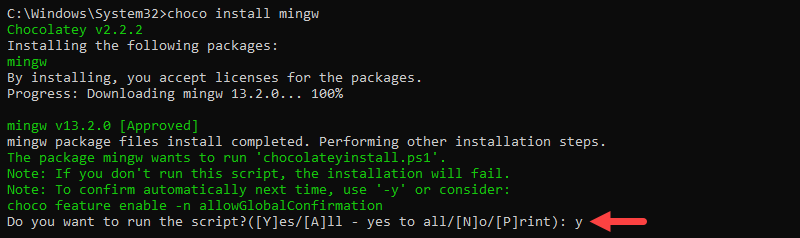
When prompted, type y and press Enter to confirm the installation.
Step 2: Confirm Installation
After the installation process completes, close and reopen the Command Prompt or run the following command to load the changes made to the PATH environment variable:
refreshenv
Confirm the installation by checking the GCC program version:
gcc --version
Install GCC on Windows via Subsystem for Linux (WSL)
Windows Subsystem for Linux (WSL) allows you to run a Linux environment directly on Windows. Doing so enables you to install and use GCC as you would on a native Linux system.
Follow the steps listed in the sections below.
Step 1: Enable Windows Subsystem for Linux
WSL is a preinstalled feature on new Windows versions. However, you still need to enable it and install a Linux distribution to use it:
1. Press the Windows key and type powershell. Select the Run as administrator option from the right panel to open PowerShell as Administrator.
2. Run the following command to enable WSL and install Ubuntu:
wsl --install
Note: Ubuntu is installed by default when enabling WSL. Run wsl --list --online to see a list of other available distros, and install one using the syntax below:
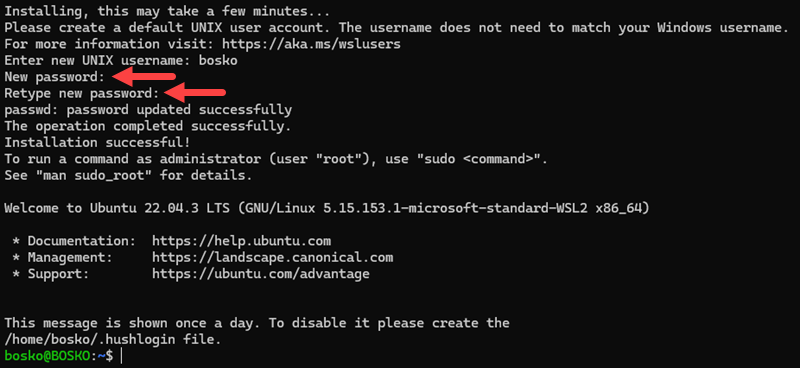
wsl --install -d [distro_name]3. Restart the system when prompted and the installation continues automatically. Type in the username and password you want to use for your Linux distro:
Step 2: Install GCC on WSL
After the installation process completes, you can install GCC:
1. Refresh the package list:
sudo apt update2. Install GCC with:
sudo apt install build-essential -yStep 3: Verify GCC Installation
In the Linux terminal, run the following command to confirm the installation:
gcc --version
Conclusion
This tutorial showed how to install GCC on a Windows system using three different methods. GCC supports a wide range of programming languages and provides a robust, open-source platform for compiling code, making it essential for software development.
Next, learn how to install the GCC compiler on Ubuntu, or check out our list of 15 best DevOps tools on the market.