The phoenixNAP Virtual Private Data Center and Data Security Cloud products utilize the VMware Cloud Director UI to manage virtual machines (VMs), storage solutions, and networking. The interface allows for changing the VM or disk storage policy to the HPE Alletra All-NVMe policy in a few simple steps.
This article shows step-by-step instructions to change the storage policy on a VM or disk via VMware Cloud Director.
Prerequisites
- The login URL and credentials provided by the phoenixNAP Provisioning Team.
- Access to a web browser.
What Is the HPE Alletra All-NVMe?
The HPE Alletra All-NVMe is a cloud-native, high-performance, scalable storage solution. The storage caters explicitly to high IOPS workloads by utilizing NVMe technology for flash storage. HPE Alletra All-NVMe reduces latency, supports scalable architecture, and is optimized to integrate seamlessly with virtualized environments.
Note: For more details, check out the impact of HPE Alletra All-NVMe on the storage landscape and how to measure storage performance and IOPS in your current infrastructure setup.
VMware Cloud Director VM vs. Disk Storage Policy
The storage policy in VMware Cloud Director has different effects on the virtualized infrastructure. The platform allows the application of storage policies to VMs or disks.
The difference in effects between the two options are:
- VM storage policy. Changing the VM storage policy modifies the storage characteristics for the entire VM. The effects impact all associated disks and the data within the VM, including the OS and applications. Applying the policy to a VM results in a consistent storage arrangement.
- Disk storage policy. VMware Cloud Director allows changing the policy on a specific disk within a VM. The change affects only the chosen disk, providing granular control over disk policies. Apply the policy per disk in situations with specific NVMe requirements.
How to Change Storage Policy to HPE Alletra All-NVMe in VMware Cloud Director
To apply the storage policy in VMware Cloud Director, follow the steps below:
1. Access the VMware Cloud Director web interface URL.

Enter the login credentials provided by the phoenixNAP Provisioning Team.
2. Select the Virtual Data Center (VDC) where the VM or disk is located.
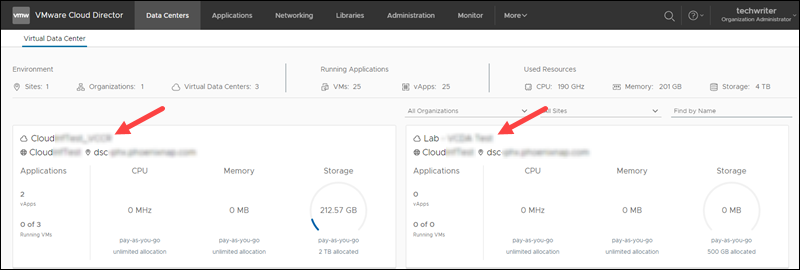
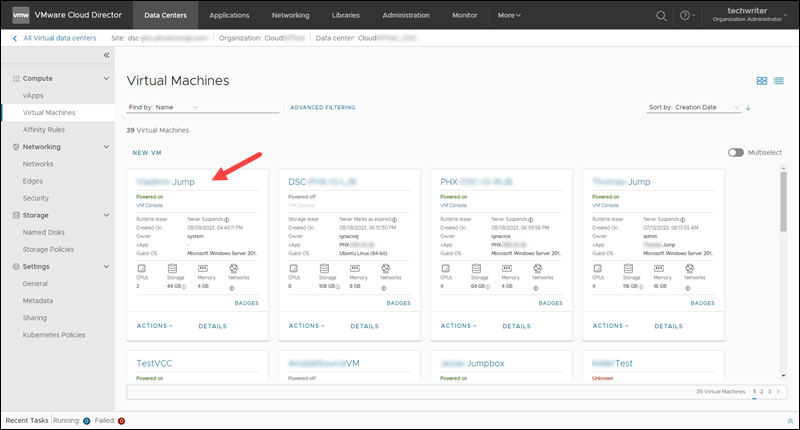
3. Locate the specific VM where you want to change the storage policy.
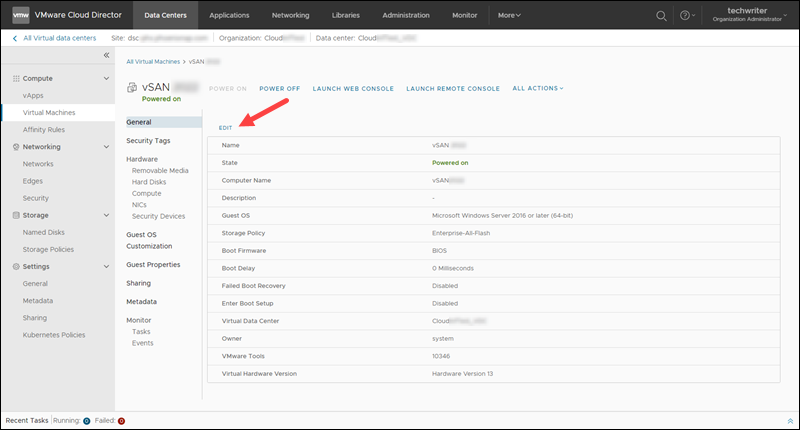
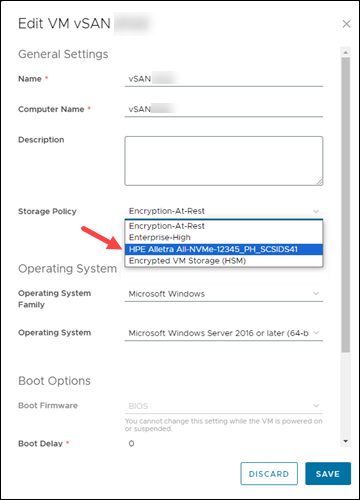
4a. (VM) To change the storage policy for the VM, click the Edit button to modify the VM settings.
4b. (Disk) Alternatively, to change the policy for a specific disk, navigate to the Hard Disks page in the menu and click Edit to configure the policy.
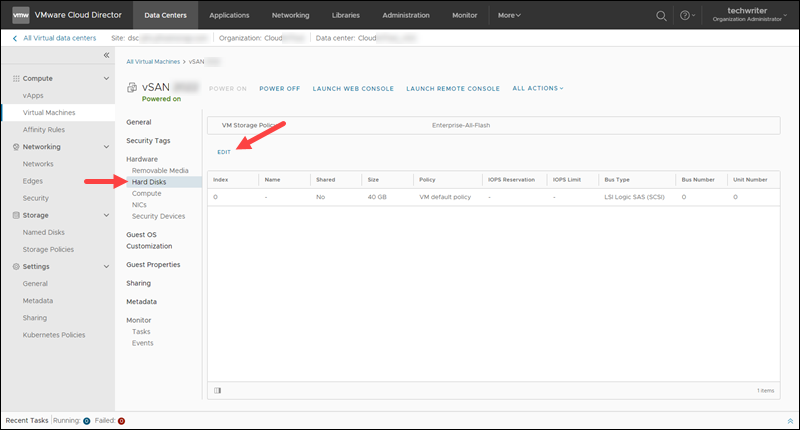
5a. (VM) Open the Storage Policy dropdown menu and select HPE Alletra NVMe from the list.
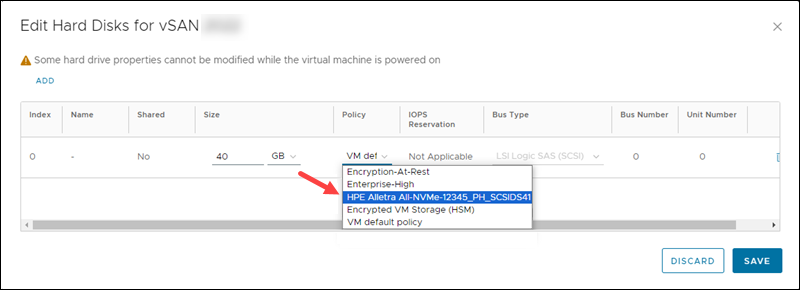
5b. (Disk) Locate the specific disk where the policy should be changed. In the Policy column, open the dropdown menu and select HPE Alletra All-NVMe from the list.
6. Click the Save button to apply the new policy. The VM does not require a restart; no changes can be made to the VM until the storage move is completed. Review the Recent Task pane to view the storage move progress.
Conclusion
After reading this guide, you now know how to apply the HPE Alletra All-NVMe storage policy via VMware Cloud Director. High-speed storage helps improve performance metrics, whether on an individual disk or all disks on a VM.
