Users working with MySQL can run into the error 'Can't connect to local MySQL server through socket '/var/run/mysqld/mysqld.sock (2)' when logging into the MySQL interface. This problem usually arises if MySQL can't access the mysqld.sock socket file.
In this tutorial, we will go over the potential causes of the 'Can't connect to local MySQL server through socket' error and show you different methods of resolving this issue.
Prerequisites
- A system running Ubuntu.
- A user account with sudo or root privileges.
- Access to the terminal.
- A copy of MySQL installed and ready to use (learn how to install it with our guide to installing MySQL on Ubunt)
Resolving the 'Can't connect to local MySQL server through socket '/var/run/mysqld/mysqld.sock' (2)' Error
There are multiple ways to solve the 'Can't connect to local MySQL server through socket '/var/run/mysqld/mysqld.sock (2)' error. If one solution doesn't work, move down the list until you find the one that resolves the issue.
Method 1: Check the MySQL Service
Take the following steps:
1. Check the status of the MySQL service with:
sudo systemctl status mysql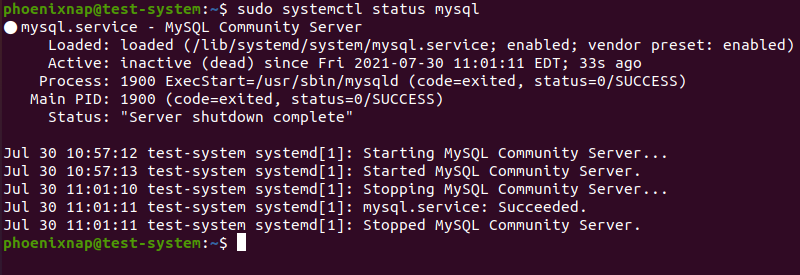
2. If the service is not running, restart it by using:
sudo systemctl start mysql3. To prevent this issue from happening, set the MySQL service to automatically start at boot:
sudo systemctl enable mysql
Method 2: Verify the mysqld.sock Location
The 'Can't connect to local MySQL server through socket '/var/run/mysqld/mysqld.sock' (2)' error also happens if MySQL can't find the mysql.sock socket file.
Do the following to remedy that:
1. Find the current mysqld.sock location by using the find command to list all the socket files on your system:
sudo find / -type s
Note: Learn more about this command in our guide for the Linux find command.
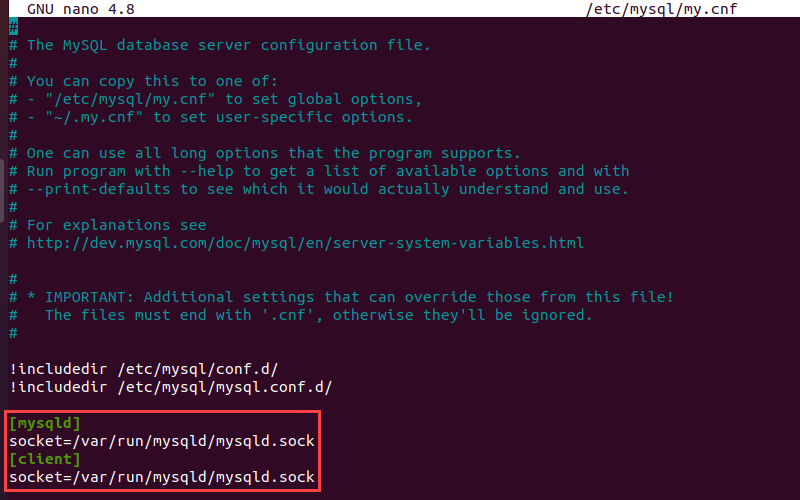
2. Open the MySQL configuration file in a text editor of your choice. For example, to do it in nano:
sudo nano /etc/mysql/my.cnf3. Add the following lines at the end of the MySQL configuration file:
[mysqld]
socket=[path to mysqld.sock]
[client]
socket=[path to mysqld.sock]
Where:
[path to mysqld.sock]: Path to the mysqld.sock socket file from Step 1.
Another method is to create a symlink from the location of mysqld.sock to the /var/run/mysqld directory:
ln -s [path to mysqld.sock] /var/run/mysqld/mysqld.sock4. Press Ctrl+X to close the configuration file and type Y and press Enter to save the changes you made.
Note: Learn how to create symbolic links with our guide to the Linux ln command.
4. Finally, restart the MySQL service:
sudo systemctl restart mysqlMethod 3: Check the MySQL Folder Permission
Another potential cause could be that the MySQL Service can't access the /var/run/mysqld directory due to permission restrictions:
1. Change the permission settings for the mysqld directory with:
sudo chmod -R 755 /var/run/mysqldSetting the permission to 755 allows the root user to read, write, and execute the directory, while other users can only read and execute.
Note: You can change permissions for files and folders with the chmod command in Linux.
2. Restart the MySQL service for the changes to take effect:
sudo systemctl restart mysqlMethod 4: Check for Multiple MySQL Instances
The error also occurs when multiple instances of MySQL run simultaneously. Take the following steps to fix this:
1. List all the instances of MySQL with:
ps -A|grep mysqld
Note: Check out our guide to learn how to use the grep command in Linux.
2. If there are multiple MySQL instances running, terminate them with:
sudo pkill mysqld3. Restart the MySQL service to start a single instance of MySQL:
sudo systemctl restart mysqlConclusion
This tutorial explained how to identify the cause of the 'Can't connect to local MySQL server through socket' error. It also outlined several ways to address this issue.
For more help with using MySQL, consult our MySQL Commands Cheat Sheet.
