Proxmox is an open-source server virtualization platform that uses a modified Ubuntu kernel to deploy and manage multiple virtualized environments on a single bare metal server. It tightly integrates two virtualization technologies, KVM for full virtual machines (VM) and LXC for lightweight containers, all managed through a central, web-based interface.
In this article, you will learn how to delete a VM in Proxmox, as well as how to remove a VM disk and snapshot.
Prerequisites
- A running Proxmox Virtual Environment.
- A virtual machine set up on Proxmox.
Note: phoenixNAP Bare Metal Cloud provides automated 8-minute deployments of Proxmox servers suitable for enterprise use cases. Sign up for Bare Metal Cloud today and spin up a Proxmox server in no time.
Delete a VM in Proxmox
There are two ways to delete a virtual machine in Proxmox:
- Using the graphical user interface (GUI).
- Using the command line.
Deleting a VM via GUI
To delete a VM using the Proxmox graphical user interface, follow the steps outlined below:
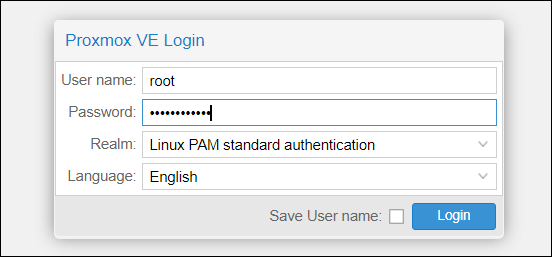
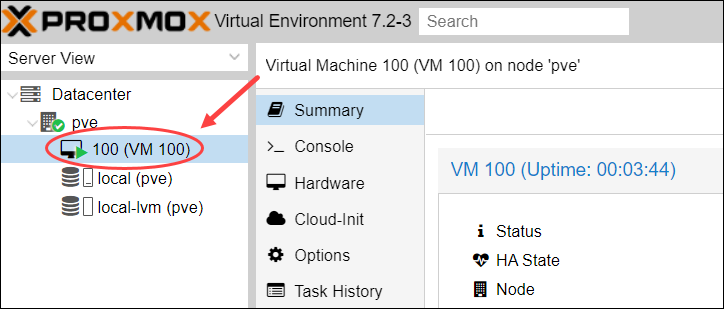
1. Log in to the Proxmox web console.
2. Select the VM you want to delete.
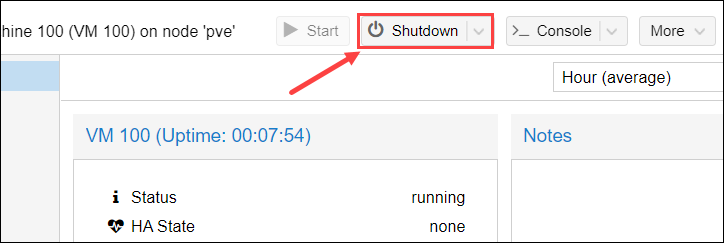
3. If the machine is running, click the Shutdown button before moving on to the next step. The VM has to be shut down or stopped.
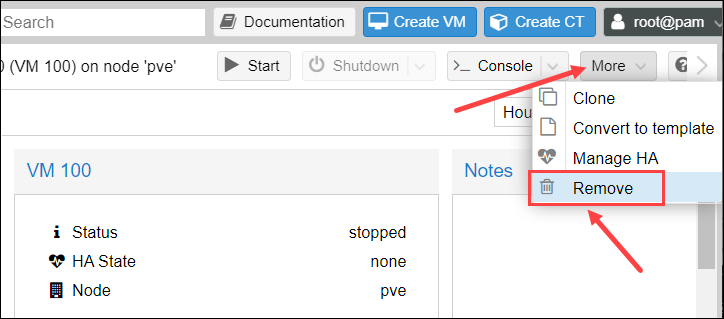
4. Select More to open a drop-down menu and click Remove.
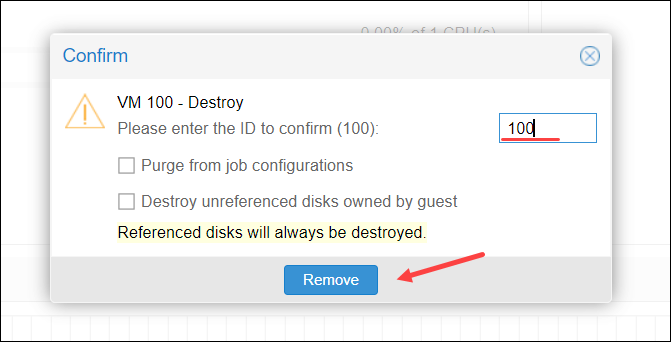
5. To confirm, enter the VM ID and click Remove.
Deleting a VM via Command Line
To delete a Proxmox VM using the command line:
1. Log into the node.
2. Find the VMID (virtual machine ID) in the VM list by running the command:
cat /etc/pve/.vmlistThe output lists information about the VMs created, including their IDs. In the example below, there is only one VM with the ID 100.

3. Shut down or stop the VM by running:
qm shutdown [vmid]Alternatively, type the following command:
qm stop [vmid]
4. Copy the ID number and add it to the following command to remove the virtual machine:
qm destroy [vmid]
Delete a VM Disk on Proxmox
In most cases, Proxmox deletes the associated disks when a virtual machine is deleted. To remove a disk manually, use the GUI or the terminal.
Delete a VM Disk via GUI
To delete a VM disk using graphical interface:
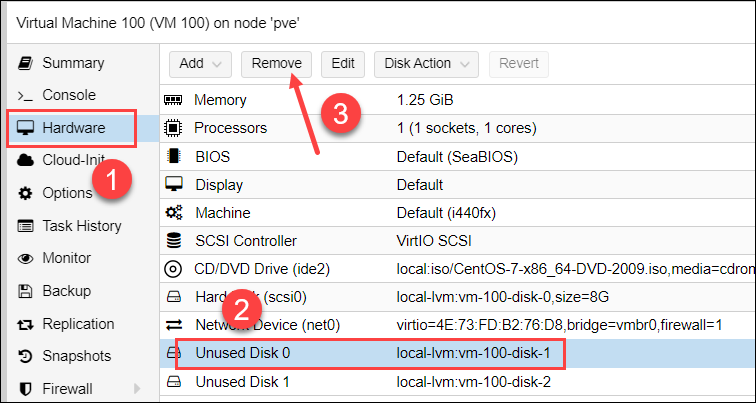
1. Select the virtual machine from the resource tree and open the Hardware tab.
2. Click the disk you want to delete.
3. Use the Remove button to instruct Proxmox to delete the disk.
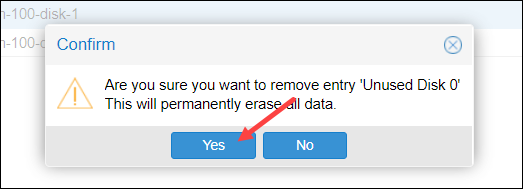
4. Confirm you want to remove the disk and permanently erase all data with Yes.
Delete a VM Disk via Command Line
Below is the procedure for deleting a VM disk using CLI:
1. List basic information of all the datasets on the system with:
zfs listThe output displays the names of the datasets and the values of their used, available, referenced, and mounted properties. For instance:
rpool/data/vm-100-disk-1 10G 5G 10G -2. To delete a disk via the command line, run:
zfs destroy -f [disk_path]Therefore, to delete the above mentioned sample disk, run:
zfs destroy -f rpool/data/vm-100-disk-1Delete VM Snapshots on Proxmox
Delete a VM snapshot in Proxmox via GUI or command line.
Remove a VM Snapshot via GUI
Follow the steps below to remove a VM snapshot using the graphical interface:
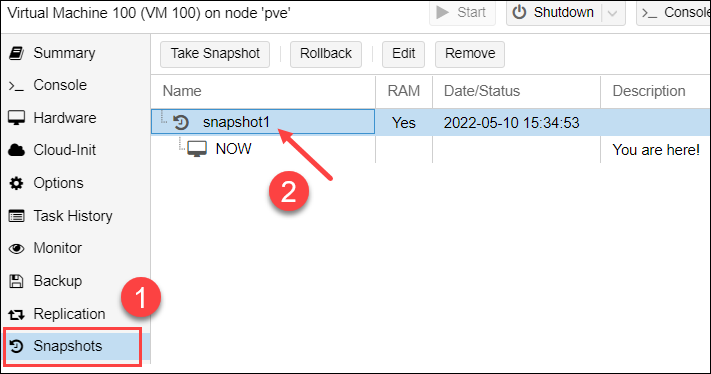
1. Select the VM in the menu on the left and open the Snapshots tab from the panel.
2. Select the snapshot you want to delete.
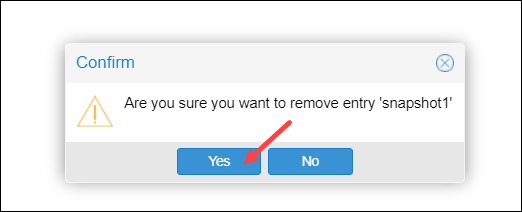
3. Confirm you want to remove the selected snapshot with Yes.
Remove a VM Snapshot via Command Line
To remove a VM snapshot using CLI:
1. List all snapshots of the specified virtual machine by running the command:
qm listsnapshot [vmid]Replace [vmid] with the virtual machine's ID.
The sample output below shows that VM 100 includes snapshot1 and the virtual machine's current state.

2. To delete a snapshot, use:
qm delsnapshot [vmid] [snapshot_name]In the example below, Proxmox deletes the specified snapshot (snapshot1) and the data related to it.

3. To confirm the snapshot has been removed, run the qm listsnashot command again.
Conclusion
In this article, you learned how to delete VMs in Proxmox, their disks, and snapshots. To see how Proxmox compares to other type-1 hypervisors, check out Proxmox vs. Hyper-V and Proxmox vs. ESXi.