Docker outputs the "Permission Denied" error when a non-root user without sufficient privileges attempts to execute a Docker command. This situation can occur after a new Docker installation, an update, or after administrative changes to users and groups on the system.
This article will present six methods to fix the "Permission Denied" error in Docker. The methods include restarting the Docker service, changing user and file permissions, and running containers in privileged mode.
Prerequisites
- Docker installed.
- Administrative access to the system.
What is Docker Permission Denied Error
The "Permission Denied" error occurs when a system cannot communicate with the Docker daemon because the user lacks privileges. The example below shows the error when the user attempts to list Docker images.

The following sections contain possible fixes listed in order from safest to the methods recommended for experts only.
Method 1: Restart Docker Engine
In some cases, restarting Docker may be sufficient to stop the error from appearing. Restart the Docker service by running the command below:
sudo service docker restartThe command prints no output. To check if the service restarted properly, type:
service docker statusThe Active field confirms the Docker service is running.

Issue a docker command to test if the error persists. The example below shows the successful execution of the docker images command.

Method 2: Run Docker Commands with sudo
The "Permission Denied" error appears only with non-root users. Running the command with sudo to acquire root privileges usually resolves the issue.
The following example creates and runs a hello-world container using the docker run command preceded by sudo:
sudo docker run hello-world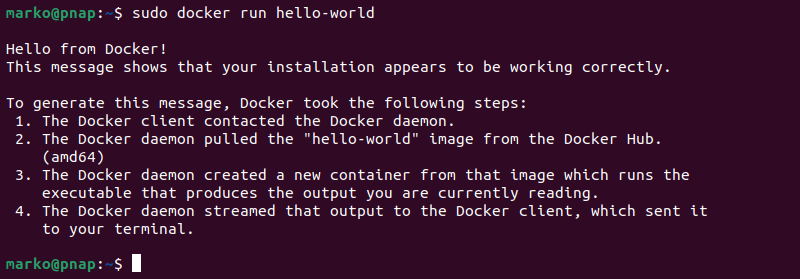
Method 3: Enable Non-Root User Access
While the previous method stops the error from appearing, it requires sudo to issue a Docker command. The following section explains how to enable non-root access for a user and grant sufficient privileges to run Docker commands without sudo.
1. Enter the command below to create the docker group on the system.
sudo groupadd -f docker2. Type the following usermod command to add the active user to the docker group.
sudo usermod -aG docker $USER3. Apply the group changes to the current terminal session by typing:
newgrp docker4. Check if the docker group is in the list of user groups.
groupsThe group appears in the command output.

You should now be able to issue Docker commands as a non-root user without sudo.
Note: If the error persists after completing all the steps of this method, try restarting your system.
Method 4: Review File Permissions
If adding a user to the docker group does not resolve the issue, it may be necessary to adjust the permissions of specific files and directories.
Follow the steps below to make the necessary changes.
1. Use the chown command to change the ownership of docker.sock, the UNIX socket that Docker daemon (dockerd) listens to.
sudo chown root:docker /var/run/docker.sock2. Type the following command to ensure that you own the hidden .docker directory located in your home directory. The -R option applies the command recursively to all the subdirectories.
sudo chown -R "$USER":"$USER" $HOME/.docker3. Assign group read and write permissions with the chmod command.
sudo chmod -R g+rw "$HOME/.docker"Note: The .docker directory is created only after the user successfully authenticates on Docker Hub with the docker login command. If you receive the "No such file or directory" error when executing the commands related to .docker, ignore the message.
The system is now set up with the correct permissions, and the "Permission Denied" error should no longer appear.
Method 5: Edit Docker Service File
The docker.service file contains parameters necessary for the proper functioning of the Docker daemon. Editing this file may sometimes resolve the "Permission Denied" issue.
1. Open the file in a text editor. The example uses Nano.
sudo nano /usr/lib/systemd/system/docker.service2. Append the following lines to the bottom of the Service section:
SupplementaryGroups=docker
ExecStartPost=/bin/chmod 666 /var/run/docker.sock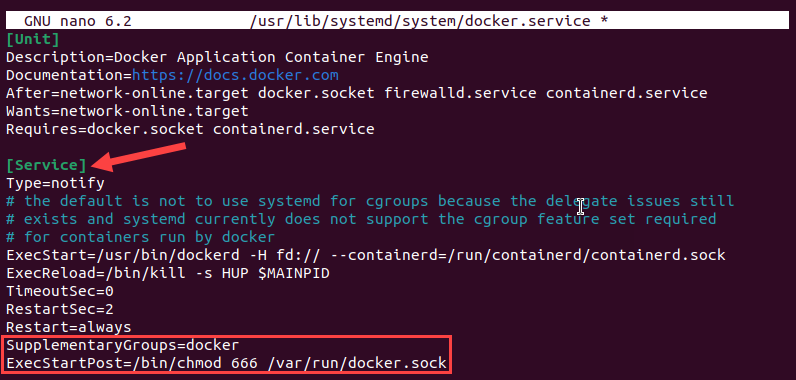
Save the file and exit.
3. Restart Docker Engine by referring to Method 1 of this tutorial.
Method 6: Run Docker in Privileged Mode
Warning: The following section describes a procedure that is not recommended in the production environment. To find out more, read Should You Run Privileged Docker Containers?
The privileged mode in Docker grants containers root privileges on all devices on the host system. Running a privileged container should eliminate the "Permission Denied" error.
To check if your container already runs in privileged mode:
1. List all the containers on your system:
sudo docker ps -a2. Find the container you want to inspect and copy its ID.

3. Execute the following command with the relevant container ID.
sudo docker inspect --format='{{.HostConfig.Privileged}}' [container-id]If the output is true, the container runs in privileged mode. The false output indicates an unprivileged container.

Add the --privileged flag to the docker run command to create a privileged container.
sudo docker run -d --privileged nginxIf successful, the output shows the ID of the new container.

Conclusion
This article provided multiple methods to fix the Docker "Permission Denied" error. It included simple solutions, such as restarting Docker, and more complex ones, like editing user permissions. To catch and troubleshoot more complex errors, learn how to use Docker's built-in logging tools.
For more information, refer to Docker Container Logs: Commands and Best Practices.