SMTP (Simple Mail Transfer Protocol) is a service that enables email exchange on the Internet and within a local network. To achieve that, SMTP interacts with the Mail Transfer Agent (MTA) and ensures the messages reach the intended recipients.
Mail servers and other message transfer agents use SMTP to send and receive emails.
In this tutorial, you will learn to install and configure the SMTP server on Windows.
Prerequisites
- A Windows Server operating system.
- A user account with administrator privileges.
Note: Client operating systems like Windows 11, Windows 10, and Windows 8, do not have SMTP Server capabilities. Windows Server operating systems provide an SMTP server as part of the Internet Information Services (IIS). The client operating systems only provide the SMTP email client, which is not an SMTP server.
Install SMTP on Windows
SMTP installation is a straightforward process on Windows Server operating systems. Use the Server Manager management console and follow the steps below to install SMTP.
Step 1: Add Roles and Features in Server Manager Dashboard
Open the Server Manager management console and select Dashboard in the left pane.
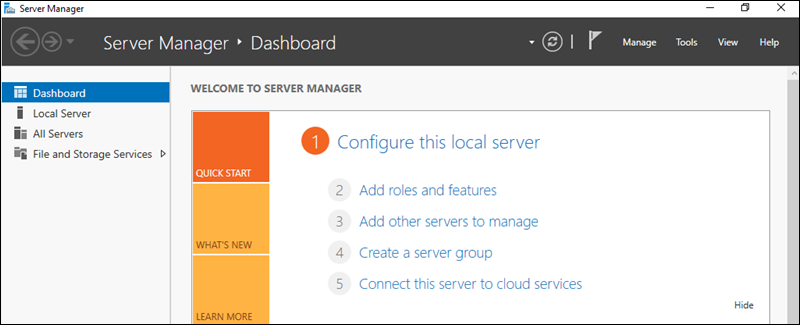
From the Dashboard, select the Add roles and features option to start the wizard and install the SMTP server.
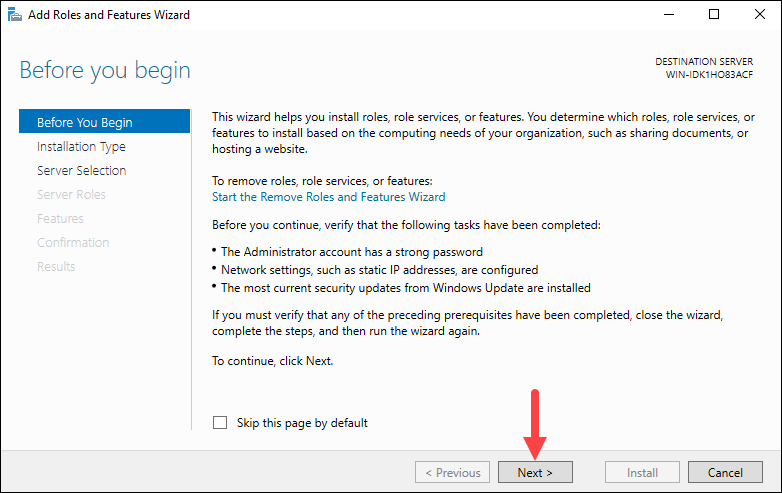
The Before You Begin screen appears, stating that the prerequisites for adding a role are:
- Having a strong password on the Administrator account.
- Configured network settings on the server.
- That you have installed the latest security updates.
If all the prerequisites are met, click Next to continue the installation.
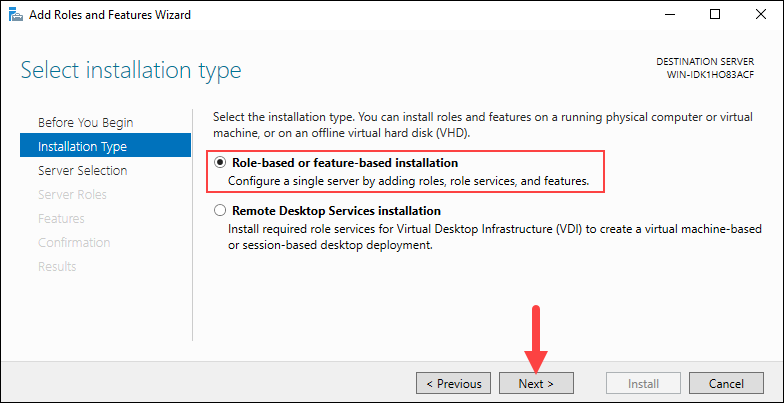
Step 2: Select Installation Type
In the Installation type window, select Role-based or feature-based installation. Click Next to continue.
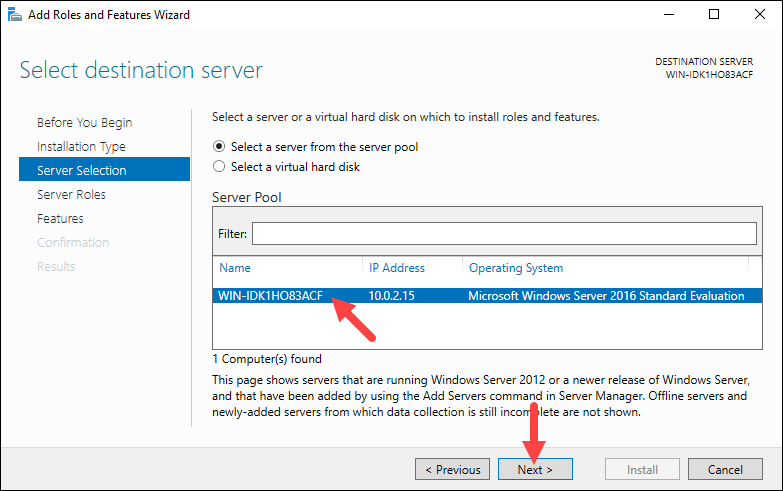
Step 3: Select Destination Server
Choose the Select a server from the server pool option and pick the desired server from the Server Pool to set the destination server. The Server Pool lists the servers you have added using the Add Server option in Server Manager. By default, the local server is selected.
Click Next to move on to the next step.
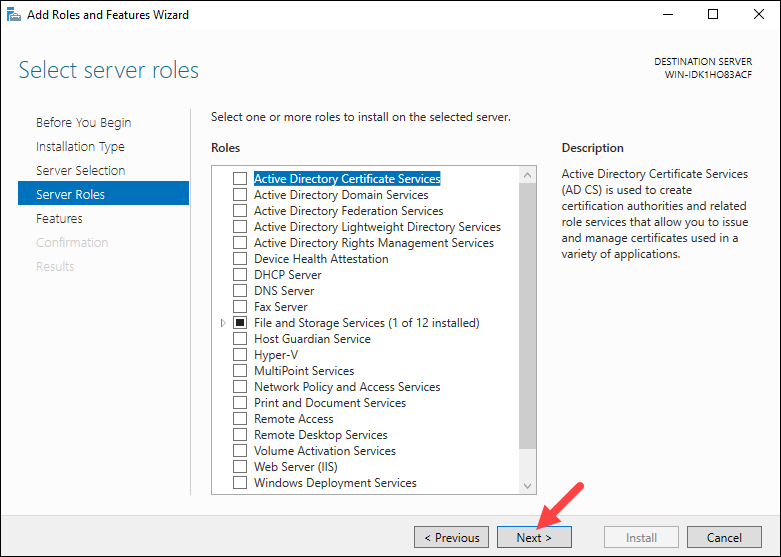
Step 4: Select Server Role
The Select server roles screen lets you to choose which features and roles to install. Keep the default selection and click Next.
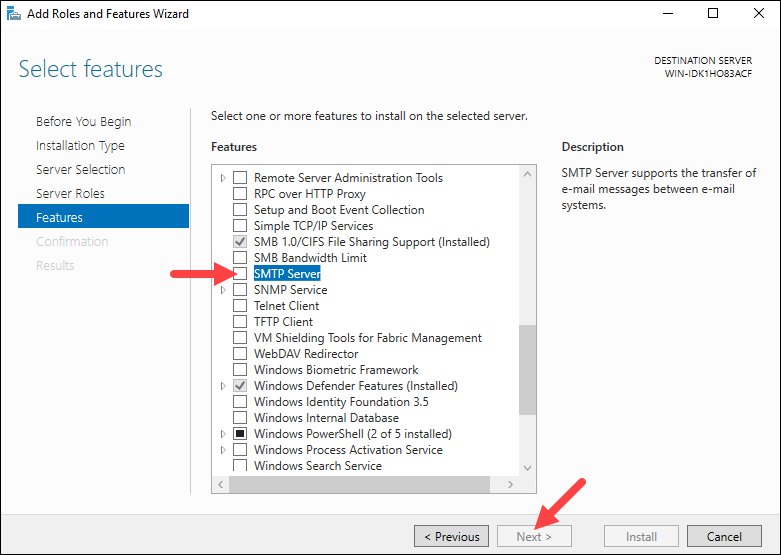
Step 5: Select Features
The next step is to select which features to install. Scroll through the list to find and select SMTP Server. Click Next to proceed.
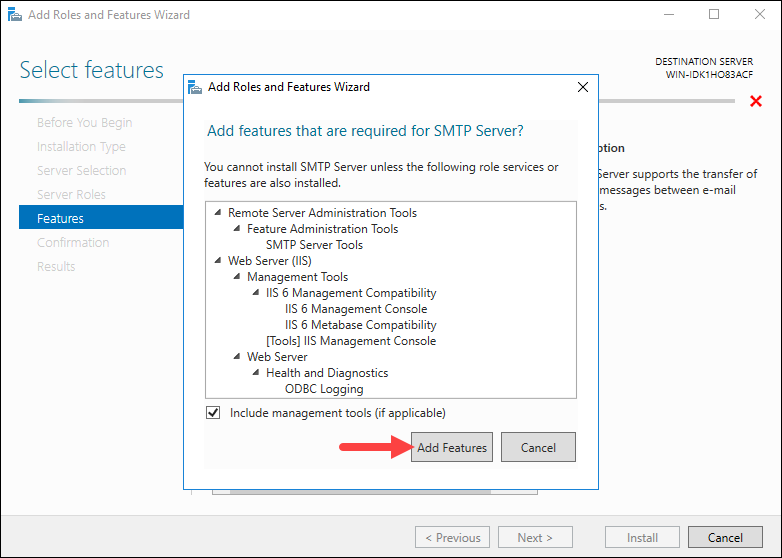
Step 6: Install Missing Features
If the Remote Server Administration Tools and Web Server roles have not been previously installed, the wizard prompts you to install them. Check the Include management tools option and click Add Features to install them:
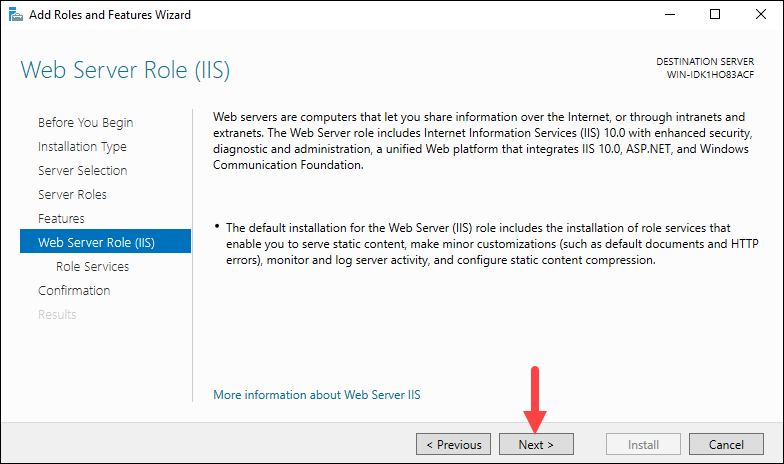
Install Web Server Role
The wizard displays an information screen about the Web Server Role (IIS). Click Next to install the role.
Install Role Services
Check all the services you want to install for the Web Server role. The default options are preselected.
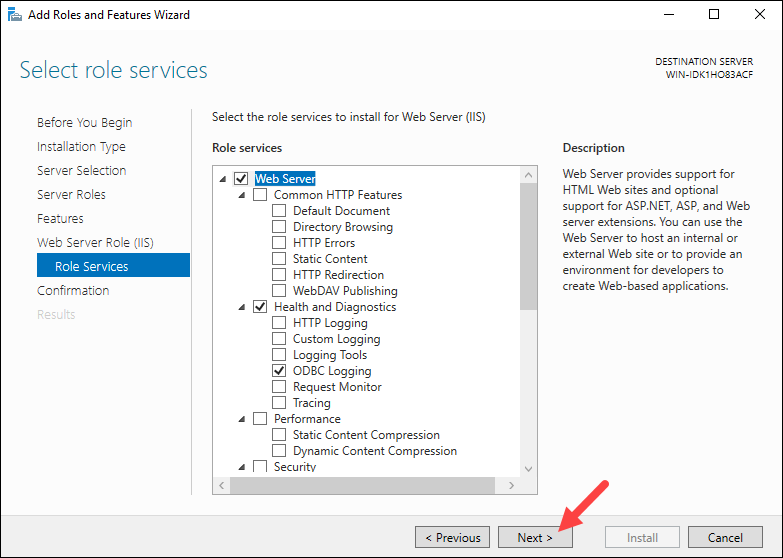
Click Next to proceed to the final step when you finish selecting the services.
Step 7: Confirm Installation
The wizard displays a confirmation window summarizing all the roles, services, and features about to be installed. Make sure that the Restart the destination server automatically if required option is checked, and click Install to finish the installation.
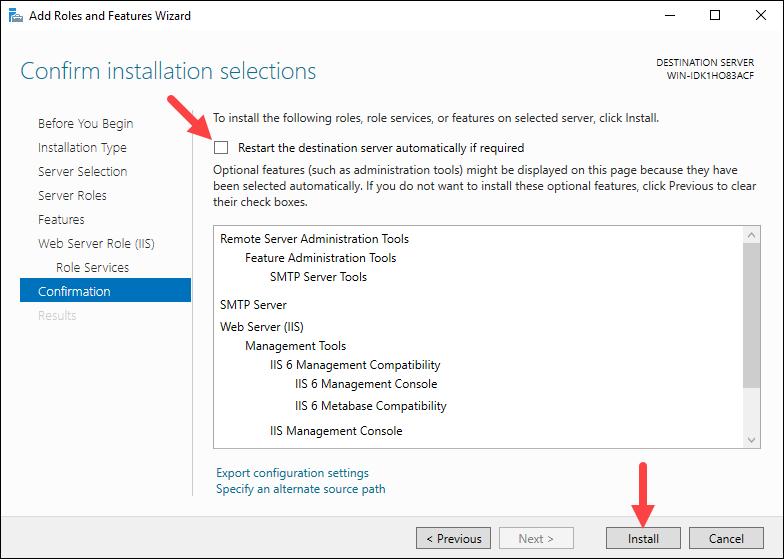
When the installation completes, click Close to exit the installation wizard.
Configure SMTP on Windows
Configure the SMTP server using the Internet Information Services (IIS) Manager 6.0. Follow the steps in the chapters below.
Step 1: Open IIS 6.0
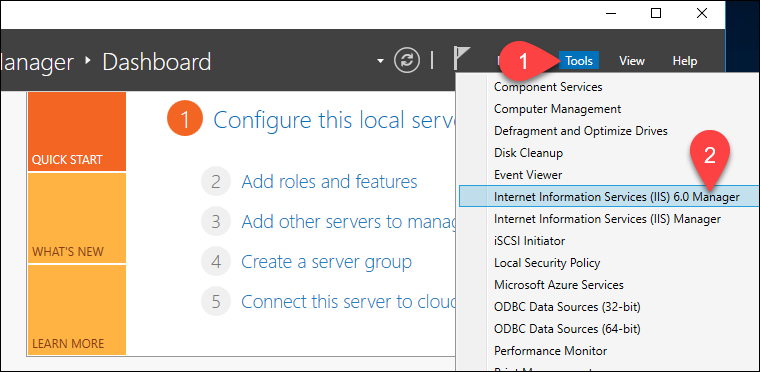
Open the IIS Manager 6.0 from the Server Manager dashboard.
Select the Tools option, and locate Internet Information Services (IIS) 6.0 Manager from the dropdown menu:
Step 2: Configure SMTP Virtual Server
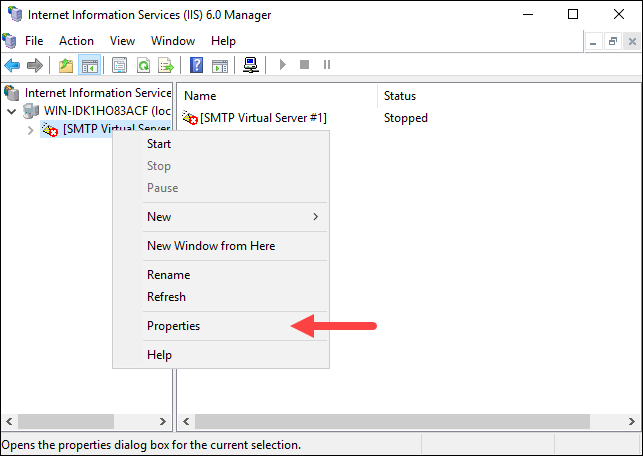
In IIS Manager 6.0, expand the computer name and right-click [SMTP Virtual Server #1].
Select Properties from the dropdown menu.
Step 3: Configure Relay
The relay options let you send emails via the SMTP virtual server.
Configure Server Access
1. In [SMTP Virtual Server #1] properties, click the Access tab and select the Relay button:

2. Select the Add… option to set which computer is allowed to relay emails through the SMTP server.
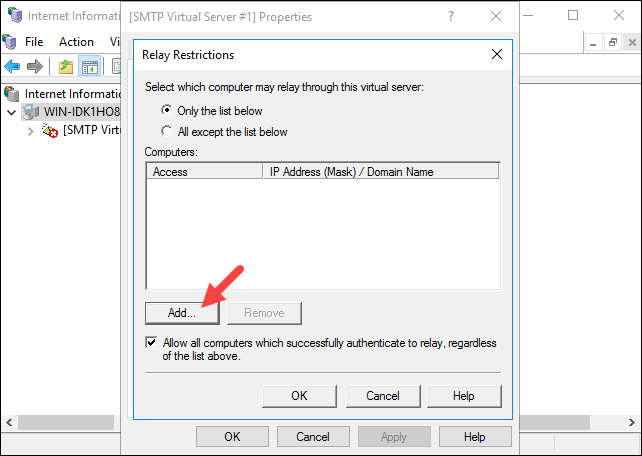
Select the Single Computer option and enter 127.0.0.1 to allow the localhost to relay emails through the SMTP server. You can also specify a group of computers using the Group of computers option.
Click OK to confirm the changes.

Step 4: Configure Security Options
The Delivery tab of [SMTP Virtual Server #1] properties contains settings for retry intervals when sending outbound emails after a failed delivery, as well as security options.
To configure the security options, click Outbound Security.
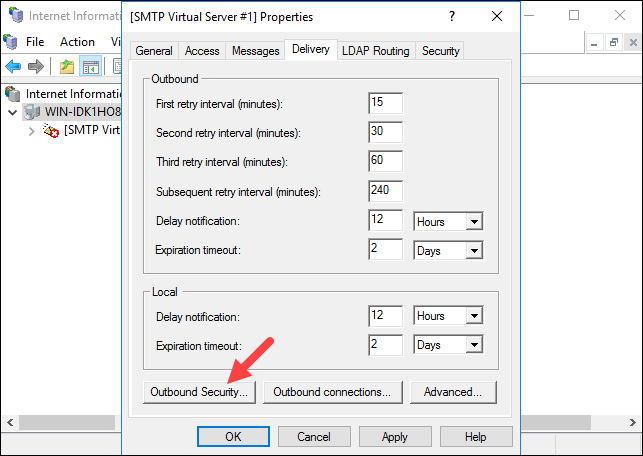
The pop-up window allows you to choose one of four options for securing your SMTP server:
- Anonymous access. Disables SMTP server authentication since it doesn't require an account name or password.
- Basic authentication. Used when sending emails to a personal or Exchange account. This option passes the account name and password in clear text, so make sure to use TLS encryption if you select it.
- Integrated Windows Authentication. Uses the Windows domain account name and password for authentication.
- TLS encryption. Use TLS to secure the connection. This option requires you to install a valid SSL certificate on the server.

Note: Test core SMTP functionality with a personal e-mail or Exchange account by selecting Anonymous access. SMTP uses the AUTH command with Basic authentication, which can cause some e-mail providers to fail.
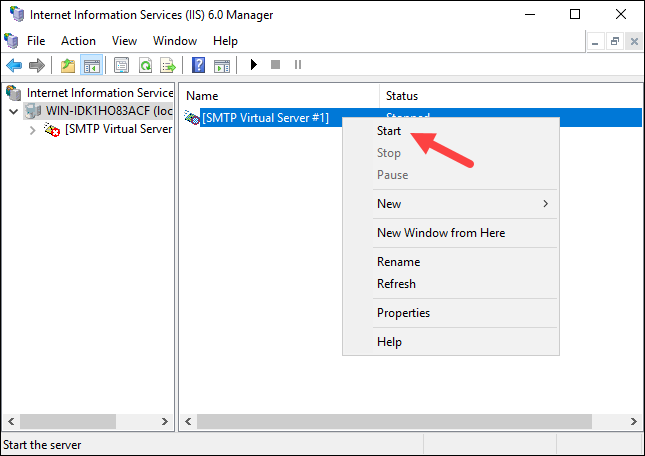
Step 5: Restart SMTP Server
Restart the SMTP Server to apply the changes. Right-click [SMTP Virtual Server #1], select Stop, and then select Start.
Test SMTP Server
Test the SMTP server configuration by sending an email message using the SMTP server. One way to do that is to use telnet. Follow the steps below:
1. Press the Windows key and search for PowerShell.
2. Run the PowerShell app as Administrator.
3. Run the following command:
telnet localhost 254. Start the communication with the server by running:
EHLO server5. Enter the email address you will use to send the email. The syntax is:
MAIL FROM: [sender_email_address@domain.com]6. Enter the recipient email address. The syntax is:
RCPT TO: [recipient_email_address@domain.com]7. Inform the SMTP Server you are ready to send the message by entering:
DATA8. Enter the email subject:
Subject: Test Message9. Press Enter twice to move on to the email body. Type in the message body and press Enter to finish.
10. Send the email by entering a period (.) and pressing Enter.
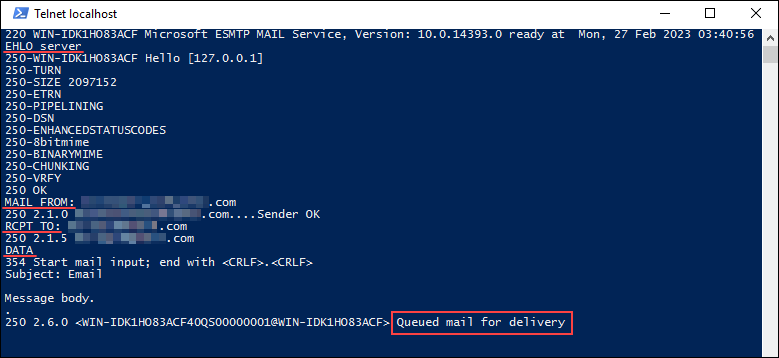
Check the recipient's inbox to see if the email was delivered. If not, the message may still be in the SMTP Queue directory (C:\inetpub\mailroot\Queue).
Conclusion
This tutorial showed how to install and configure an SMTP server on Windows Server. An SMTP server allows you to exchange emails using the MTA, making it a great solution when you want to set up your own mail server.
Next, learn how to set up Postfix to use an external SMTP server, or learn to use the mail command in Linux.