Direct access to the runtime environment of Kubernetes containers is often necessary for successful debugging, troubleshooting, and app management.
The kubectl exec command provides this capability, enabling direct inspection of live processes, file systems, and network configurations within a container.
This article shows how to use the kubectl exec command and provides a set of illustrative examples.
What Is kubectl exec?
The kubectl exec command serves as an interface for direct interaction with running containers in a Kubernetes cluster. It enables users to execute arbitrary commands and launch interactive shell sessions (e.g., /bin/bash or /bin/sh) inside a container.
This capability is frequently used for:
- Real-time debugging.
- Inspecting containerized processes.
- Examining file systems.
- Testing network connectivity.
- Performing temporary administrative tasks.
When the user runs the kubectl exec command, the following process takes place:
1. The kubectl client initiates a request to the Kubernetes API server.
2. The API server establishes a secure, multiplexed connection with the kubelet agent running on the relevant node.
3. The kubelet communicates with the container runtime (e.g., Docker, containerd, or CRI-O) to execute the command within the specific container's isolated environment.
Standard input, output, and error streams are channeled back and forth between the user's local terminal and the container, providing a seamless interactive experience. This architecture ensures that all interactions are governed by Kubernetes' Role-Based Access Control (RBAC) policies, thereby maintaining cluster security.
kubectl exec vs. kubectl run
Both kubectl exec and kubectl run directly interact with containers in a Kubernetes cluster. However, their use cases differ significantly, as shown below:
kubectl execexecutes commands within an existing, running container. Its primary use case is debugging, troubleshooting, or ad-hoc administration of active workloads.kubectl runcreates and runs a new pod based on a specified image. It is used for deploying new applications or ephemeral jobs.
kubectl exec Syntax
The basic syntax for kubectl exec is given below:
kubectl exec [pod] -c [container] -- [command] [arguments]The command consists of the following elements:
[pod]is the name of the target pod.- The
-cflag specifies the container name. If omitted, kubectl defaults to the first container in the pod. - The (
--) symbol separateskubectl execoptions from the command intended for the container. [command]is the command to be executed inside the container.[arguments]includes any command arguments.
kubectl exec Examples
The following sections contain practical examples that demonstrate the use of kubectl exec.
Listing Files in Container
Execute the command below to list the contents of a directory located in the default container of a pod:
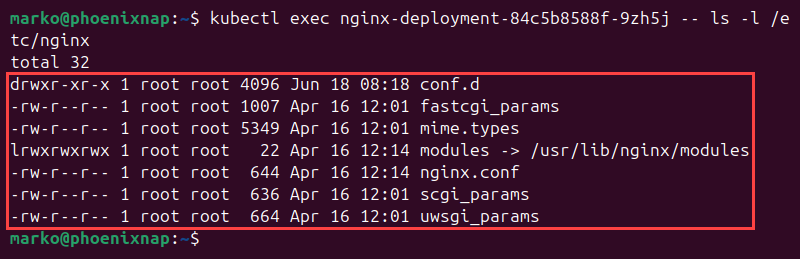
kubectl exec [pod] -- ls -l [directory]For example, to see the contents of the /etc/nginx directory within the Nginx pod named nginx-deployment-84c5b8588f-9zh5j, enter the following:
kubectl exec nginx-deployment-84c5b8588f-9zh5j -- ls -l /etc/nginxKubernetes executes the command and prints the output directly into the terminal.
Executing Commands in Specific Container
Print the contents of a file located in a specific container in a pod using the cat command:
kubectl exec [pod] -c [container] -- cat [file]For example, to see the Nginx configuration for the container named nginx-container located in the nginx-deployment-84c5b8588f-9zh5j pod, type the command below:
kubectl exec nginx-deployment-84c5b8588f-9zh5j -c nginx-container -- cat /etc/nginx/nginx.conf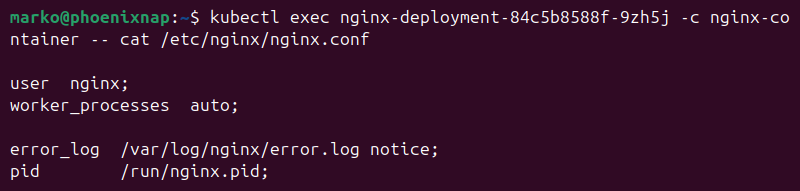
Accessing Interactive Shell
Obtain an interactive bash shell within a container to execute multiple commands:
kubectl exec -it [pod] -c [container] -- bashThe command above includes the following options:
-i(--stdin). Keeps the standard input open for interactive sessions.-t(--tty). Allocates a pseudo-TTY. This option is commonly used with the-iflag for interactive shell access.-c(--container). Provides a way to pass the name of the target container tokubectl exec.
For example, to start a bash shell instance within the container named nginx-container in the nginx-deployment-84c5b8588f-9zh5j pod, enter the following command:
kubectl exec -it nginx-deployment-84c5b8588f-9zh5j -c nginx-container -- bashThe shell prompt appears in the output.

Running Network Utility
Pinging an external address from a pod container allows users to diagnose network connectivity issues. To execute the ping command with kubectl exec, use the syntax below:
kubectl exec [pod] -- ping -c 4 google.comNote: If the ping command is not available in the container, install it with: kubectl exec [pod] -- apt install inetutils-ping -y.
For example:
kubectl exec nginx-deployment-84c5b8588f-9zh5j -- ping -c 4 google.com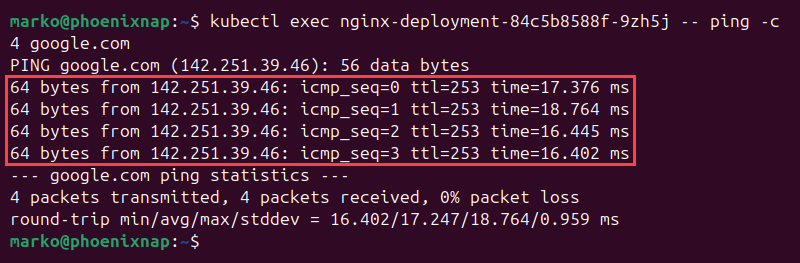
Conclusion
This article presented the kubectl exec command, a tool for establishing direct communication with containers running within a Kubernetes instance. It also provided examples to illustrate the most popular uses of the command.
Next, read our Kubernetes Port Forwarding Guide to learn how to connect and manage individual cluster resources.