FFmpeg is an open-source command-line tool for audio and video file processing. It comprises a suite of programs and libraries for decoding, encoding, streaming, filtering, and playing various multimedia formats.
This article will guide you through 3 different ways to install FFmpeg on macOS.
Prerequisites
- Mac OS X 10.9 or newer.
- Administrative access to the system.
Option 1: Installing FFmpeg on Mac via Homebrew
Package manager installations provide automatic app updates, simplifying the management process. The recommended way to install FFmpeg on macOS is using the Homebrew package manager.
The sections below describe the necessary steps and provide three ways to install the tool with Homebrew.
Note: If you do not have Homebrew installed on your system, read How to Install Homebrew on Mac.
Step 1: Update and Upgrade Homebrew Formulae
1. Before installing FFmpeg, ensure that Homebrew formulae on the system are up to date:
brew update2. Upgrade outdated formulae by running:
brew upgradeStep 2: Install FFmpeg
1. Install the latest version of FFmpeg available on Homebrew with the command below.
brew install ffmpegHomebrew installs the tool and all the dependencies.
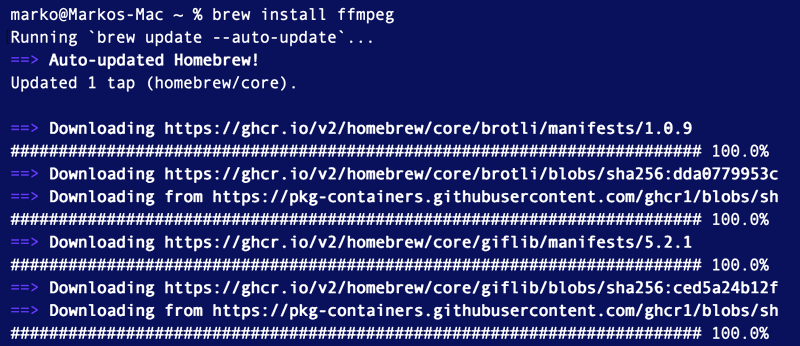
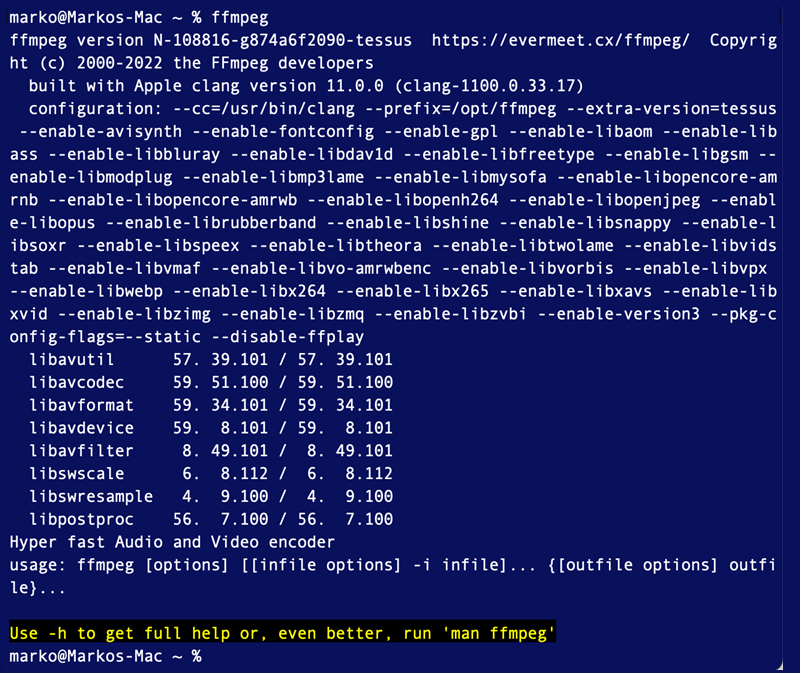
2. Wait for the installation to finish, then verify it by launching FFmpeg:
ffmpegIf successfully installed, FFmpeg displays an overview of configuration options.
Install Git Master Version (Optional)
To install the latest Git master version of FFmpeg, add the --HEAD flag to the installation command.
brew install ffmpeg --HEADHomebrew clones FFmpeg's Git repository and checks out the master branch.

Install Using Third-Party Repository (Optional)
The default version of FFmpeg comes with a selection of free libraries. If you need additional libraries (including the proprietary ones) to be included in your FFmpeg installation, follow the steps below:
1. Add the following Homebrew tap (third-party repository):
brew tap homebrew-ffmpeg/ffmpeg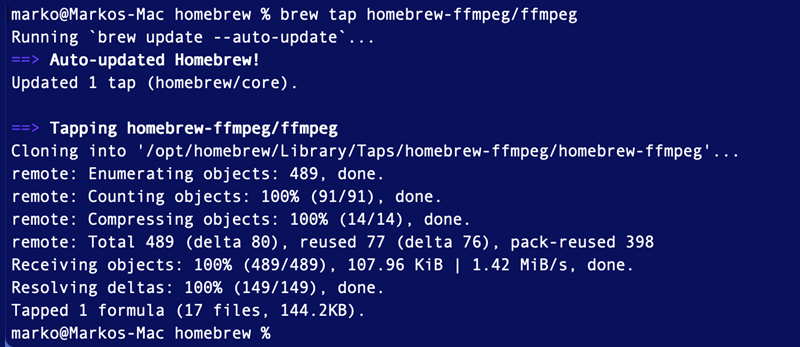
2. Install the third-party version of FFmpeg with the command below.
brew install homebrew-ffmpeg/ffmpeg/ffmpeg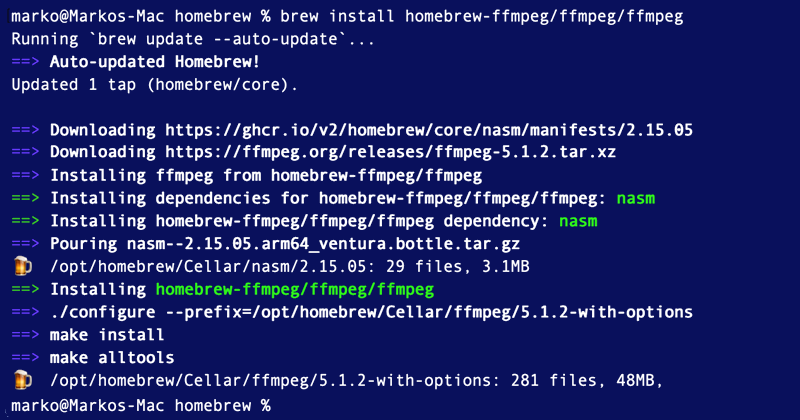
Option 2: Installing FFmpeg on Mac via MacPorts
MacPorts is another popular package manager for macOS. If you do not have MacPorts on the system, install it by downloading and executing the PKG file for your macOS version.
Note: For detailed download and installation steps, refer to the Install MacPorts section of our PuTTY tutorial.
1. Install FFmpeg on MacPorts by typing the following command:
sudo port install ffmpeg2. When prompted, enter Y to proceed with the installation. MacPorts installs FFmpeg and its dependencies.

Option 3: Installing FFmpeg on Mac Using a Static Build
Another way to install FFmpeg on Mac is to download a static build binary. Static builds allow you to choose and install the latest snapshots and releases. However, app management will be more difficult as you will need to manually update the app.
Follow the steps below to run a static build of FFmpeg.
Step 1: Download FFmpeg
1. Visit the official FFmpeg download page.
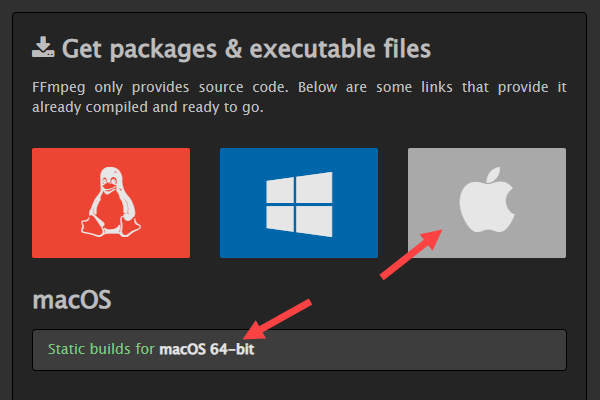
2. In the Get packages & executable files section, select the Apple logo and click the Static builds for macOS 64-bit link.
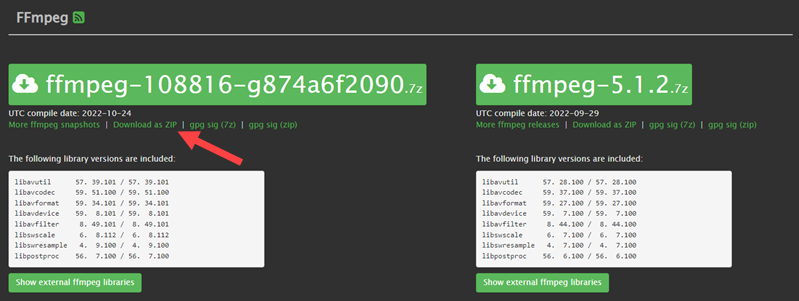
3. Scroll down to the FFmpeg section and choose a version. To download the latest snapshot, select Download as ZIP in the column on the left side.
Step 2: Extract and Move FFmpeg Binary
When the download completes, execute the following steps to place the binary in a location where the OS will recognize it.
1. Double-click to unzip if the file did not unzip automatically.
2. Move the file to a directory of your choice. Make a note of the directory path.
3. In the terminal, add the directory to the path variable. For example, if the FFmpeg binary is in /Users/test/local, type:
export PATH=$PATH:/Users/test/Local4. Test the installation by invoking FFmpeg from the terminal.
ffmpegConclusion
After reading this article, you should know how to install FFmpeg on macOS.
The guide explained 3 different methods for installing FFmpeg - using package managers (Howebrew and MacPorts) or by manually downloading and building a static binary file.
