SSH File System (SSHFS) is a file system client that allows the user to mount and access directories on remote computers. It uses SSH File Transfer Protocol (SFTP) to establish a secure connection and provide remote file access.
This article shows how to mount remote file systems in macOS using SSHFS.
Prerequisites
- Command-line access.
- Administrative privileges on the local macOS system.
- Remote user credentials.
Install SSHFS and macFUSE on macOS
SSHFS on macOS requires the macFUSE software package, which provides APIs that enable the system to handle non-native file store types. Follow the steps below to download and install SHHFS and macFUSE.
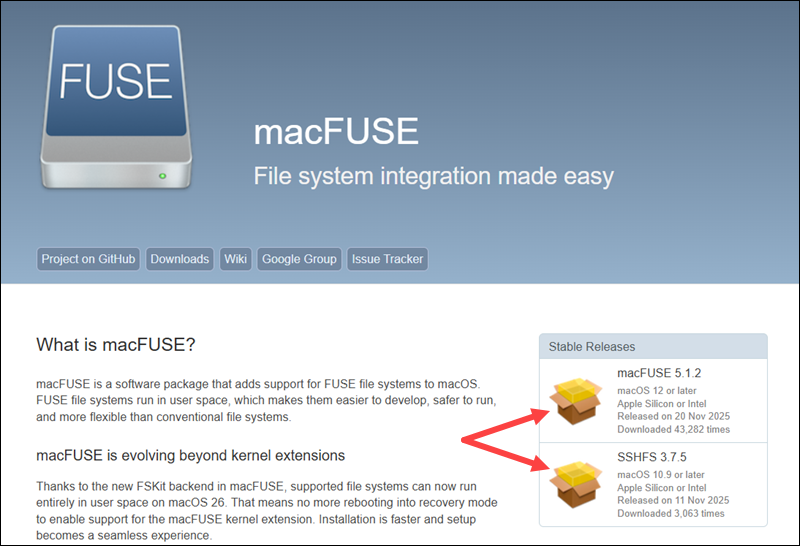
Step 1: Download Packages
Visit the official macFUSE website. Download the latest stable SSHFS and macFUSE installation packages from the Stable Releases section of the main page.
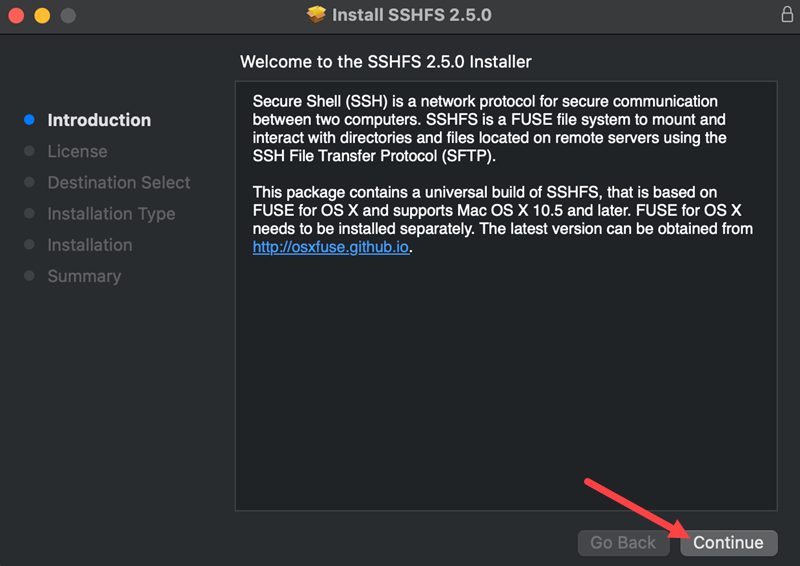
Step 2: Install SSHFS
The following steps show the SSHFS installation procedure:
1. Locate and start the SSHFS PKG installer. Select Continue to proceed to the next page.
2. If the installation is performed on an Apple Silicon system with Rosetta not installed, a prompt asks to set up Rosetta before continuing with the SSHFS installation. Select Install and wait for the procedure to finish.
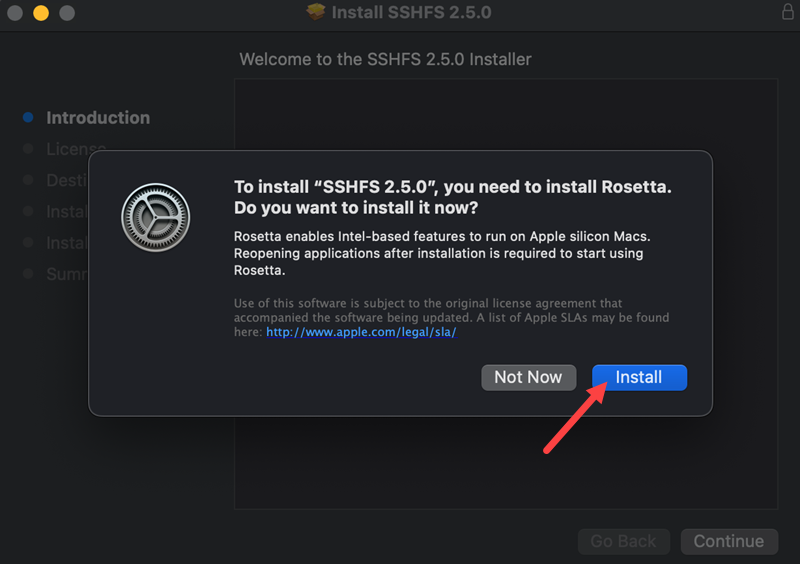
Once Rosetta is installed, the SSHFS setup resumes automatically.
3. Finish installing SSHFS by following the installer prompts.
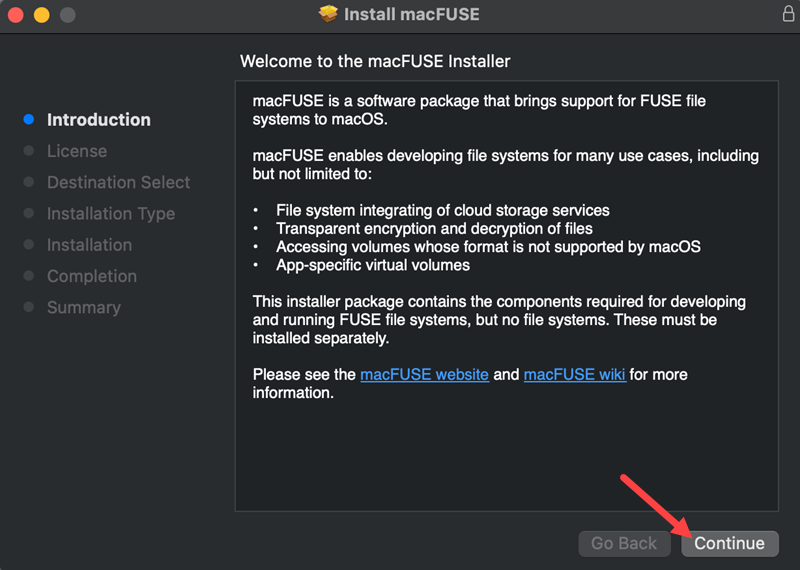
Step 3: Install macFUSE
Since macFUSE is a system extension that modifies how the kernel handles file systems, installing it requires modifications in the macOS Startup Security Utility. Follow the steps below to install and enable macFUSE on macOS:
1. Start the macFUSE DMG installer. Follow the installer prompts to install the extension.
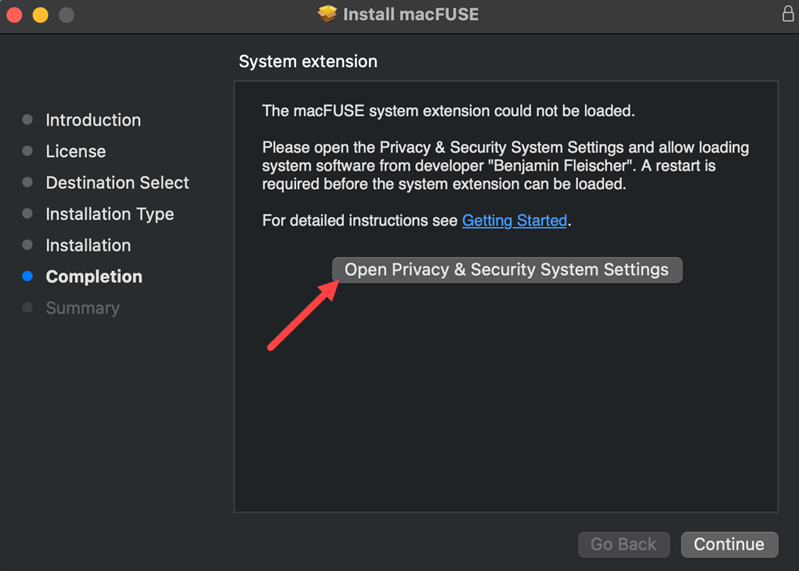
2. When the system finishes installing macFUSE, a message appears stating that the system extension could not be loaded. Click the Open Privacy & Security System Settings button to proceed.
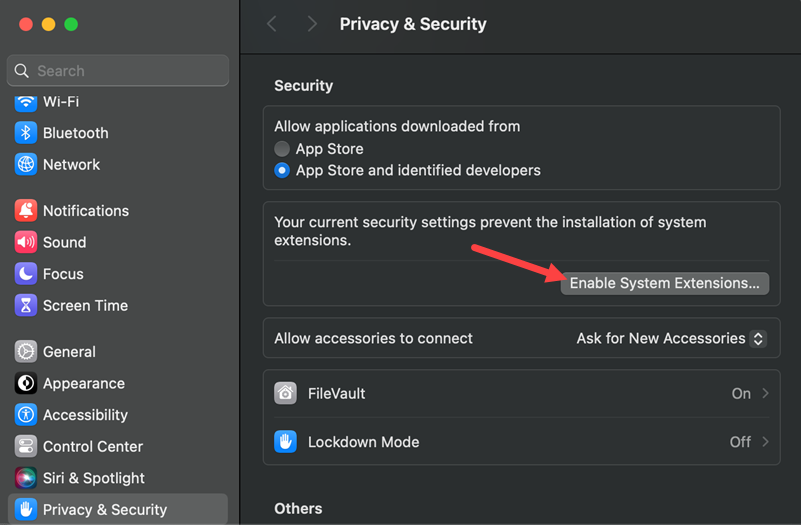
3. Click the Enable System Extensions button in the Privacy & Security section of the System Settings.
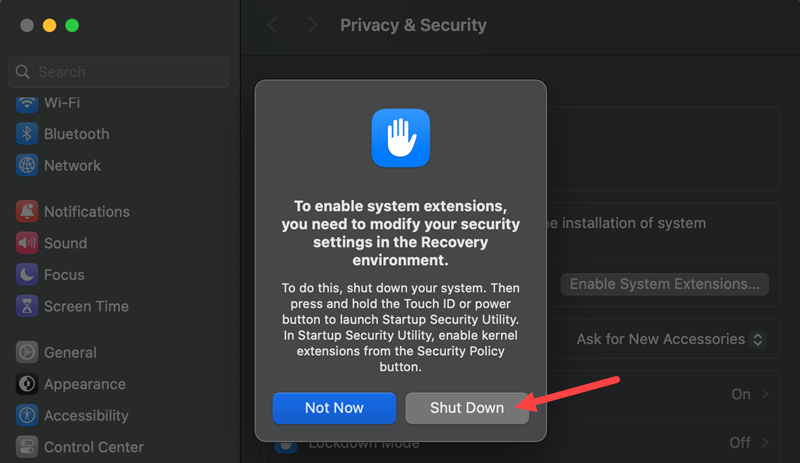
4. Ensure all your work in the current OS session is saved and select Shut Down to power off the computer.
5. When turning the computer back on, long-press the power button to enable additional startup options.
6. Select Options from the boot list.
7. Log in with your user.
8. Select Startup Security Utility from the Utilities section in the top menu.
9. Select the disk containing the macOS installation (usually called Macintosh HD), and click the Security Policy button.
10. Select the Reduced Security option and check the box to Allow user management of kernel extensions from identified developers.
11. Click OK to confirm and restart the computer.
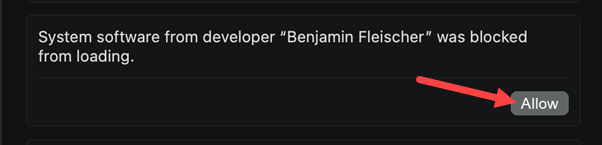
12. Return to the Privacy & Security section in System Settings and select the Allow button to load macFUSE.
13. Restart the computer for the changes to take effect.
Mount Remote File System on macOS
With SSHFS and macFUSE installed, you can mount a remote directory on the local system. Proceed with the steps below to learn how to mount, access, and unmount a remote file system using SSHFS on macOS.
Step 1: Create Mount Point
A mount point is a directory in the local file system through which a remote directory is accessed. Create it with the mkdir command:
mkdir [path]/[directory]For example, to create a mount point named ubuntu in your home directory, type the following command:
mkdir /Users/[username]/ubuntuReplace [username] in the command with your actual username.
Step 2: Mount Remote Directory
SSHFS includes a CLI that enables different options for mounting remote directories. Below is the basic command syntax:
sshfs -o [options] [user]@[host]:[remote-path] [mount-point]For example, the following command establishes an SSH connection with the user marko@192.168.0.32 and mounts the remote server's root directory to the previously created /Users/marko/ubuntu mount point.
sshfs marko@192.168.0.32:/ /Users/marko/ubuntuType the remote user password when prompted. SSHFS mounts the remote directory.

If you encounter a problem when connecting to the remote server, run the command below to enable debugging options:
sshfs -o debug,sshfs_debug,loglevel=debug [user]@[host]:[remote-path] [mount-point]Step 3: Access Remote Directory
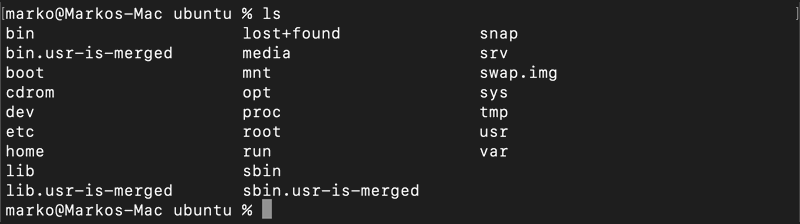
Test the connection by going to the mount point directory and typing the ls command:
lsThe system displays the contents of the remote machine's root directory.
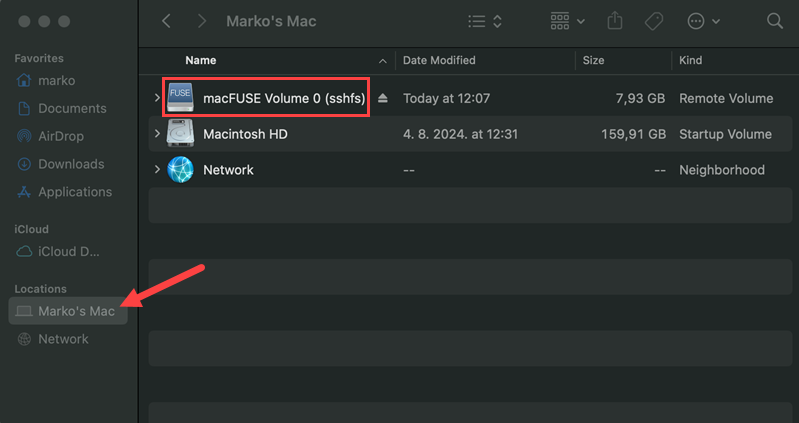
Access an SSHFS mount through Finder by navigating to the Computer section.
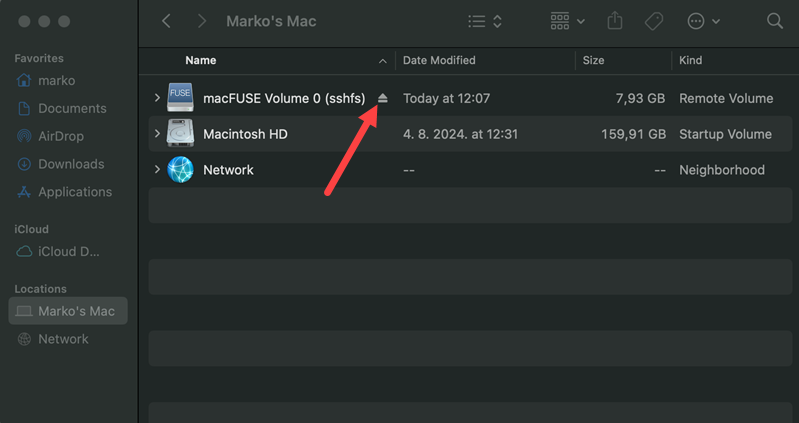
Step 4: Unmount Remote Directory
To stop using the mount point and break the SSH connection between the systems, eject the relevant macFUSE volume in Finder.
If you have difficulties ejecting the volume, force unmount it by entering the following command in Terminal:
diskutil umount force [mount-point-directory]The output shows that unmounting was successful.

Conclusion
This article showed you how to mount a remote directory on macOS using the SSHFS file system client. It presented the installation steps for SSHFS and macFUSE and explained the mounting and unmounting procedure.
Use the macOS command-line interface to manage the system more effectively. Read our Mac Terminal Commands article for more information.